Greetings!
Welcome to Scifi-Meshes.com! Click one of these buttons to join in on the fun.
Quick Links
3DViper MK2 Sharp Corners
Hi Community,
So, I am endeavoring to build my own MK2 in subD from my much beloved BSG. I have a nice cage so far of the fuselage and I am starting to work on the cockpit area and will soon tackle the side opening that exposes some of the internals. I am having some serious challenges figuring out how to achieve some of the sharp corners needed in the indicated areas. Right now I am at the cockpit, but I see the same issues coming up once I get to the side details. I tried adding additional cuts to sharpen up the corners in question, but I am sure you can guess that I will start to experience unwanted creases when I have too many cuts to close together.
This image shows the uncut cage.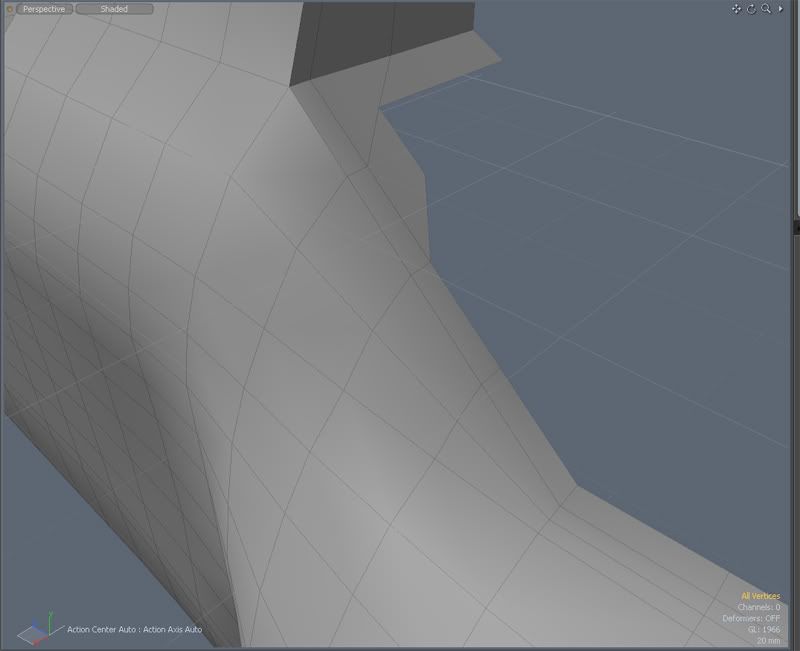
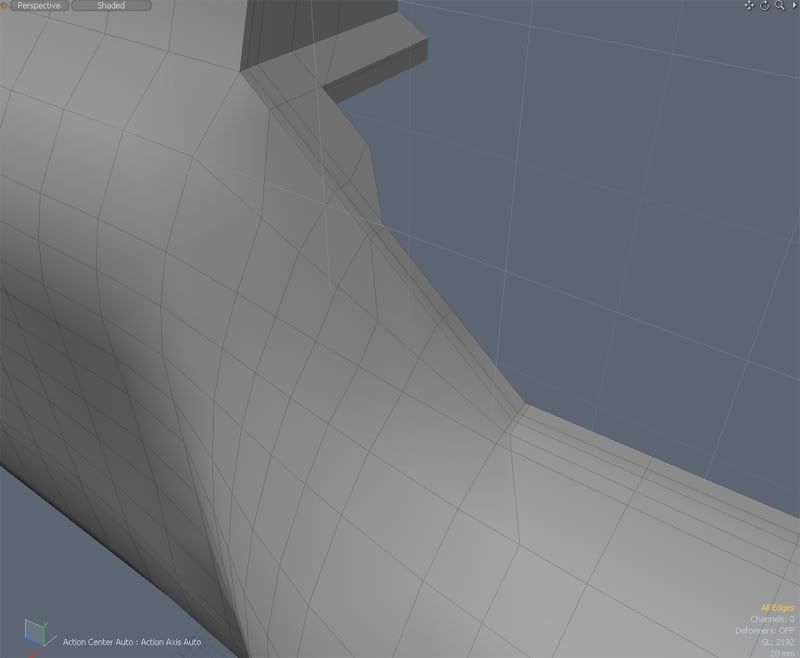
This image shows cuts made and edges moved to sharpen up the cockpit surrounding edges and its several corners.
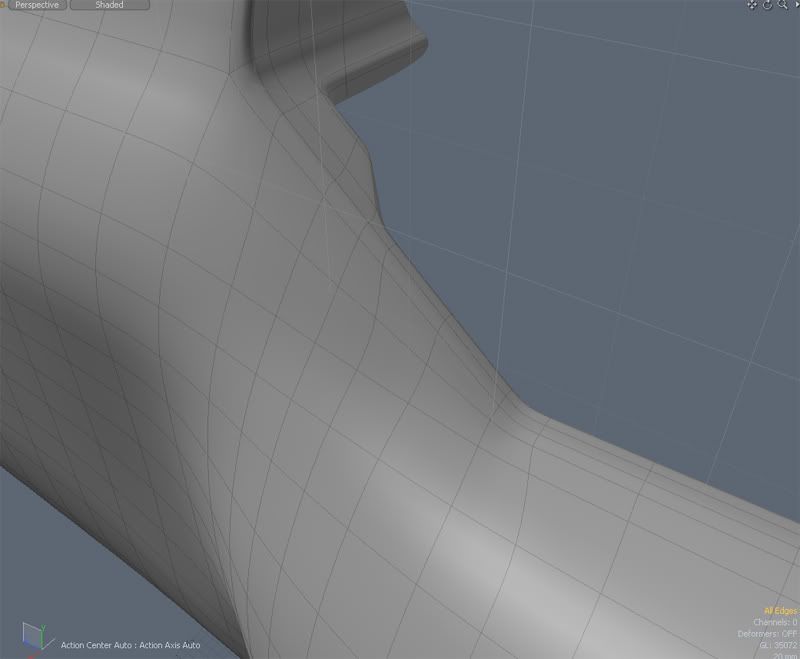
This image shows the result in subD mode. Corners are not sharp enough and to add more cuts will certainly result in unwanted creasing that has already begun to happen.
I would be forever grateful to get input and advice on how to approach these areas.
Thanks for looking.
-Jeremy
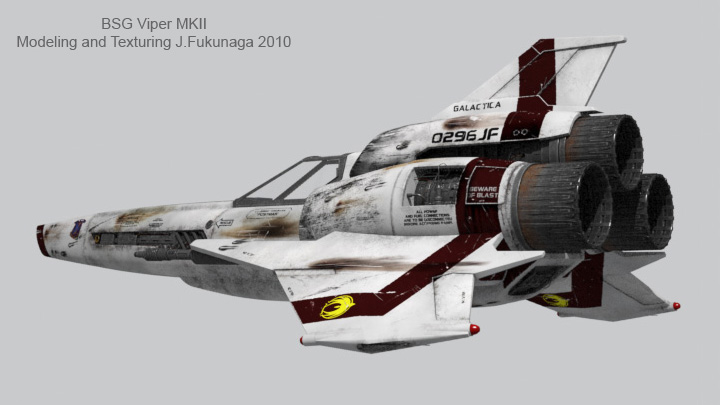
So, I am endeavoring to build my own MK2 in subD from my much beloved BSG. I have a nice cage so far of the fuselage and I am starting to work on the cockpit area and will soon tackle the side opening that exposes some of the internals. I am having some serious challenges figuring out how to achieve some of the sharp corners needed in the indicated areas. Right now I am at the cockpit, but I see the same issues coming up once I get to the side details. I tried adding additional cuts to sharpen up the corners in question, but I am sure you can guess that I will start to experience unwanted creases when I have too many cuts to close together.
This image shows the uncut cage.
This image shows cuts made and edges moved to sharpen up the cockpit surrounding edges and its several corners.
This image shows the result in subD mode. Corners are not sharp enough and to add more cuts will certainly result in unwanted creasing that has already begun to happen.
I would be forever grateful to get input and advice on how to approach these areas.
Thanks for looking.
-Jeremy
Post edited by under9stars on
Additional credits
- Icons from Font-Awesome
- Additional icons by Mickael Bonfill
- Banner background from Toptal Subtle Patterns
© Scifi-Meshes.com 2001-2024
Posts
So, I would recommend getting the base fuselage done - nice and even and smooth - save a copy - and then freeze - clean it up - and then start to work in your detail elements.
I'm sure you'll get some other good input here too. You might even get someone who has worked on the show to give you a few tips.... one never knows...
--J
Viper Mk2 flicker wip images
Maybe WIZ or al3d could chime in with some advice as they have both built really great vipers...
Once again, thank you so much for your help so far!!! Your suggestions definitely shed light on the situation and give me confidence to move forward.
I will most certainly spend some time looking over you WIP, which is really what I would like to get from you and others. I have put so much effort and faith into subD modeling lately that I think I have lost touch of the benefit of utilizing polys at times.
I do have the Zoic images and they are setup in my scene as the ref planes. Thanks for offering that.
I will continue to post my WIP and I look forward to anything else you have that comes to mind.
Tomorrow I shall repeat what I did tonight but take more care in order to produce a nice, clean mesh. The following images are of my test run.
Thanks for looking!
No problem on the input. Al's Viper was done a while ago (before the big server crash on SFM) so it's probably not available here anymore. Keep on posting updates as you have them.
If you're determined (or restricted through app) to use Sub-D, although I gave up after a while when I tried it, I got some mileage out of it by not trying to model that ridge that runs along most of the length of the top of the nose (aaaargh @ imprecise descriptions, these things have no proper name that I can think of...) instead I modelled the nose smooth and added that in with extrudes and bevels after converting to poly. Otherwise the mesh tended to pinch horribly where the ridge merged in to the hull because of all the points clumped together.
Sorry, Jeff. I am not quite sure what you were suggesting. Do you mind clarifying a bit more?
-Jeremy
That's great info, David!!! I can't really tell you why I was trying to maintain a subD mesh, but I have definitely resolved to doing a poly mesh instead. It is extremely helpful to hear examples of people's processes, as you and Jeff confirmed: start with subD or NURBS object to get the smooth curved aspects, then convert to polys to created the finer details.
Anything else you can think of as I go along would be much appreciated.
BTW, do you have link to your viper?
thanks,
Jeremy
3D WIPs - Scifi-Meshes.com
you can see the thread thumbnails here . . .
just click 'edit' on the first post in this thread , and click 'go advanced' and scroll down to 'manage attachments'
http://www.scifi-meshes.com/forums/attachments/3d-wips/14045d1156500448-viper-mk-ii-take-ii-part-ii-viper_test_074.jpg
One thing which may not be immediately apparent is that the cockpit window, frame, and the ridge which runs backwards from the cockpit is all part of the same poly extrusion that made the ridge down the nose.
Break your modelling down into chunks which suit each method of modelling, and if you ever find yourself screaming in frustration at a method's inability to efficiently do what you want it to, either convert now or add it to a list of things to do after you've converted later.
And the best advice I can give (even though it is obvious, it can never be stated enough) is to save regularly and keep multiple copies, ESPECIALLY before converting object type. You never want to have to redo an entire object from scratch just because you converted to poly before you had finished all the modifications you needed to do in NURBS or Sub-D! I may have over 20 variously-completed copies of my Viper (numerically named, all with thumbnails, and with a render of each one with the number marked on the image) on my hard drive but I'd rather sacrifice the HDD space than have to redo something from scratch.
I hope you're looking forward to the wings, they're a lot more complex than they look
Text block attack over.
Thanks, David. Awesome Viper!
It sounds like the challenge is knowing when to say when. I am sure I will hit some walls and dead ends along the way. I feel I have an adequate cage which was developed from Modo's curve and patch system. I already did a test run (not pictured) of subDing the cage with edge-weights in the appropriate places, and then freezing to polys.
I agree with the iteration saves. I am actually pretty good about doing that because of the exact reasons you stated. You forgot to mention saving regularly because of the inevitable app crashes and the resulting loss of hours of work.:-)
BTW, are you able to post some wires? Wire seem to be worth a thousand words.
Thanks again!
Yes, Cameron, it is Modo 302 I am using. So far I am loving Modo. I have completed the Seahorse, the Tank, and the Lemans C9 series, all by Andy Brown and Modo is quickly becoming a warm and powerful home for me.
Sounds like you have your own bonafide viper junkyard, Jeff. That could make a cool scene.
As you can see I have a low poly cage and posted the SubD too. I'm in the initial stages of figuring this whole modeling thing out. I was doing everything in poly until someone asked me "are you using tab?" to which my response was of course "huh?"
Tab (SubD in LW) opened up a new world. Before I'd try to round edges with the rounder tool, and it was a real pain. But now in SubD it's a pain to get corners, as you yourself noticed. Not to mention my cage was a perfect match for the reference images, as I can control the position of points very precisely, but with SubD it's more of a guessing game and trial and error, move it a bit this way, a bit that way...I dont know seems less precise.
Thanx to JeffrySG though for shedding light on this. It does make sense to mix poly modeling with SubD. Use SubD to get the roundness, and poly modeling to work the details and straight bits and sharp angles.
Jeffry you said freez the SubD and clean up the mesh? What do you mean by that? I.e remove all unnecessary segments by removing points?
I find it terribly hard to work with a frozen mesh. It adds so many more segments. I mean when you start off in poly it's easy, you have like a dozen points lol. But when you freeze it gets a pain to work with all those points. Like if I try deleting a point, then I get holes in my model, which I have to resurface, and then I have to be careful with vertices cause if there are too many SubD wont even work.
It's good to see someone else on the same boat though. I hope we can share our learning experience under9stars.
Keep it up. I'm learning a lot from this discussion
You've got a good curve on that fuselage, increasing the sharpness of the edges around the cockpit will make it easier to fit the cockpit window. I'll post a wireframe when I get a chance to pull my Viper off a hard drive (old projects never die...).
Hi Adalla (Commander),
Thanks for the comments. Perhaps I can be your wingman once we are finished?
I hear you on difficulty of working with many verts and polys once you freeze. I am not sure what app you are in, but you should be able to dictate the level of subD before freezing, and therefore control your poly count after the operation. I plan on freezing with a subD level of 1, and that should give me enough geometry to ensure a smooth mesh. Also, you might give some serious thought on what you can model before freezing, and applying edge weights to the details that are easier to model with your cage and so that detail will survive the sudD to poly freeze process. For instance, that opening on the side of the fuselage that houses some of the internals, might be best created with the cage since it runs along so much area of the mesh, and therefore would include numerous polys and verts that would have to be shaped later, but better and more manageable with the cage. I actually would love to hear from Jeff and David on how and when they tackled that area.
Hi David,
You're right, the back boxy section probably could or should be a separate mesh and I did consider that. I did find it helped with the transition from the cockpit area to the back to keep them joined, and I was pretty satisfied with what I came up with. Mostly, I have been studying various real models of the viper to get some guidance on how to break up the parts in sections. I know some models are not very accurate, so I am cautious.
-Jeremy
Reason: My 93 year old Grandfather, bless his heart, has always worried about my future, retirement and such. He suggested that I get into the postal service field to ensure a retirement for myself. I tried to explain to him my passion and aspiration to break into the VFX industry, but he was unable to understand what I was saying. So, I came up with the idea of following his advice (obviously not literally) and following my passion at the same time.
I'm not sure if there is a official registry, but I've never been one to care much anyway. I think your idea would be much better anyway. For my viper I used a call sign for myself and used 1701 for the number just as a poke towards all the Trek fans here.
The viper is looking nice! keep up the good work!
I like to think of it as a form of credits that are harder to remove from the image!
I have an update and a question.
I haven't post lately because I was in fuselage-revision-hell. I finally came up with something I was happy with. I want to finish this model in a reasonable amount of time, so I am trying to ignore my ocd.
Anyway, I am posting my progress. I decided to do some of the model in polys and whatever else I can in subD. So far, it seems the best solution for the fuselage is polys.
My question or request is if anyone has any good ref images the area where the front of the canopy meets the fuselage.
Thanks, and comments are always welcome.
-J
Never mind. I looked closer at the refs and saw that the front rim meets the top of the fuselage. If you are looking at the refs from the side, it looks like the canopy angles down lower, but that is because you are seeing the profile of the glass.
It also helped to see some other examples of hard-surface subD models—to see how "messy" subD cages can get. This opened me up.
I would still be interested, as would others, I imagine, to see others approach to a subd curved surface with a sharp cornered shape carved in to it.
Now on to the rest of the model!