Home › McC › Best Of...
Greetings!
Welcome to Scifi-Meshes.com! Click one of these buttons to join in on the fun.
Badges


McC
About
- Username
- McC
- Joined
- Visits
- 46
- Last Active
- Roles
- Member
- Points
- 373
- Posts
- 704
- Blender
- Blender
- GIMP
- GIMP
- Inkscape
- Inkscape
- Krita
- Krita
- Badges
- 8
-
U.S.S. Coronado, a Seven Year Mission
Spent a little more time massaging all of the emissive shaders, with an initial focus on the room interiors, then running and signage lights, and the finally on the deflector, warp nacelles, and bussard collectors to make them more physically correct and in-line with one another. The net result, though frustrating to get to, I think was well worth it.
Special note: the balance of window visibility and other emissive surface brightness in full direct sunlight is not intended to match what we normally see on the TV shows and in the movies, but rather what you might actually see if looking at this ship. You rarely see illuminated rooms in buildings or on cruise ships in broad daylight, for example.


-
U.S.S. Coronado, Katana Class Starship
If you're just joining this thread, hi! Please read the first post for some background info. Many questions have come up over and over again that are answered there. Thanks!
Been a minute, hasn't it?
I haven't done much on this since October, but I did end up solving the bay doors in a way I was satisfied with, and then started in on the shuttlebay interior. I've returned to lurking ever since the forum revamp and doing so has gradually ratcheted up the desire to get back into the mix of things, despite the craziness of my schedule these days--currently running four D&D campaigns, including a game for my coworkers, as well as playing in a campaign my wife is running; my wife and I have also taken up indoor rock climbing and try to make it to the rock gym three times a week if we can. Doesn't leave a lot of time for modeling
Anyway...
Still unhappy with any of my bay door solutions above, I started looking outside the box I'd put myself in for completely alternate solutions. One of the old Coro RPers suggested looking to the Luna-class for inspiration, which has a more conventional spherical clamshell door (and thus doesn't have the mechanical issues that non-spherical doors do), but nestled inside some long hull extrusions. Combining this idea with the fantail of the Intrepid-class that had formed the original basis of the ship's aft bay, I ended up with something I rather liked:


Test animation to verify the doors fit/open nicely:

Here's what she looks like when dressed up for the camera (still with only temporary textures, though):

Cool! Finally time to move on--or rather, in!


For the shuttlebay, I'm taking a lot of design cues from the Intrepid-class bay interiors, while retaining some of the design elements I used on my Ambassador, despite pretty wide technological gulfs between the ships. I figure a shuttle tractor beam is a shuttle tractor beam is a shuttle tractor beam. The overall bay layout comes from some 2D floorplan work one of the Coro RPers did back in the day, slightly adapted to fit the hull shape of this model.
I also started messing around with Blender's filmic rendering and redid a bunch of shaders.

I'm not sure if any of the things that went into this image are actually all that noticeable (other than "it's darker/shinier" or similar), but the above represents the following:
- Switching from standard to filmic rendering, dramatically expanding the range of virtual f-stops
- Redid the underlying shaders so that every single piece of hull/metal shares a single "hull shader" master node, which uses Principled BDSF at its heart.
- Cooked up a shader for the running lights that will automatically color them red/green/white based on where they are relative to the centerline of the model.
Another angle, with an older render for comparison.

None of the shader settings are final, and the textures continue to just be quick idea mock-ups, nothing remotely final.
Sadly, I haven't done much since then, though. Hopefully will find some time to get back to it soon!
-
U.S.S. Coronado, Katana Class Starship
If you're just joining this thread, hi! Please read the first post for some background info. Many questions have come up over and over again that are answered there. No, this is not the Insignia class. Thanks!
Thanks, @evil_genius_180 and @Brandenberg!
Still at it! Also, I'm a dad now!
I've been posting periodic updates in Discord since I've gotten back around to working on the model again (after another half-year hiatus!). The new Intel denoising node in more recent versions of Blender has more or less solved my demoralizing noise issues entirely, which is awesome. I set about the arduous process of UVing the main hull (the saucer has been UVed for a while, as evidenced by the multiple color tones on it). I should've kept up with my UVs as I went, but I got lazy, and now I'm paying for it!
In the process of doing so, I started seeing more and more mesh distortion, especially around the windows in the main hull. I knew if I didn't address it, it'd eat at me forever, so I rebuild every single offending panel with significantly higher polygon density and vastly superior loop flow, then re-integrated it into the existing (and now quite a bit lower resolution, though it doesn't show thanks to the placement of the panels) hull. Finally finished that this evening, so I can now return to UVing and--hopefully soon--actually do some texture work and, maybe, possibly, finish this project at last.
Some "establishing" renders from Feb. 8th, just to refresh on the overall look of the ship.


Added an underside fill light on the 10th, no longer lit only by the single sun-bright key.

After chatting with @Viper on Discord, switch to the same HDRI he uses in his WIP renders on the 18th.

Before/after comparison of the hull panel rebuild and the comparative mesh density from yesterday evening.

Render of the finished panel rebuild from this evening.

Not-quite-the-same-but-close before/after comparison render from the same angle as above of the overall wires of the ship from last summer and now.


-
SDF-1 Macross
Many thanks, @Warp Propulsion Laboratory , @Gidiot , and @Zhor2395 !
No plan to, no. The DYRL version is the one that, for me, is the most "authentic" even though it's not the original. As outlined above, the plan is to replicate the 1/4000 model kit first, then go back and revise it based on all manner of sources (other larger-scale model kits, stills from DYRL, and probably some riffing of my own).But when you are done doing the DYRL/Post-2012 refit....will you also do the original series' version?
Oh, I lurk there regularly, rest assured.BTW, might want to get onto Macrossworld's forums too, as they have tons and tons and tons of images for viewers to look at, straight out of the Macross Chronicles magazine - which is official canon, and is second only to the Animes/OVAs/Movies for how detailed some of the images are.
Right! Now, that things have settled down in life and I've gotten the Ambassadorial monkey off my back, time to actually make some more progress on SDF-1!

I couldn't quite stick to a completely nondestructive workflow for that battery mount (which still has more detail yet to be added...and the battery itself!), but all of the "destructive" aspects have preserved source meshes, so can be revised rapidly. I've got some new, better calipers coming in the mail on Tuesday, too, which will hopefully make taking measurements from the kit pieces a little more reliable!
I also migrated my revised PBR shader and compositing mix over from my Ambassador revamp, and then tweaked both further. For a bunch of procedural and stock images, I'm pretty happy with that surfacing--at least as a placeholder!
-
U.S.S. Coronado, Katana Class Starship
Little remained after all the stuff in the last post, but I wasn't quite done yet!
I experimented with ventral registry, which I ultimately decided against. Dorsal regsitry's big enough to span that middle spar, but ventral isn't. Tried different placements other than centered, but didn't care for them.

Revised my room interiors to vary what you can see through the windows -- either quarters or hallways now, instead of just quarters everywhere, depending on what part of the ship it is. Totally rebuild both the quarters textures alongside the hallway ones to provide more variety.

Also rigged up the rooms to respond to different alert statuses, controlled by a single "alert status" parameter that drives shader changes. Yellow, red, and blue (for landing) alerts:


From here, I did a whole deep dive into the branched path tracer, instead of using the regular path tracer, to finally find a good balance of render speed and noise level (or rather, denoising artifact level). After a lot of iterations and experiments with progressively more or fewer subsamples in different combinations, I settled on 90 AA, 3 diffuse, 2 glossy, 2 transmission, 2 mesh light, and one of everything else to provide a clean look I was happy with, without taking hours to render. That combination, for the render angle I was testing, only takes about 9 minutes, in fact!
Now it was time to zero in on a final render "look". I started from enotobian's blog post on his post-processing method and did what I could to adapt it to Blender as a starting point, then iterated on it from there.
When I was finally happy with my results...I called it done at last!
-
Ambassador Facelift: Meet Aurora
new_purple wrote: »Also loving the window texture...I've seen other models using set images for the windows, but I haven't tried it yet myself. Going to experiment once the windows are all in place.
Bear in mind that it's not just a texture on the windows. The windows are actual "panes" of glass, with very simple room boxes behind them, mapped with set photos.
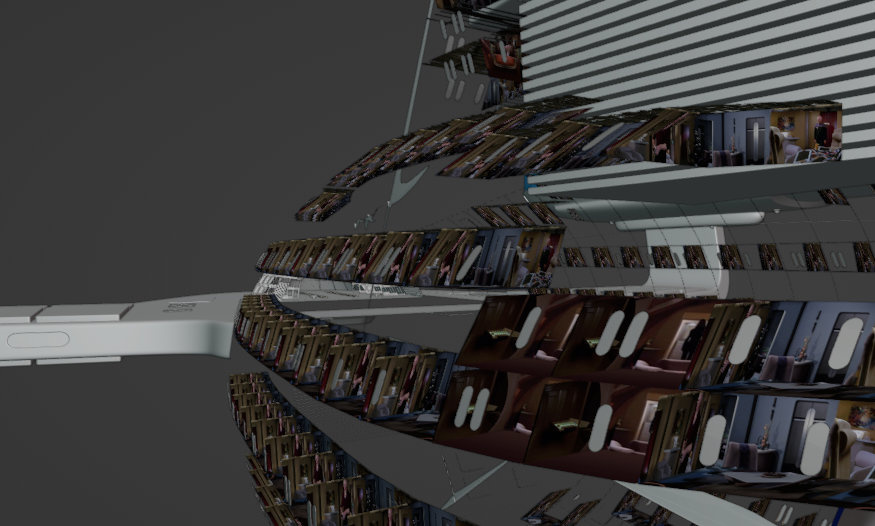
Whether or not that's worth the effort depends entirely on how close you plan to get and if you ever plan to see the thing in motion, though. If you're only ever rendering stills, just slapping a texture on the window itself and calling it a day is generally fine. If you plan to see it move, or want to get close, though, having room boxes (or an equivalent) is pretty much a must-have, I think!
-
SDF-1 Macross
Now that Coro's done, it's time at last to start working on something new! And for that, I've decided to take a crack at modeling one of my favorite ships of all time.
Latest, for thumbnail:
Because it's not necessarily what one would call a "mainstream" (i.e. Star Trek, Star Wars) ship, I'm keeping the identity of the ship a mystery until someone correctly guesses it! The prize goes to @ashleytinger! It is, indeed, the SDF-1 Macross from Superdimensional Fortress Macross (which was also chopped up, merged with two other anime series, and redubbed with a heavily modified story to become Robotech). Specifically, it's the ship as it appeared in the movie adaptation Do You Remember Love?, which is the version of the ship I first fell in love with.
This is a slightly unusual project, because I'm not just modeling the ship as one might for high-fidelity VFX...I'm also trying to very precisely replicate the Hasegawa 1:4000 scale model kit of the ship to serve as a "backup" that I can 3D print replacement (or duplicate!) parts from if I screw something up when I eventually get around to assembling and painting the physical model kit.
My plan is to do this in two passes. The first is to model all of the kit pieces as precisely as I can, so I have the aforementioned "backup" that I can use to 3D print replacement parts for the physical model kit if (when) I screw something up. To do that, I'm using some 10-micrometer (0.01mm)-precision calipers and a little "helping hands" gizmo with both 2x and 3x magnifying glasses attached.
The second pass, once the first is completed, will use the first pass's pieces as foundational geometry to create a higher-fidelity model such as one might expect for live-action VFX (or, y'know, as best I can manage), which will also involve fixing any inaccuracies as I go along adding detail. Whether or not I then back-propagate these updates into the 3D print pieces...well, we'll see! The Hasegawa 1:4000 kit has got some inaccuracies when compared with the movie (many of which aren't present on the Yamato/Arcadia 1:3000 toy, based on pictures I've amassed), but I'll worry about those after I finish capturing all of the parts.
I'm trying to model everything as non-destructively as possible (making heavy use of boolean and bevel modifiers), to make refinements and revisions easier at this stage.
This is the first completed piece. Not very exciting yet, but it's a beginning all the same. The shader material is currently just a very generic set of metal textures, along with a manipulated AO input as a mask for some grunge in the recessed areas.


-
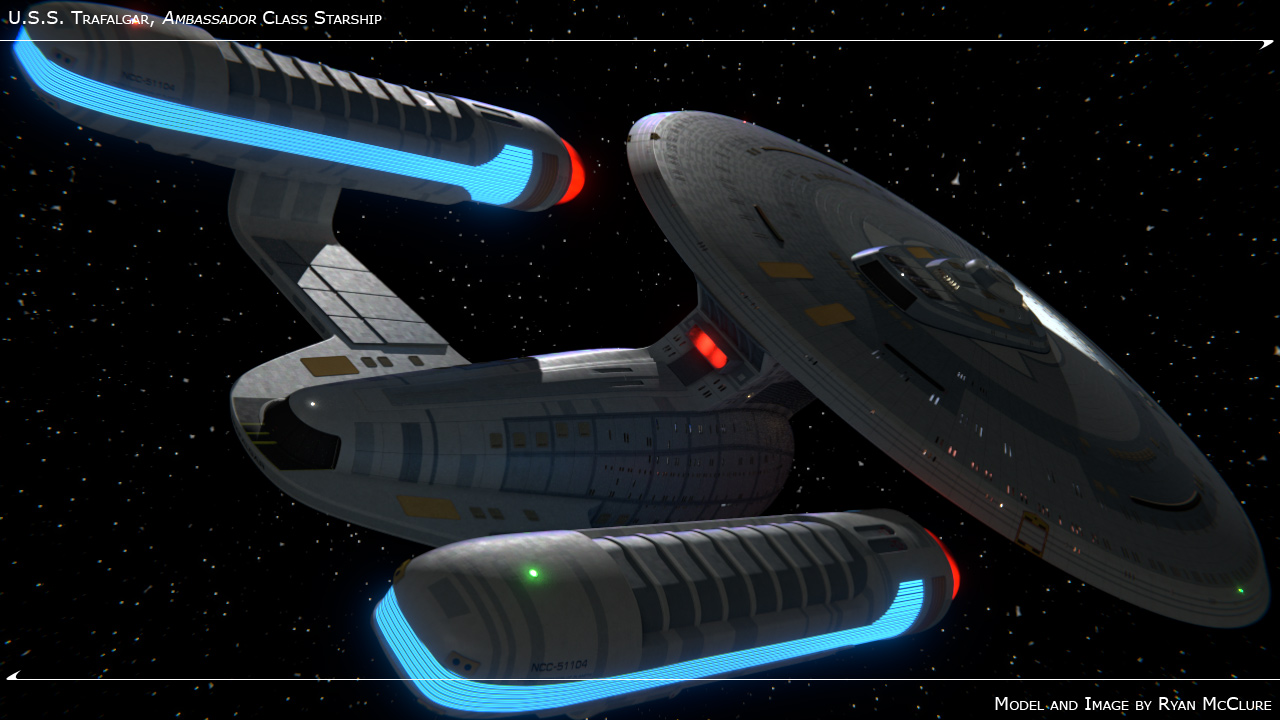
U.S.S. Trafalgar, Ambassador Class Starship
Finally, after a year and a half, I'm calling her done. :runs:


Addendum, 2014-02-13 (details here):

WIP thread here.
-
U.S.S. Coronado, Katana Class Starship
If you're just joining this thread, hi! Please read the first post for some background info. Many questions have come up over and over again that are answered there. Thanks!
Thanks, @evil_genius_180 and @ashleytinger!
Mentioned rebuilding the panels around the launch platform in the last post, so here's the before/after of that in-process and then completed:


I then spent a bunch of time cleaning up the geometry on the launch bay interior to get a clean rendered plate to use as a paintover backdrop to plan out the next stuff for this final interior.

Those arms about halfway down are inspired by the runabout landing platforms on DS9. Of course, those are pretty clearly Cardassian in designg, so I'll need to retool them to be more aligned with Starfleet aesthetics!
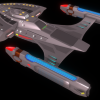
While working on the paintover, I got to chatting with the old Coro gamers about the size changes in the various bays. The upper bay is about the same, though significantly wider than it was on the "old" blueprints we made back in the day. The launch bay is much longer, while the main (aft) shuttlebay is significantly shorter, but also significantly taller. This in turn led to us talking about the fighters attached to Coro, which we called Specters. They were pretty much straight-up Bearcats from the Wing Commander series, with impulse engines and phasers tacked on. Back in 2001, I made a model of one in Inspire3D (LightWave's kid brother) that we used to make renders for the game's website. I decided to dive back into my old archives to pull out the LWO file and see how hard it'd be to make it look not-awful in Blender. This included hacking the Blender LWO importer from v. 2.79 to work in 2.80! I then spent the next ten hours working through the night on fixing polygons, cleaning up the remnant of boolean operations I'd never cleaned up 18 years ago, re-UVing, and surfacing the model. I decided to stop when the sun started coming up and I could hear birds chirping... ...then woke up five hours later to keep going for another three hours until I was happy with the result.
Original Specter render from 2001:

Updated Specter in Blender:


And only after doing the side-by-side comparison of those renders did I realize that there's a typo in that insignia texture -- that's been there for 18 years!
I might go in later and try to further Trekkify the model, but for now, it was a fun diversion and felt nice to finish something in such a comparatively short amount of time.
With the Specter pulled out of mothballs, it was back to the paintover plan. Drawing heavily from this John Eaves concept of the Enterprise-E main shuttlebay, I used a combination of Blender (to warp the image via planes and UVs) and GIMP (to warp the image in other ways and do the actual paintover) to end up with this:

Fast-forward a bit more and the bay begins to take shape.

A lot of that floor detail from the paintover is going to be pure texture, so the bay is going to look pretty barren even after all of the modeled detail is in place, but so it goes.
For fun, I decided to down a render from long range looking down the launch axis of one of the bays...and immediately noticed a problem: the arboretum was dark. I hopped into LookDev mode and drove the camera inside...where it was fully lit. WTF? A bit more digging and I came to realize that somewhere along the way, the normals of my glass window panes had gotten messed up not just for the arboretum, but in numerous places all around the ship! Cue the arduous process of going through window-by-window and flipping normals until everything was pointing the right way -- the outer pane facing out, the inner pane facing in. The problem seemed worst on the engineering section, with most of the saucer windows still being correct. I bet I was a lot more careful doing the saucer windows--which I did well before the engineering section ones--and then got more cavalier about doing them when I got further along. Sigh.
Anyway, here's that render with the windows cleaned up, but revealing some more hull paneling surface issues that I'll need to dig into!

-
U.S.S. Coronado, Katana Class Starship
Thanks, Vortex5972 and evil_genius_180!
These took way longer than they had any right to. (Starting to play STO again didn't help with that...") )
)


All the "cape" texturework is just stand-in for tone. Those big dark swaths will have lots of little panel detail on them going forward and I'll probably futz with the baffles (or whatever they are) on the impulse engines, too. Mostly, I'm just super ready to move on from this section right now. :argh:


Additional credits
- Icons from Font-Awesome
- Additional icons by Mickael Bonfill
- Banner background from Toptal Subtle Patterns
© Scifi-Meshes.com 2001-2024