Home › Freak › Best Of...
Greetings!
Welcome to Scifi-Meshes.com! Click one of these buttons to join in on the fun.
Badges


Freak
About
- Username
- Freak
- Joined
- Visits
- 1,853
- Last Active
- Roles
- Member
- Points
- 1,088
- Posts
- 4,361
- Blender
- Blender
- Photoshop
- Photoshop
- Badges
- 13
-
Freak's Trek Build's
Thanks for the advise lewisniven.
But I had finished off before I had seen your post.
I deleted all the faces around the longitudinal cut outs, attached it to the saucer and then selected an edge and just kept hitting F to replace the deleted faces and job done.
Here are the results. I slapped a tmep Material onto it as Scifieric mention it was a little hard to see some of the details.


-
Freak's Trek Build's
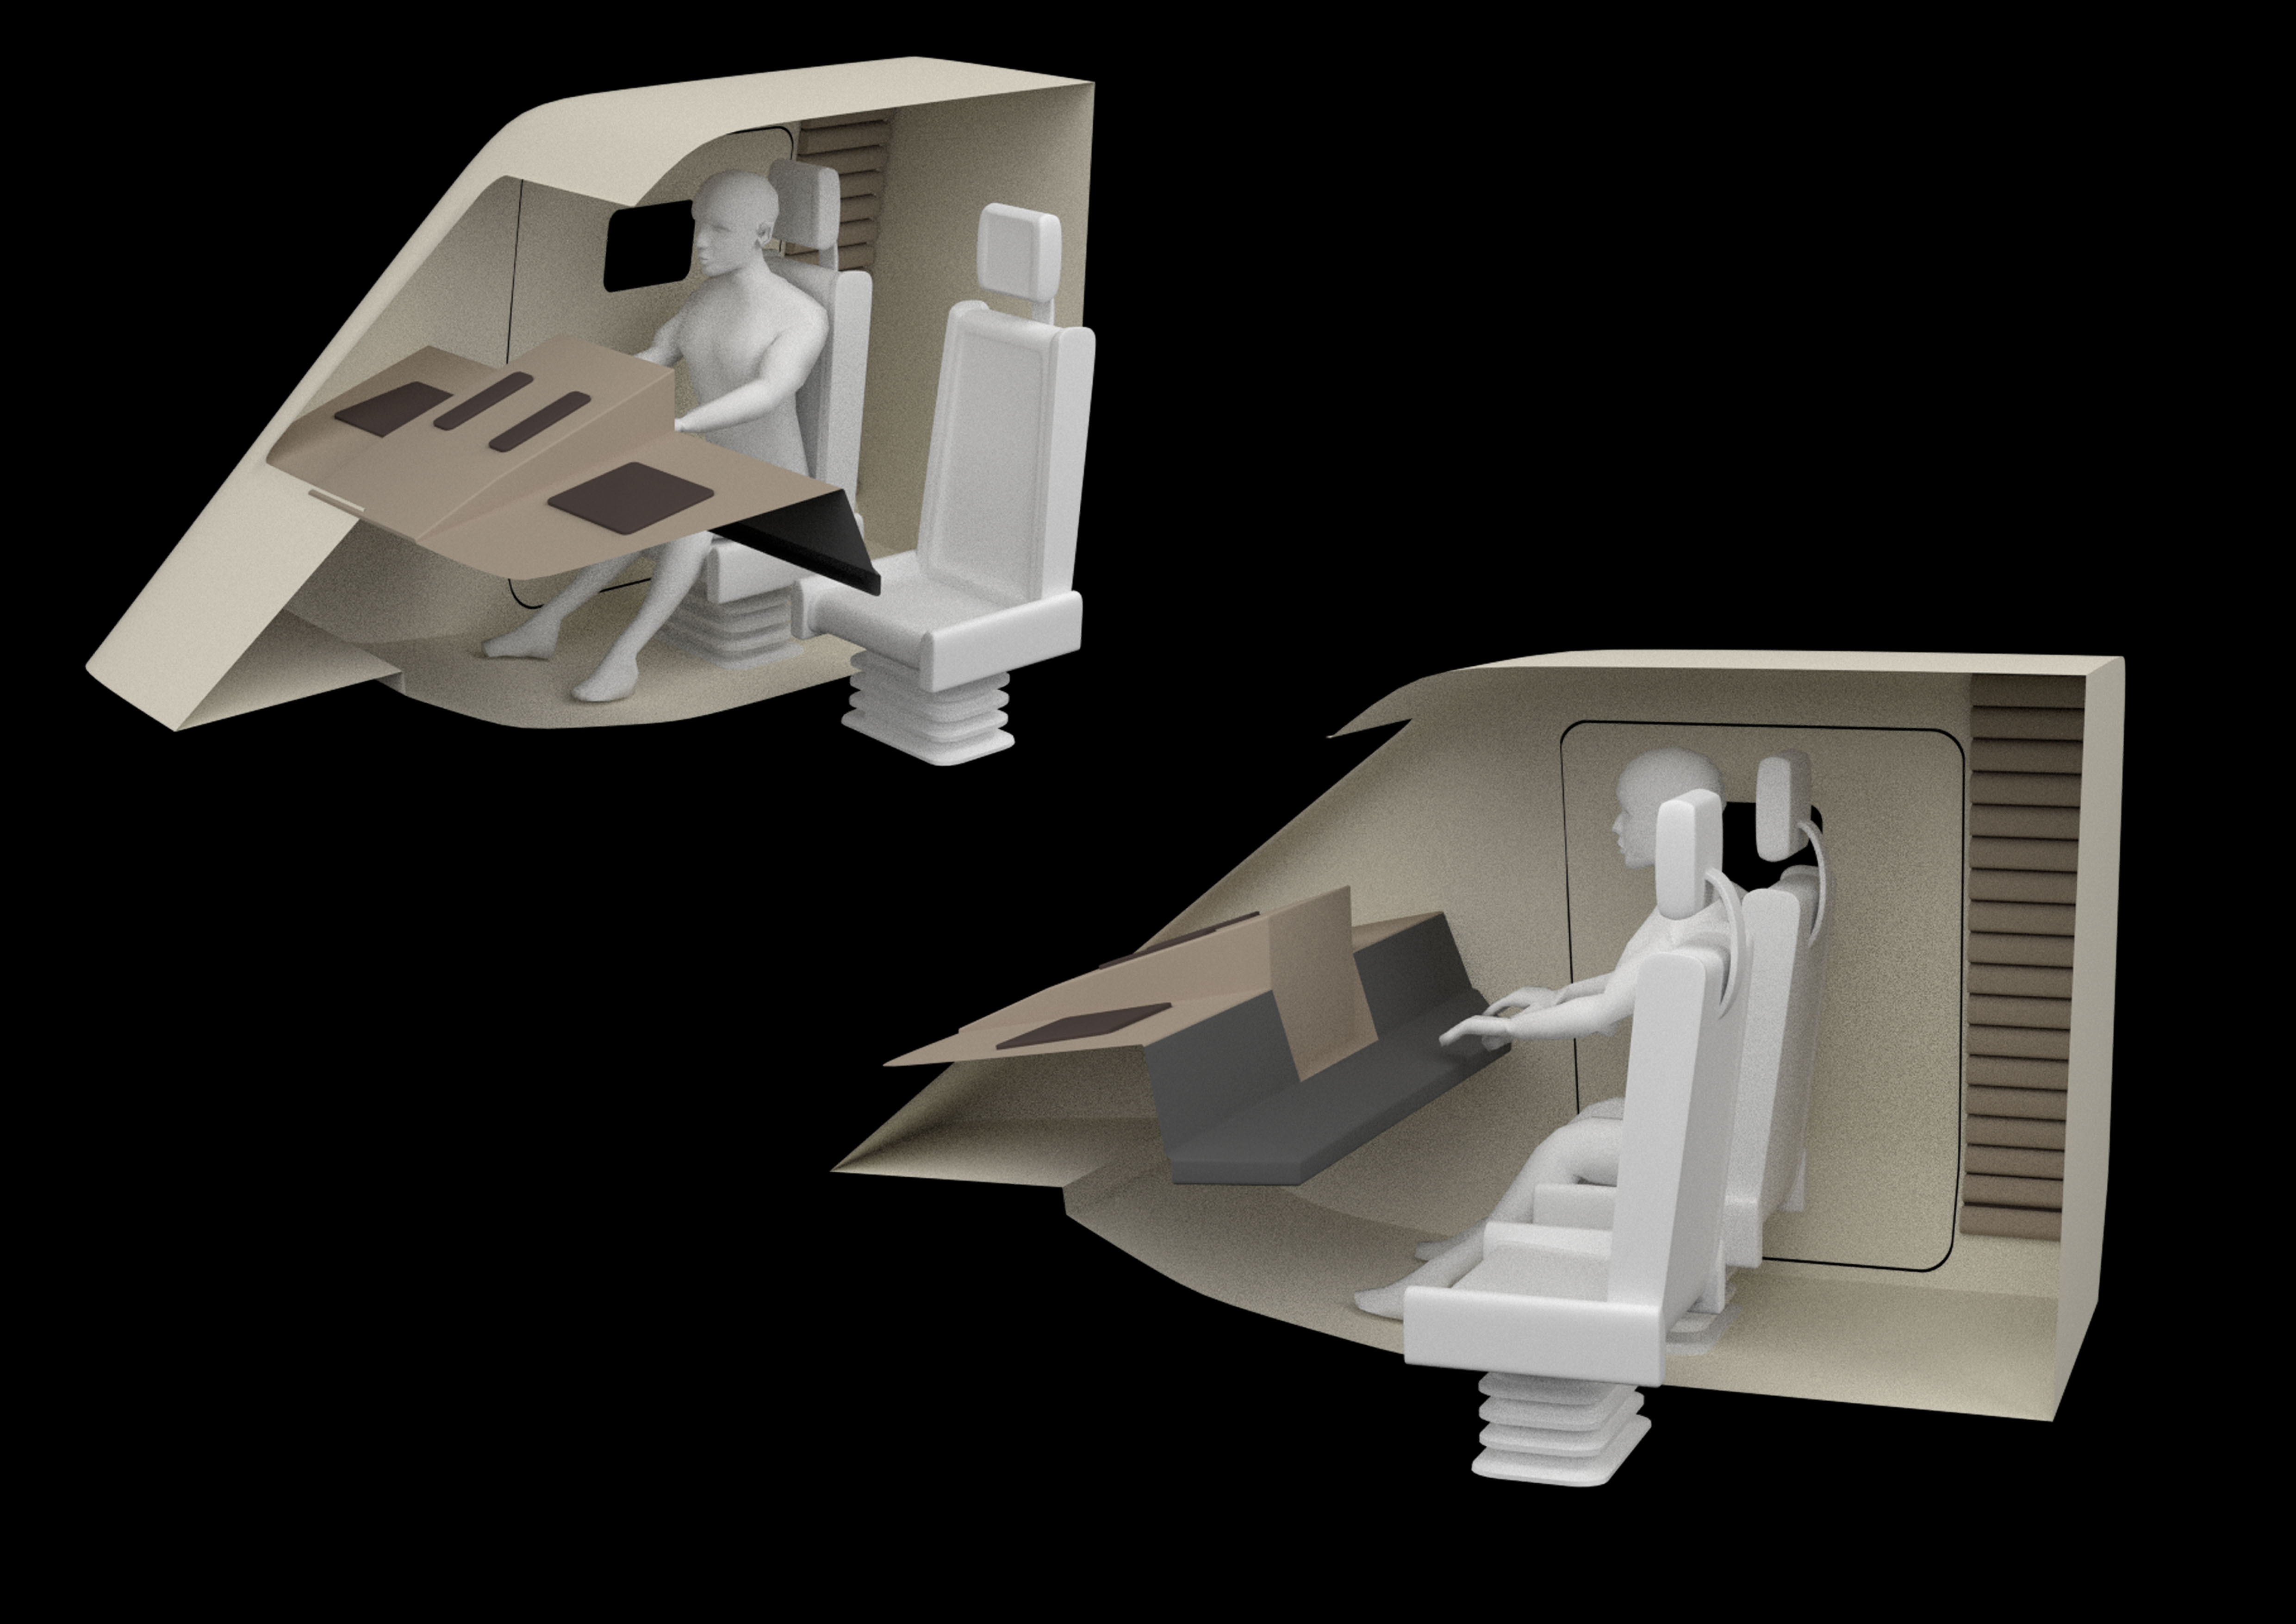
Just a simple interior for the shuttle, as I have no plans to actually see inside except though the “windscreen”
I am happy with the chairs, but if I was to do this properly I would have to figure out how to show the chair having a cushion on it. At present it looks a little on the hard side.


-
Freak's Trek Build's
tondemonai wrote: »Pretty sure the font called "Microgramma D", all caps.
I used a font called finalship that got it spot on.
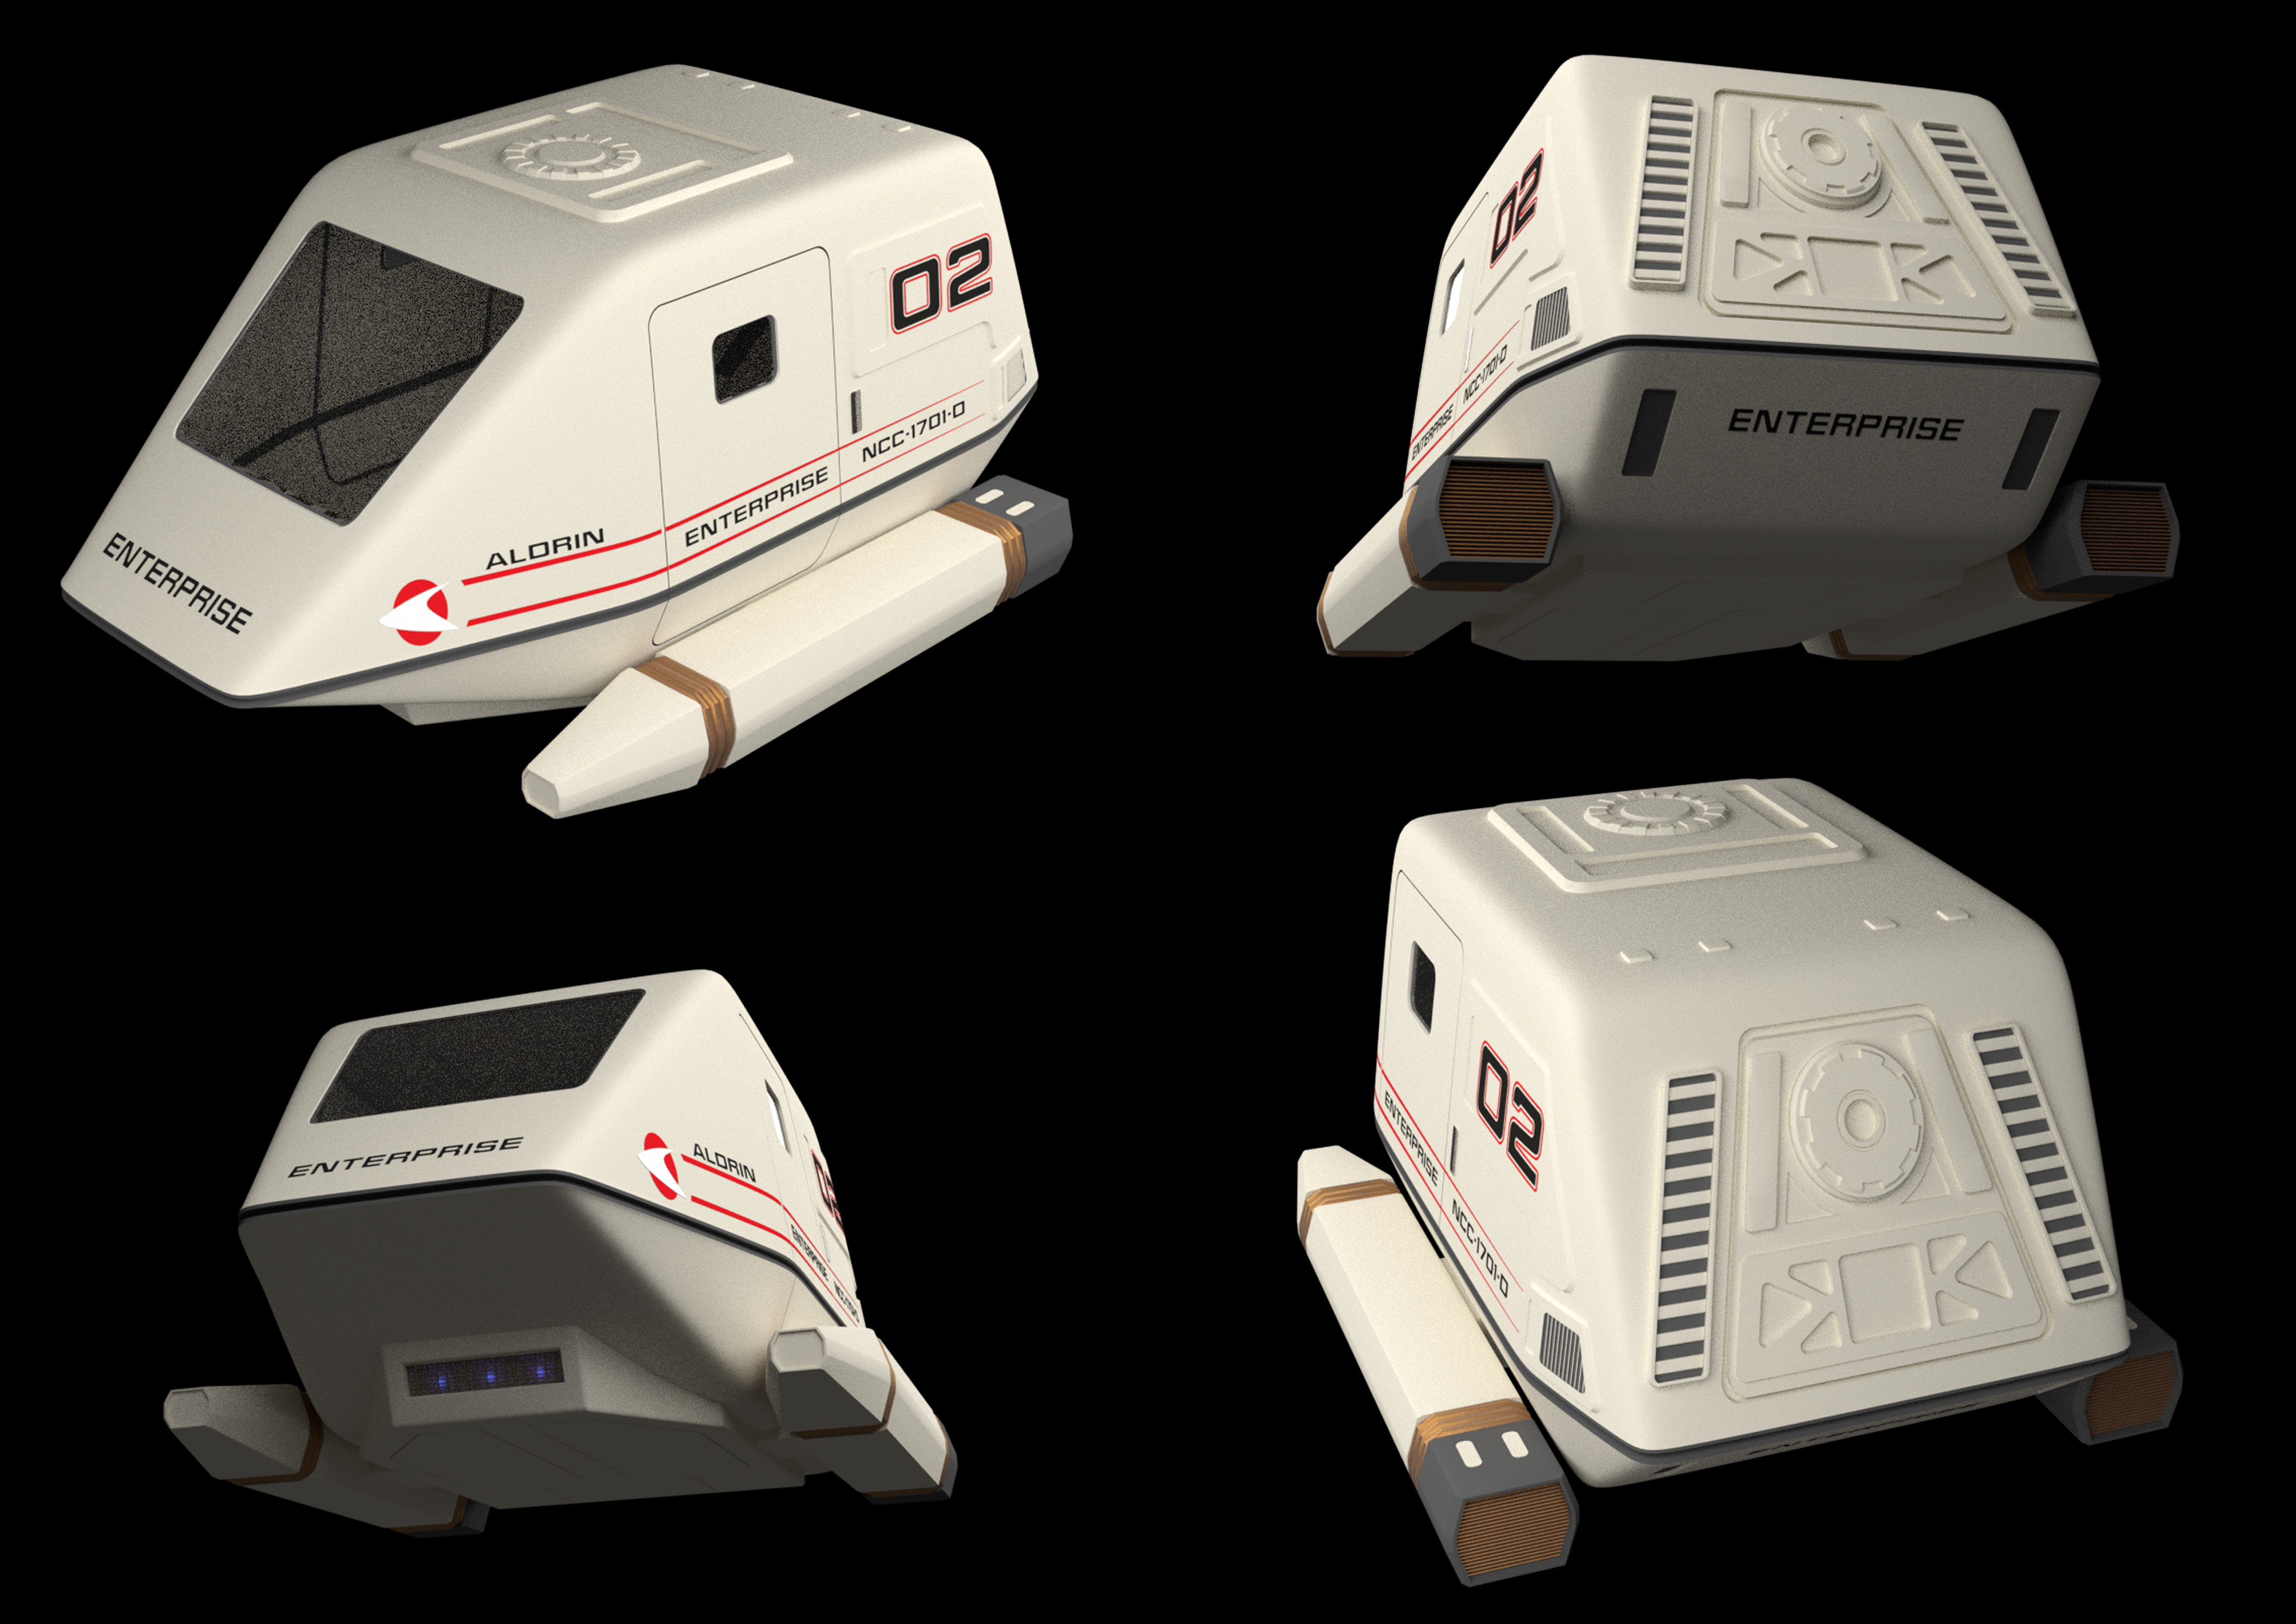
So the other day, I posted a sneak peek of what I am currently working on.
The outside is pretty much done, I only got a few small things left to do.
This is not an accurate model of the one used for the show. Reason being is that I hated how sharp the edges are on that, when the reset of Starfleet ships shuttle have a are more rounded look for this era. So I just softened the edge on this I think it look much better.
I might have to remodel the nacelles as they have kept the sharp edges of the original shuttle.
Given the large front port on her, I think I’ll have to model and interior to go with it.
Lastly, There are no textures applied to this model it all martials. So everything you are seeing has been modelled.

-
Freak's Trek Build's
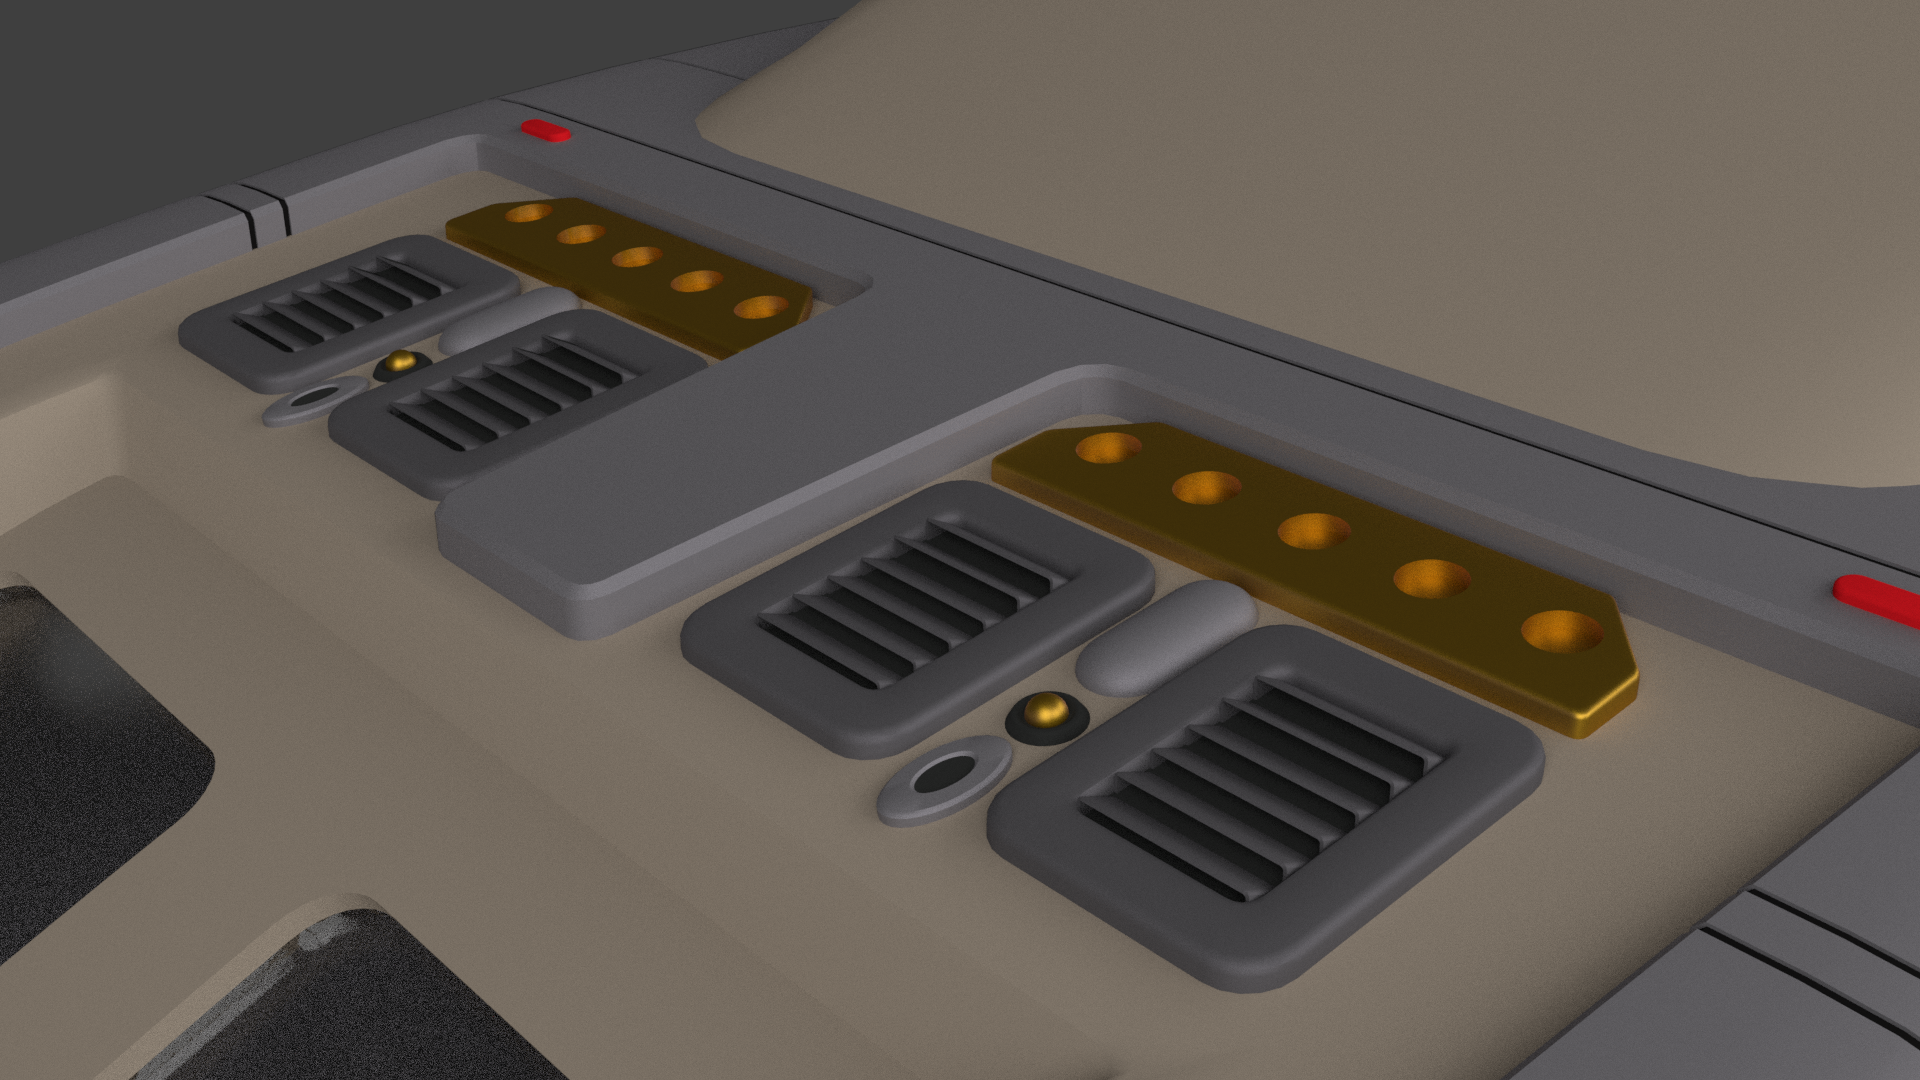
Okay I think I can now say that the cockpit area is done.
The Hull Grey material that is currently on won’t be final. Looking at reference photos, it looks like the different panel have a different shades. So I am going to knock up a different colours to be added so that it keeps that look.
I have added micro torpedo launchers under the main cockpit. Official they sit in winglets, but I never liked that. Going off the Deep Space Nine Technical Manual the Micro Torpedo is only 12 centimetre’s in length. Which would do nothing to a normal size ship with a full shields.
Especially when a full size torpedo (Which slightly larger than a person. As seen in Star Trek II: The Wrath of Khan.)
So with that in mind I made mine larger and because of this it won’t fit into the winglets. This is why I have moved it.

-
Freak's Trek Build's
Still playing around with Blender 2.8. No real modelling just figuring out where everything is.
Anyway just for fun I though I'll do a Render of all the Trek ships I have built since returning to modelling.
The picture included the unfinished Connie Refit and the newly stated Oberth Class.
While putting this picture together I notice the scale of the Obreth was wrong. I had it double it size in the last picture rendered. This has now been corrected and is in scale with everything seen in the pic.
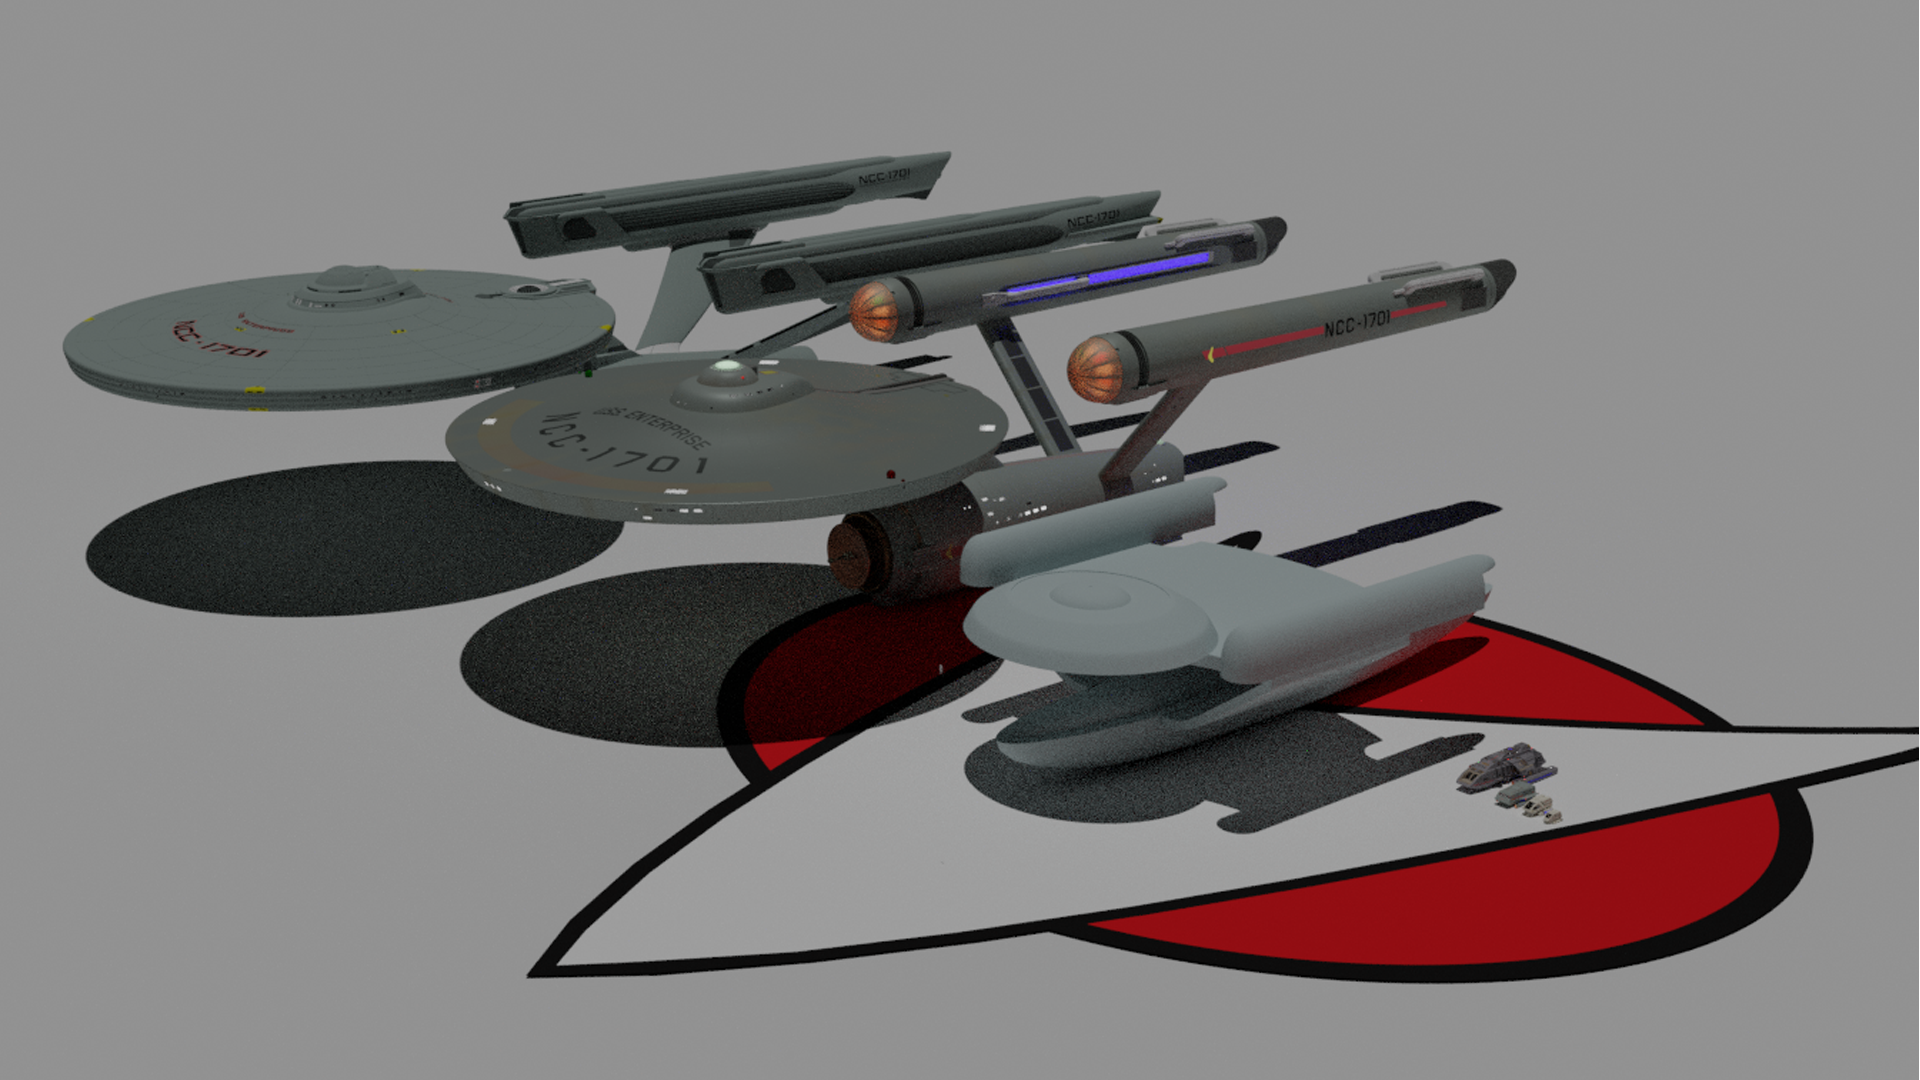
Now to get back and finish off those other projects.")

-
Freak's Trek Build's
Just a quick update on TMP Enterprise. I have not really be able to work on it. I am building it on a PC at home that the whole family uses.
My Son will be taking his GCSE this year, so with that he is spending every free moment on that machine revising for the tests he will be taking in June/ July. My other machine is not powerful enough for it.
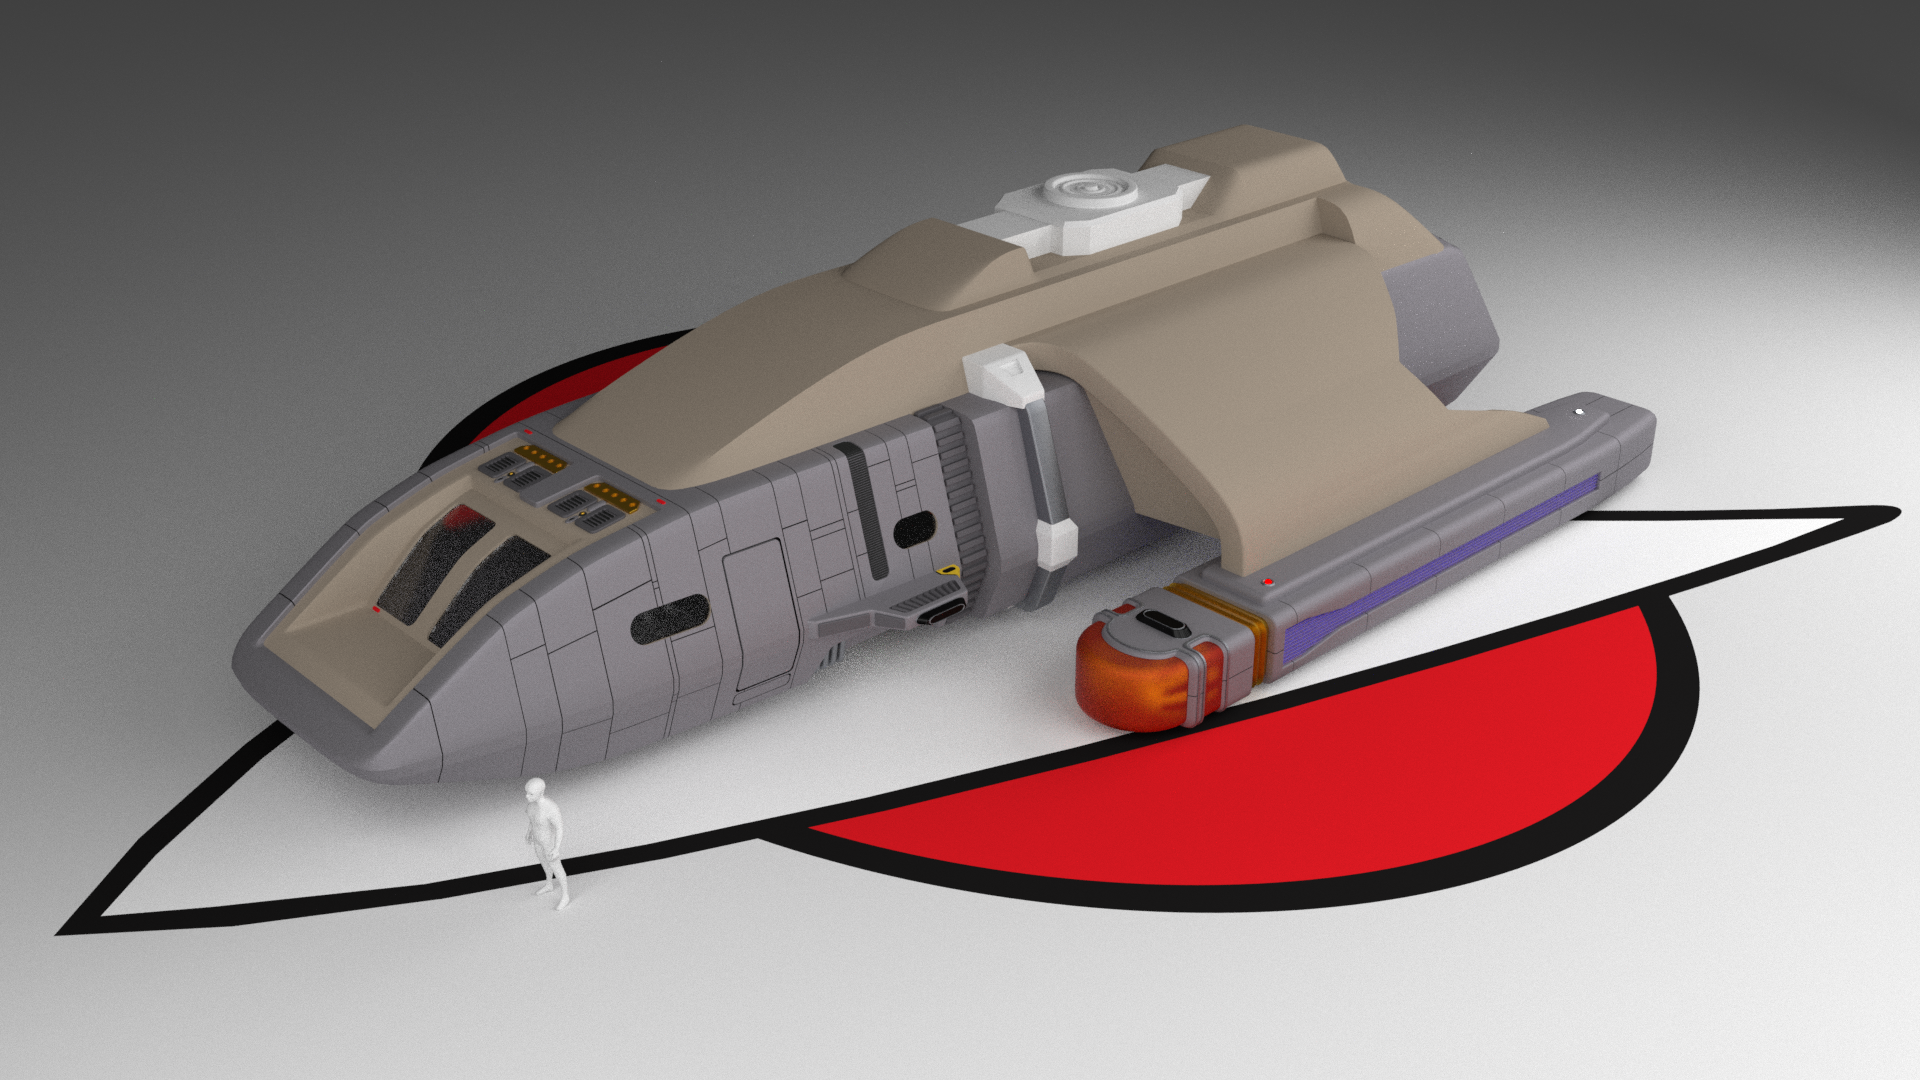
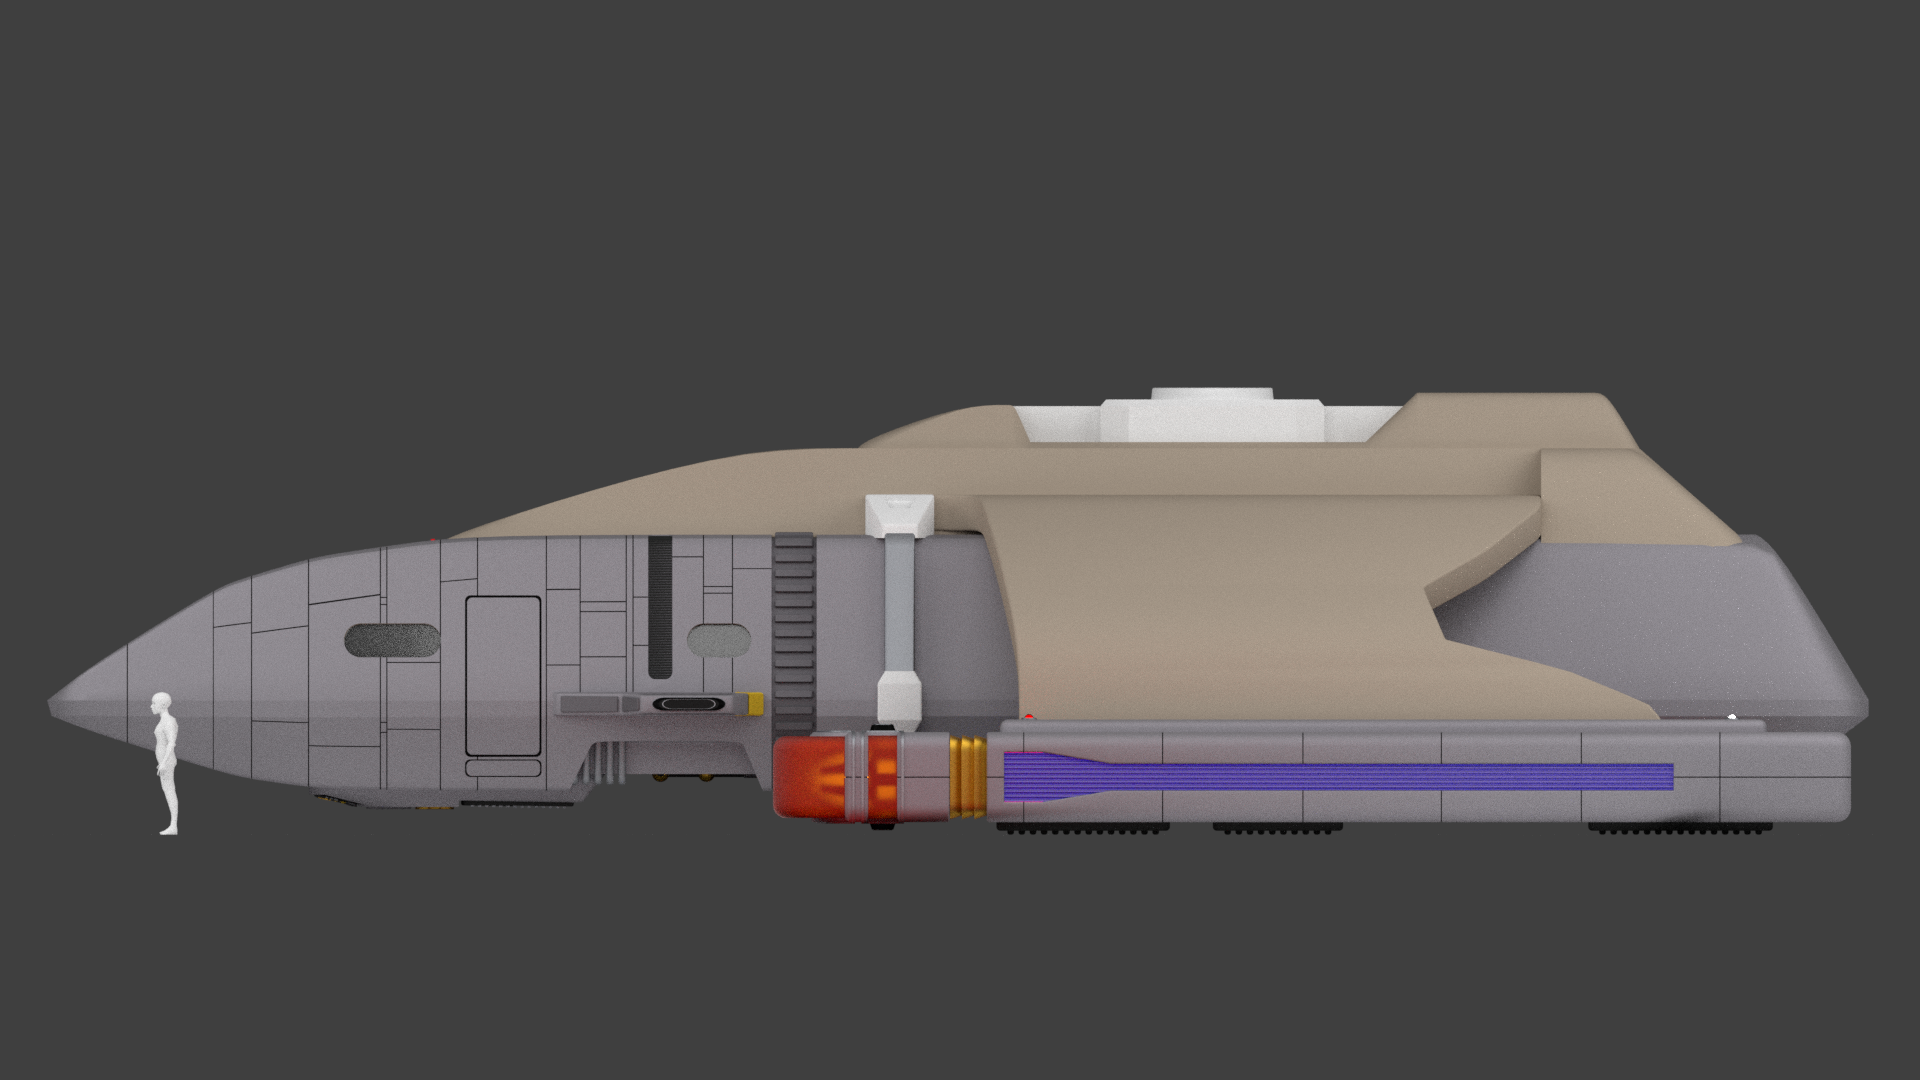
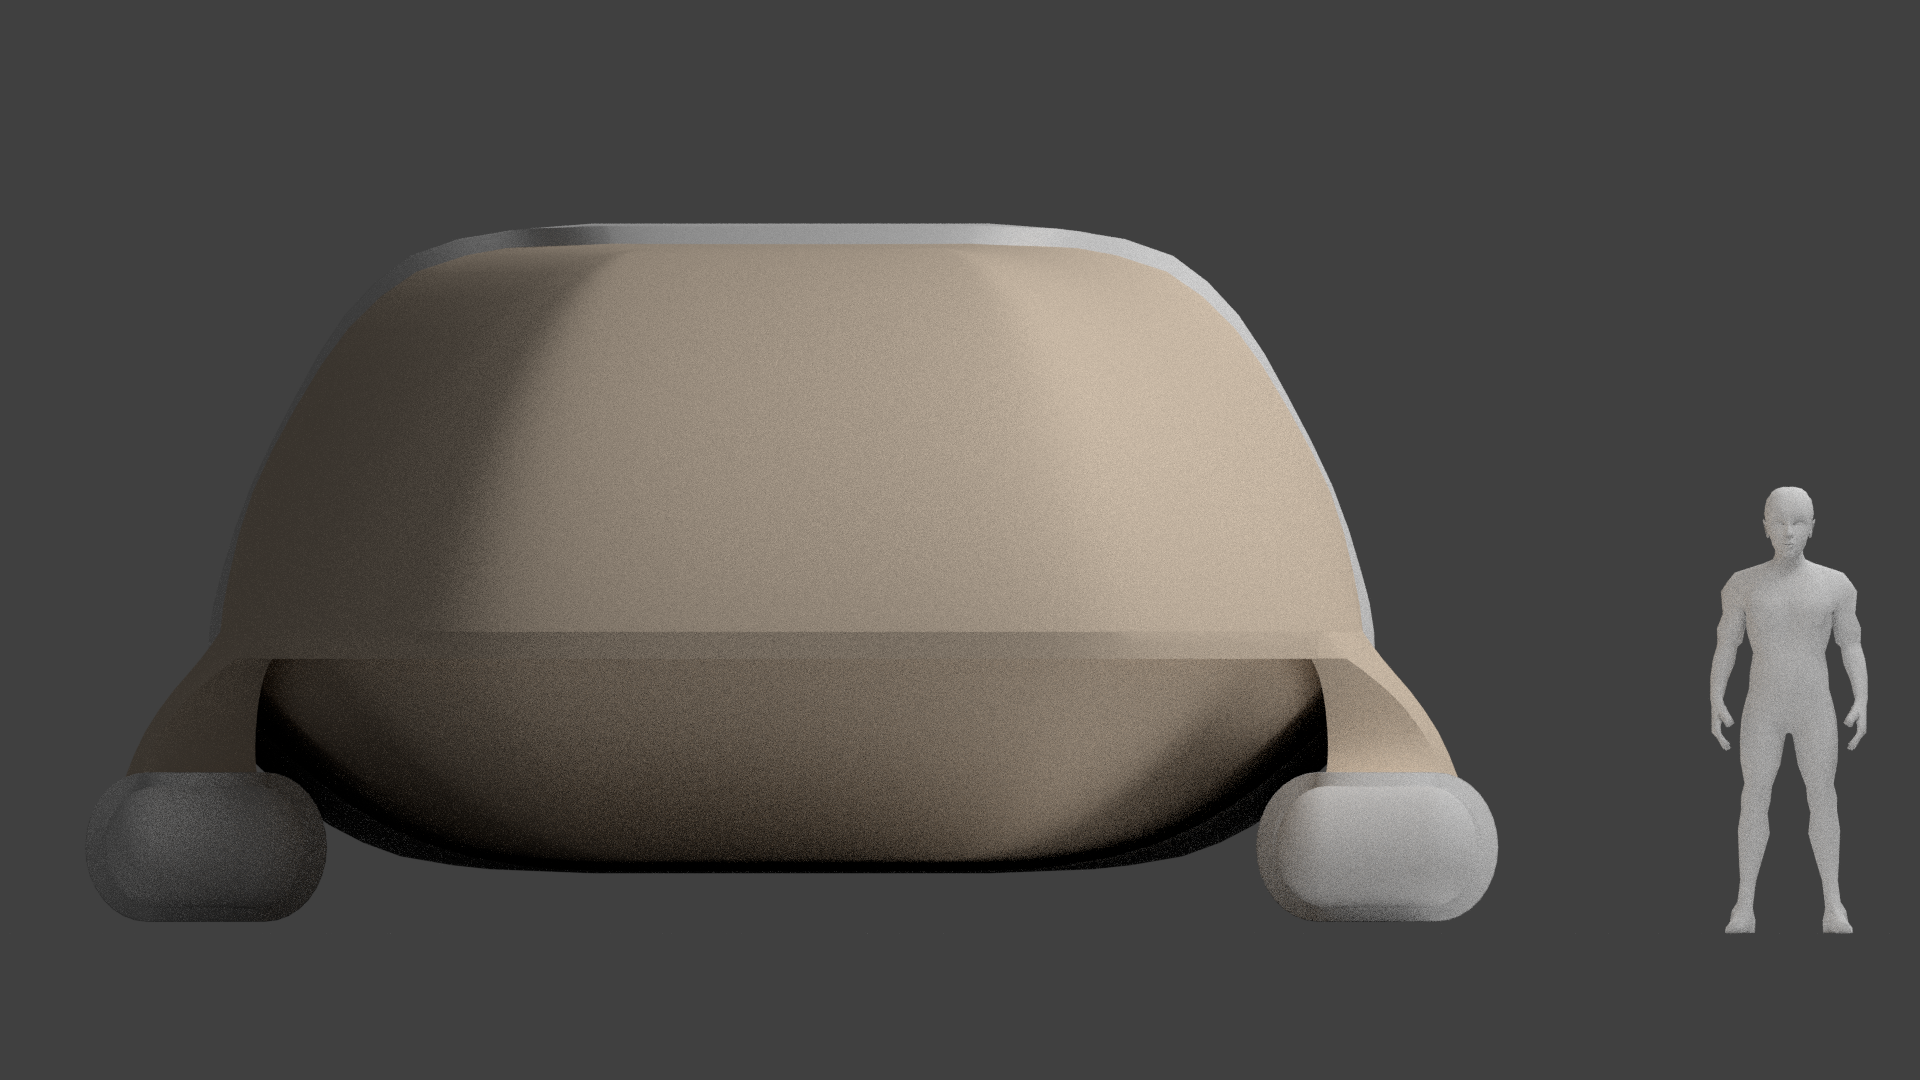
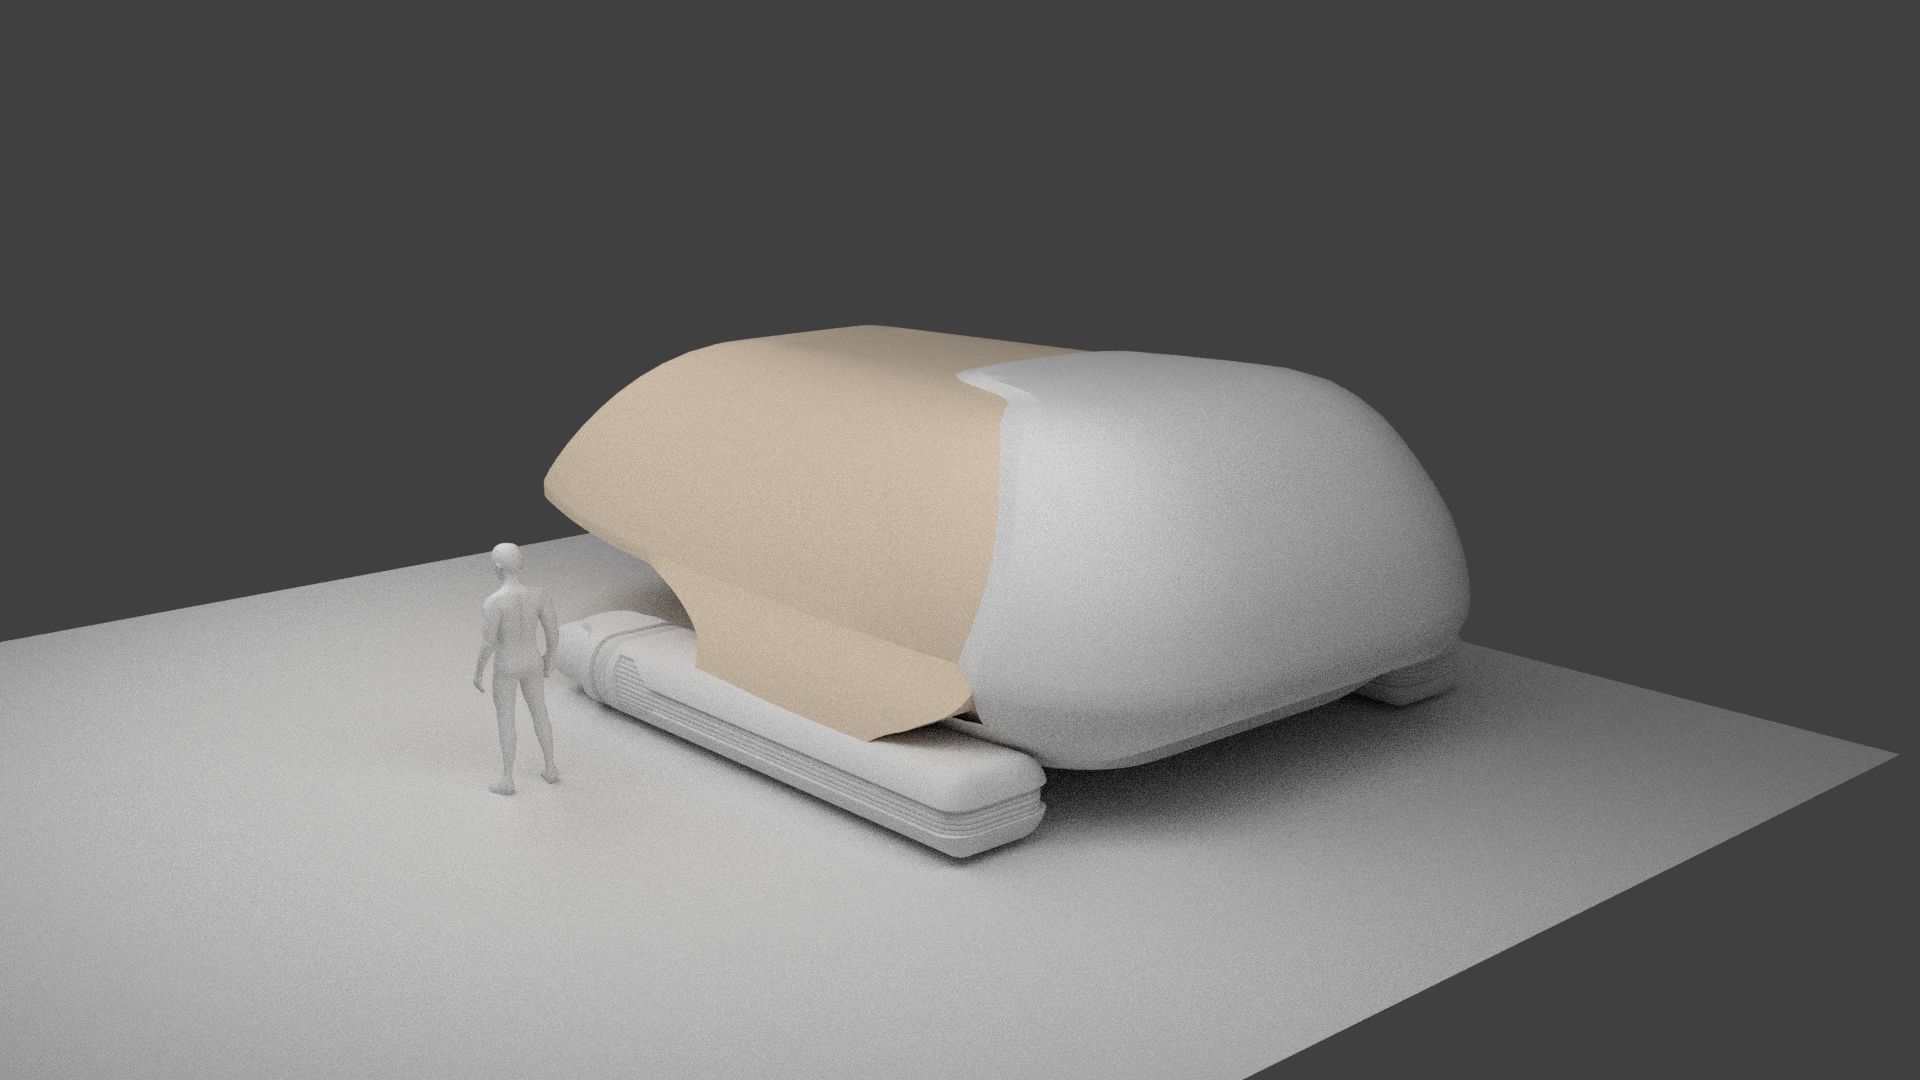
Anyway with that said on to my other build, The Type 7 Shuttle form Star Trek: The Next Generation.
I have modelled the warp nacelles and pylons for them. I have knocked out the basic shape of the main hull, however I getting the shaping right or the rear end of it to be a right pain in the arise. (The white section.) It is a separate object and must of modelled it about 20 times.
I am still no happy with it as I keep finding error, I still need to model the bottom section of this. Which you can see in the front view picture. This is all dark as there is currently nothing there.
But for now here is where it stand.


-
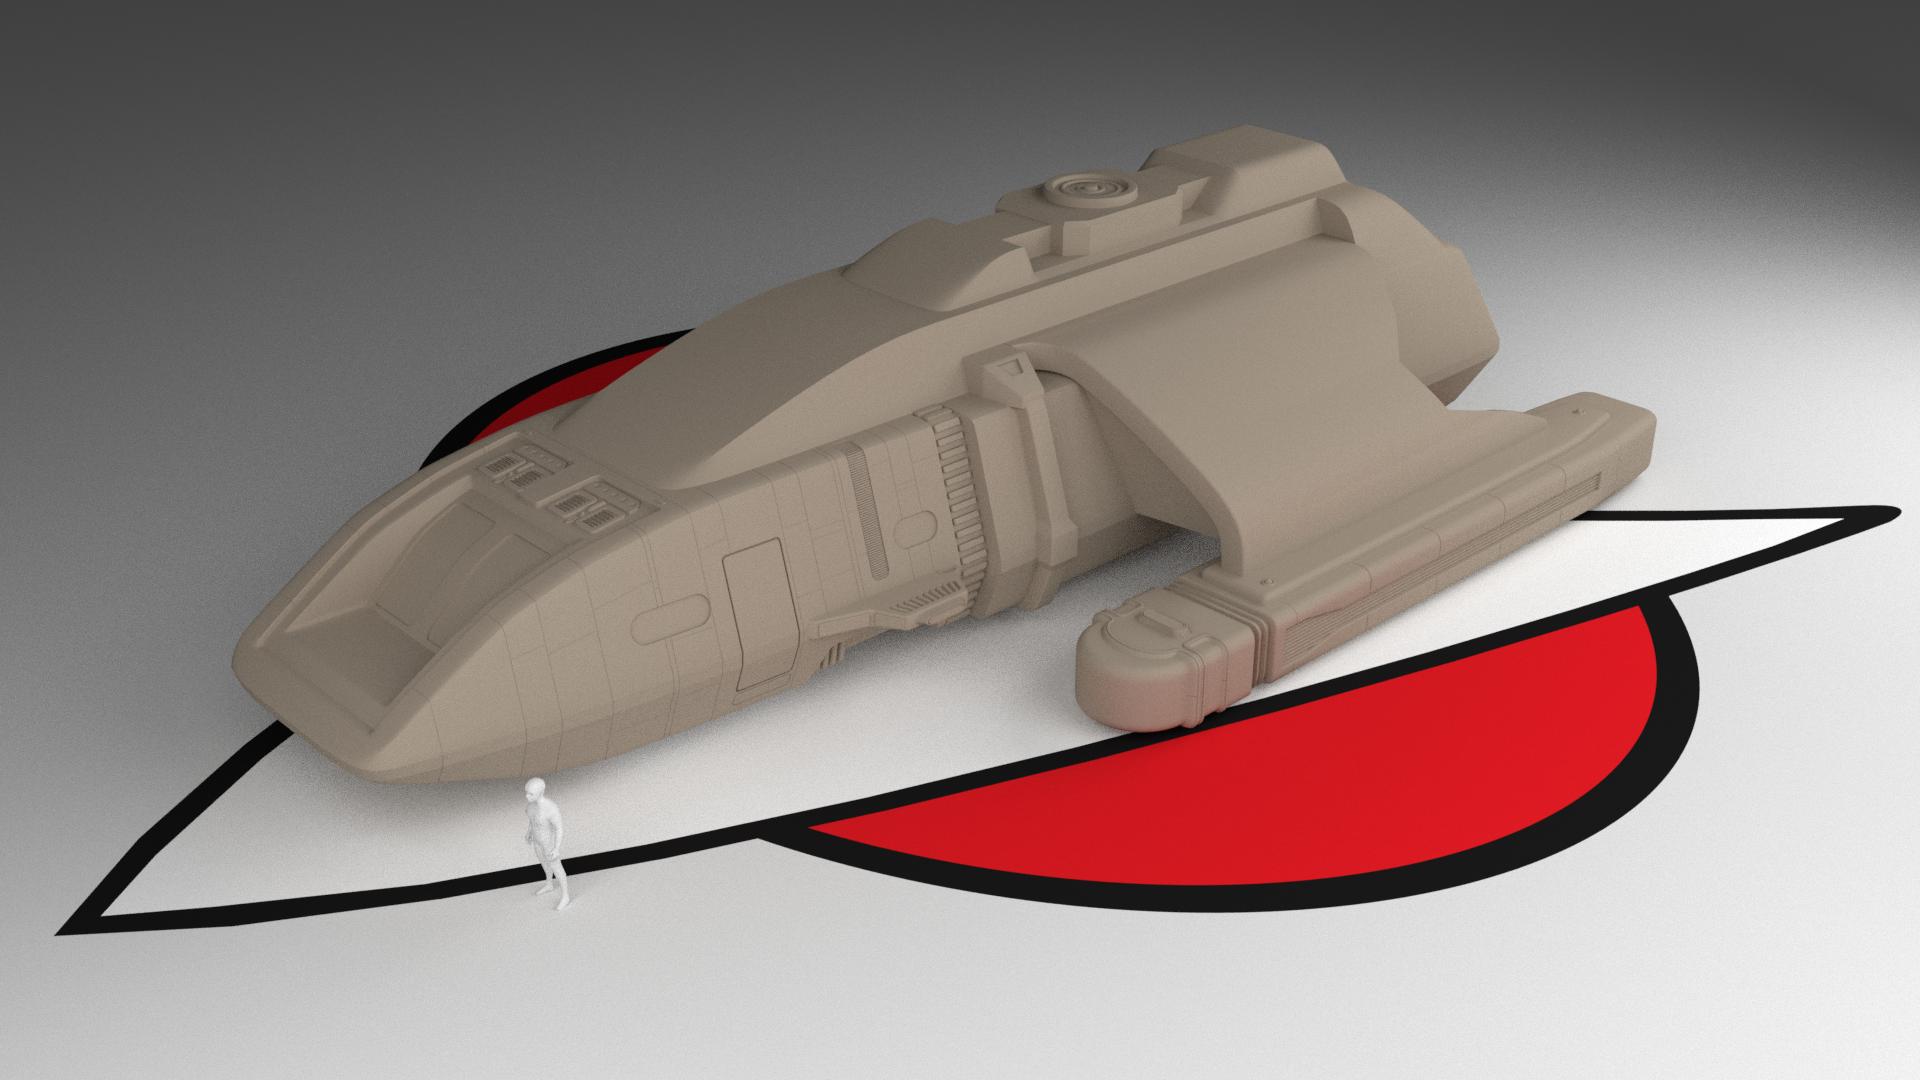
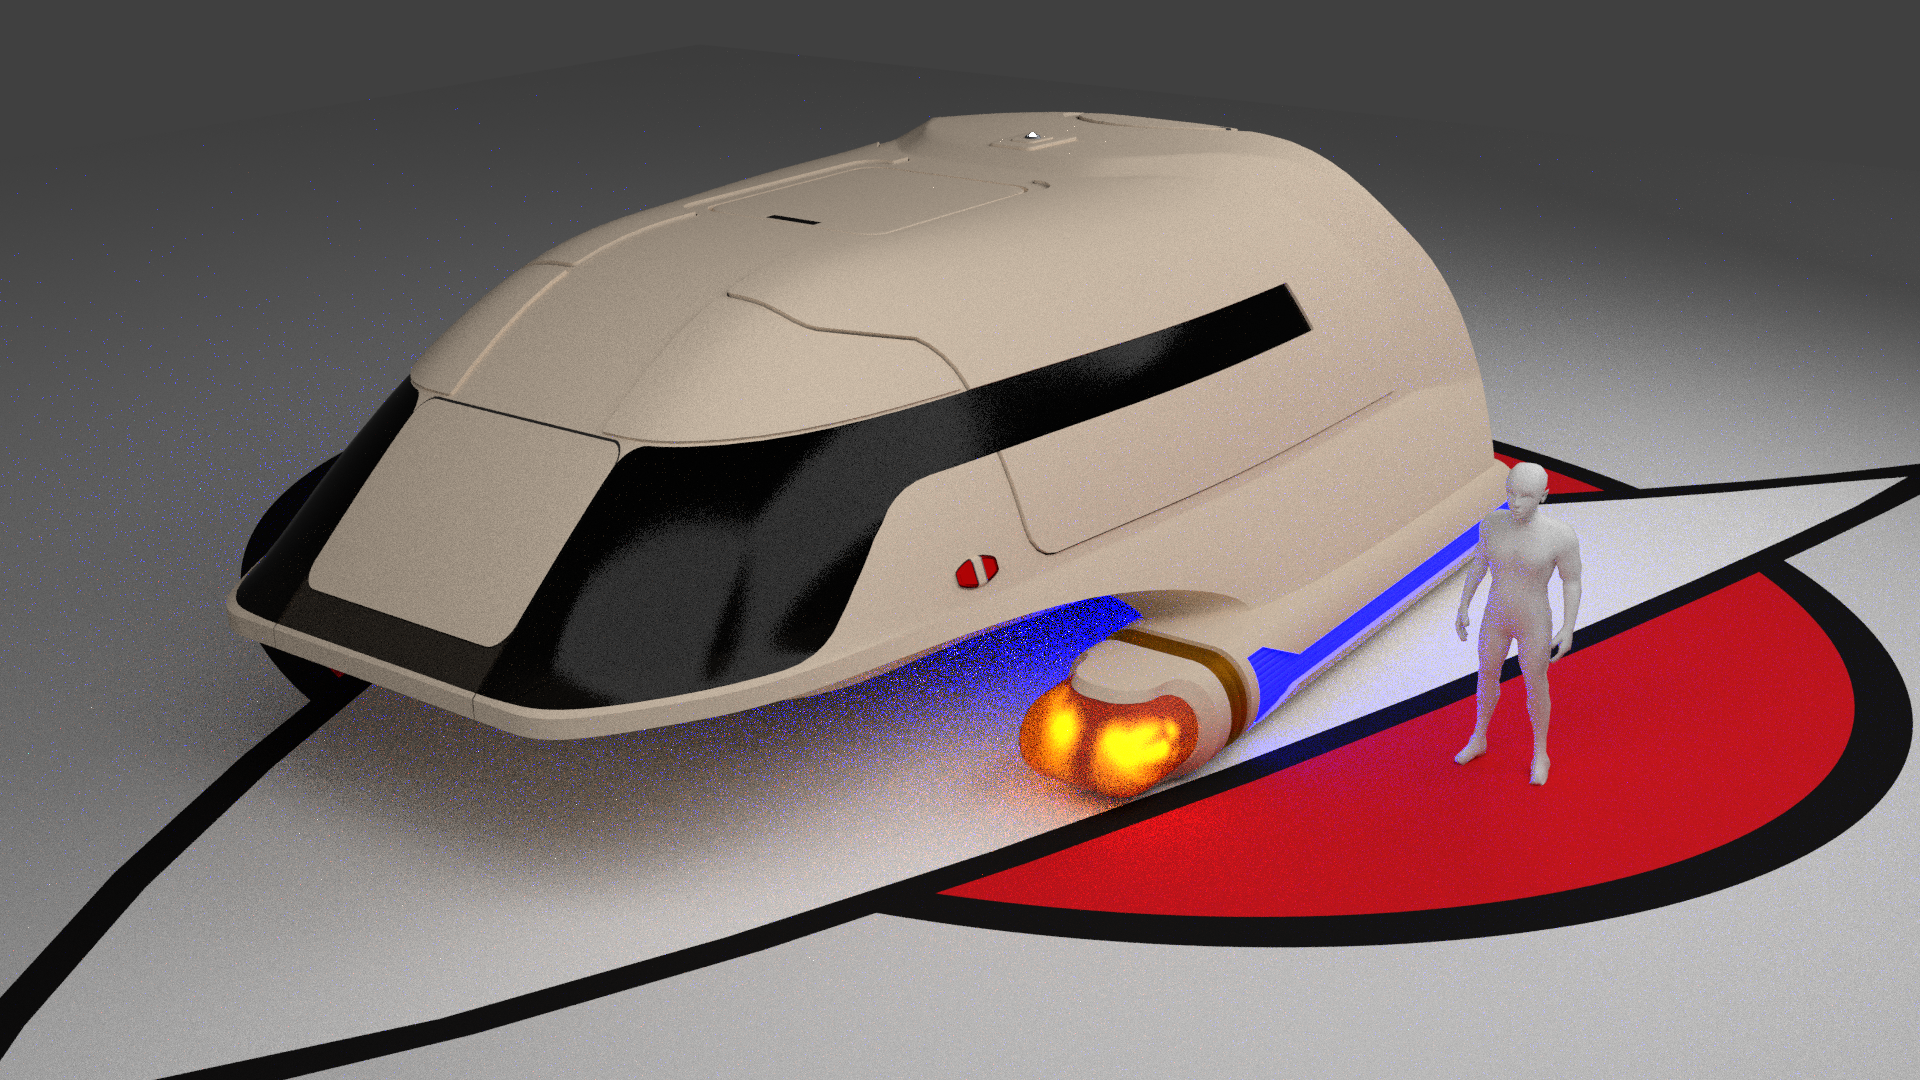
Freak's Trek Build's
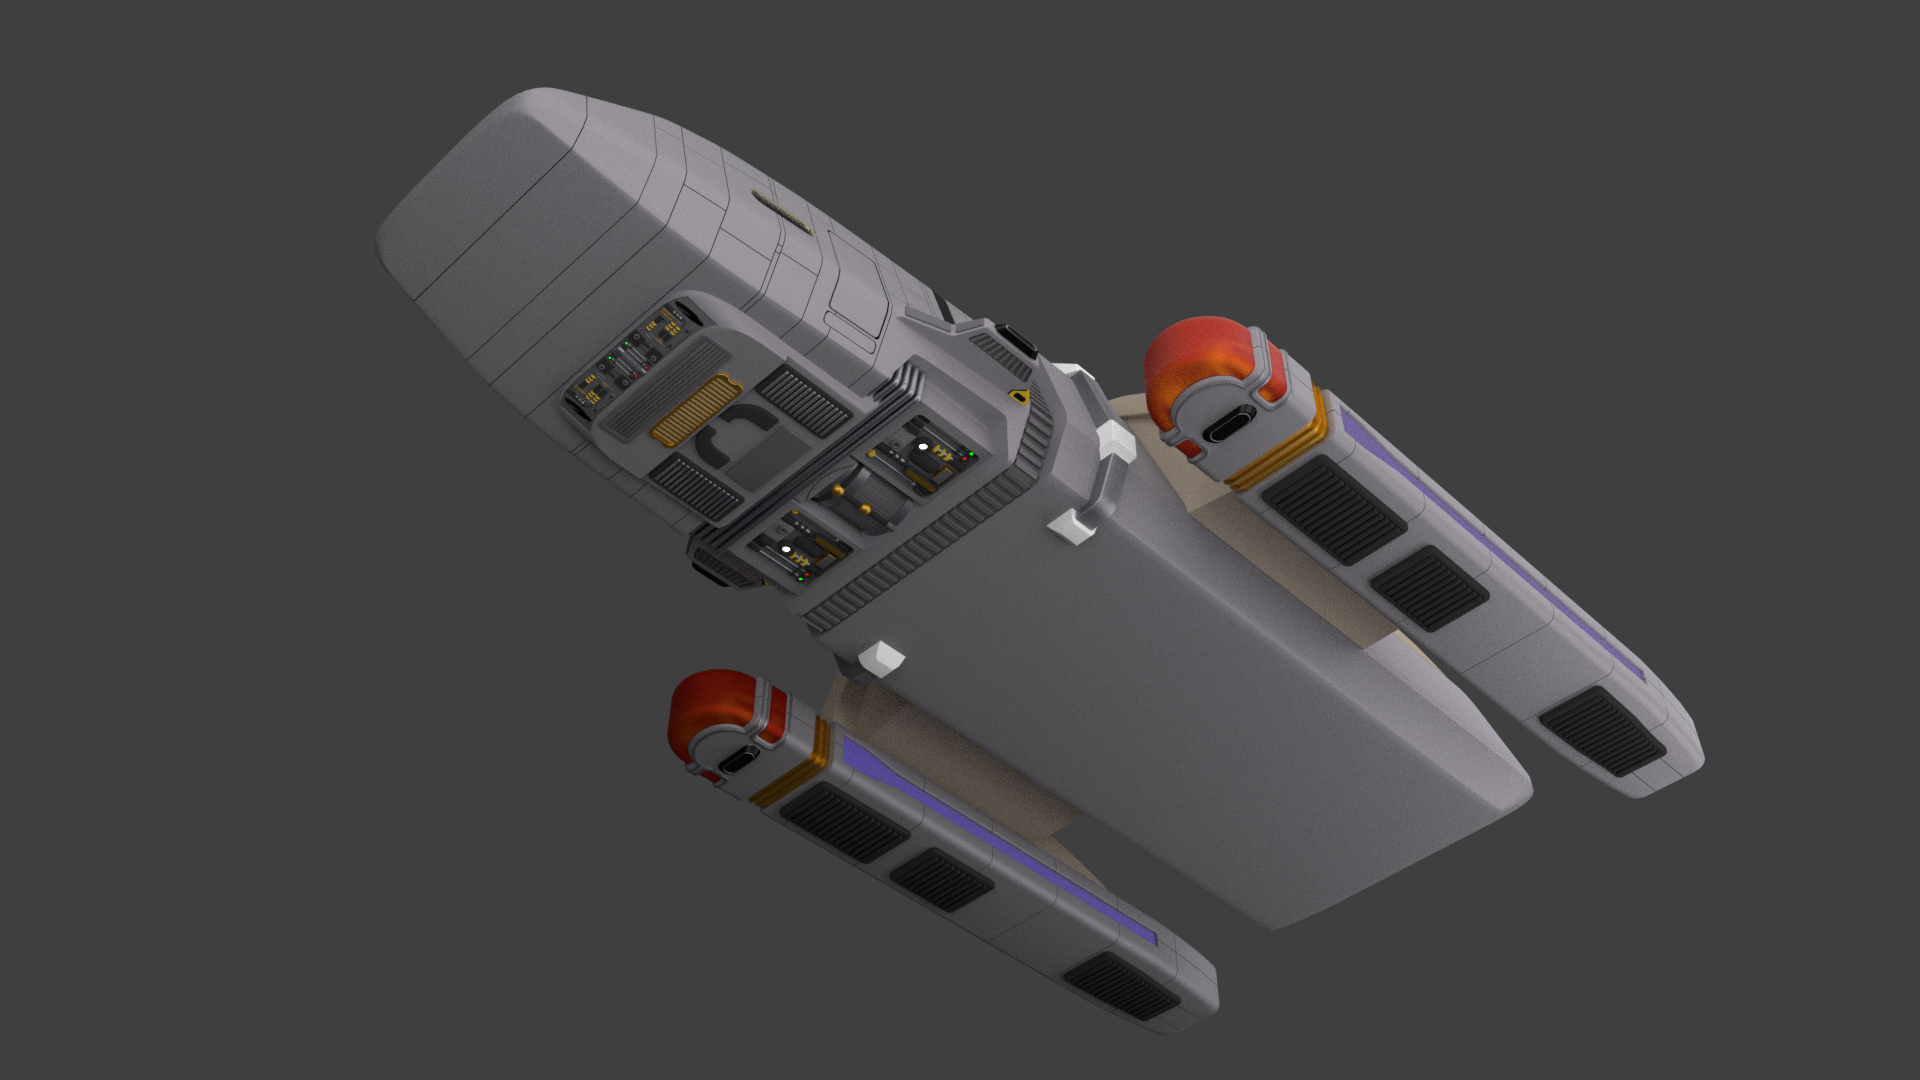
Small update on this build. With heading back into the office, I am not getting a chance to work on this as much as I wanted.
Anyway, I have decided to do a cross between what was shown on screen and Andrew Probert concept.
I am not a fan of those big chunky navigation lights on the side or back, but with Probert concept they are imbedded into the main hull.
So What I have done is mix the two. With the ones on the side I have them sticking out but I have streamlined the design so it follows better and not as chunky. With the rear ones I have them imbedded into the main hull and gave them a little lip so it stick out just a little but not noticeable.
The panels on the main part of the shuttle are a separate object and I am 50/50 on liking them, but they do bring it inline with the studio model. I have also left the window length the same as Probert concept as I think it looks better than the studio model.
As I made the impluse engine hatch thingy a door, that will be reworked back to being the impluse engines. As I have now corrected the front to incorporate Probert concept design for the main door.
I have included the second hatch on top of the shuttle as they are both on Probert concept and studio model and was seen open in Season 1 Skin of Evil Episode. Though I don’t think Probert originally envisioned that as a Escape hatch.
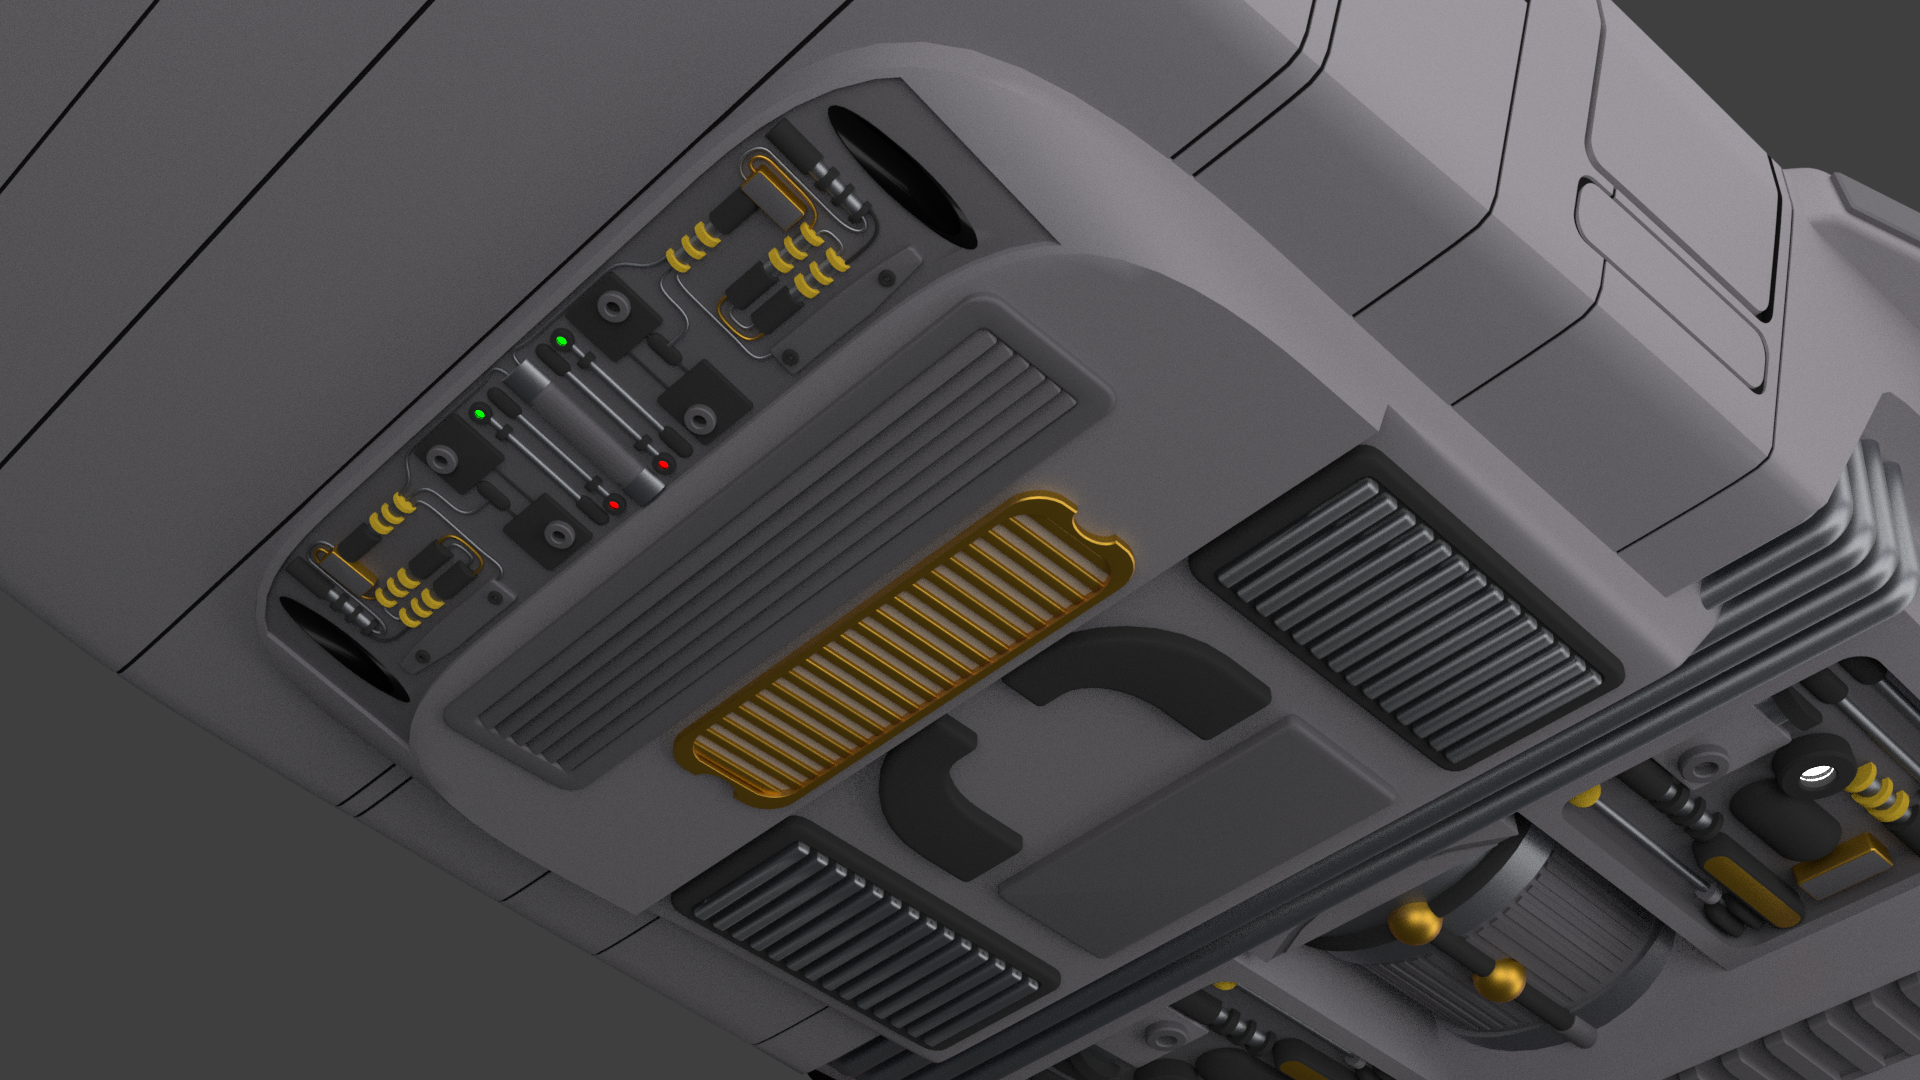
I still need to add the RCS and details the bottom, as there is no clear view of it I might just do my own thing.
I have also added some temporary materials to get a feeling of where that will go.


-
Freak's Trek Build's
**Edited to update Thumbnail**
**Edited to update Thumbnail**
With having built the Enterprise for Star Trek TOS and the shuttle. I still got that modelling itch that needs to be scratched, so I have decide while I have it why build each version of the Enterprise from Star Trek. However for the Enterprise A I won’t do another Refit Connie, I’ll just redo the Textures and the Reg.
Each Ship will be to scale.
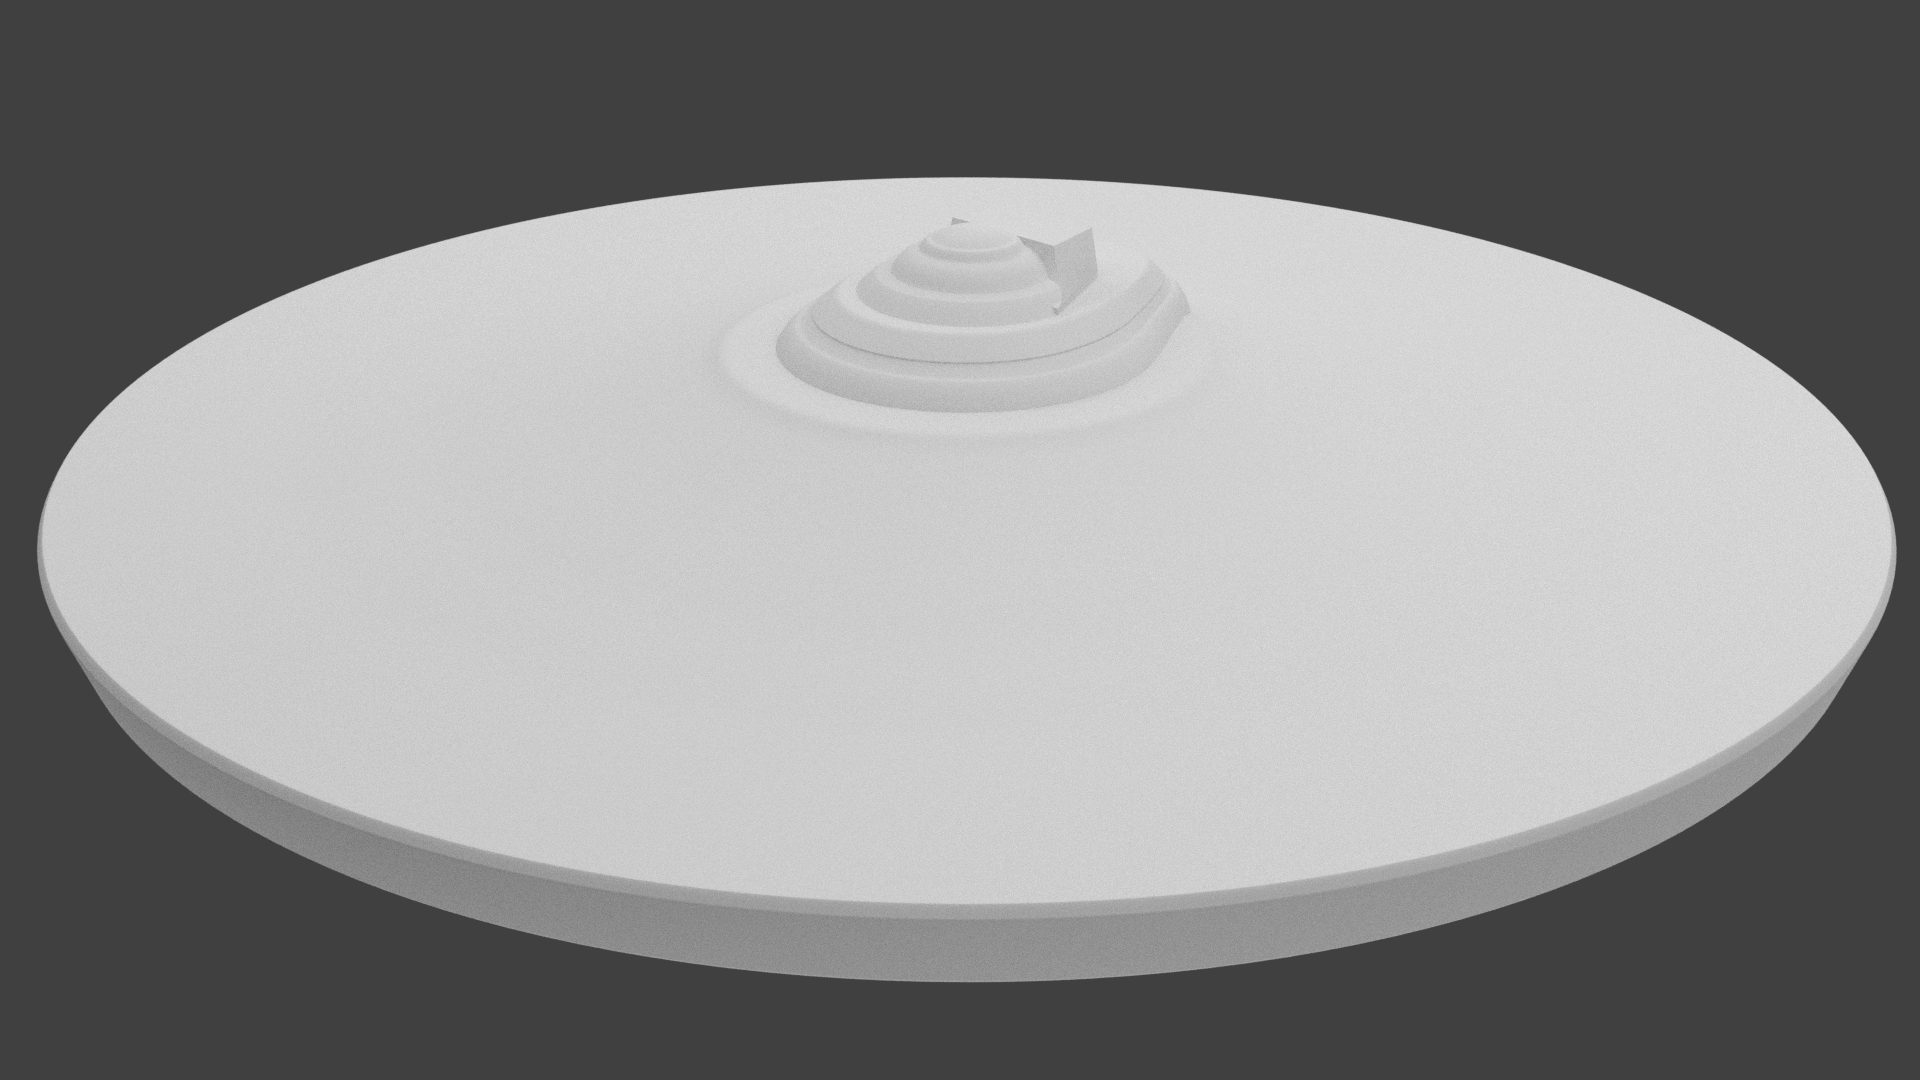
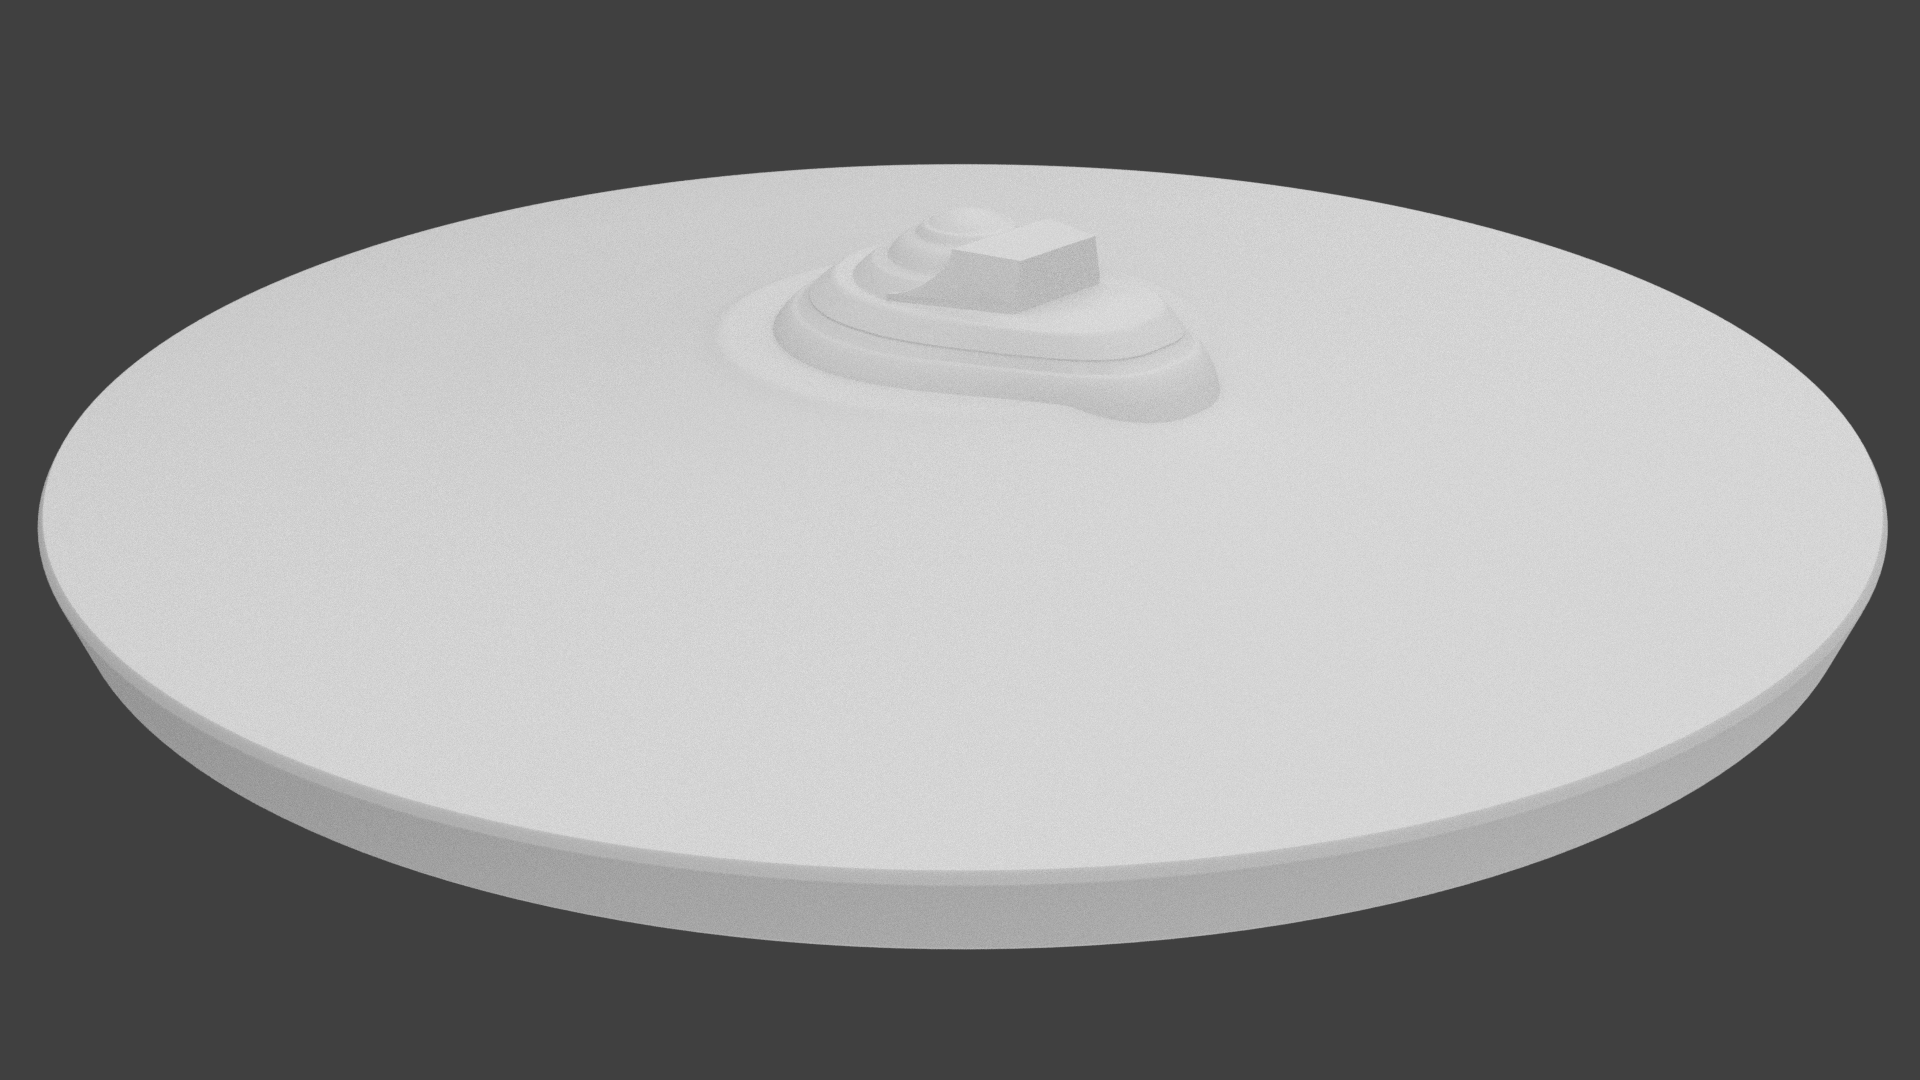
With that said, onto the next Build and I am starting of with the Refitted Enterprise.
I am using the plans by Monte R. Johnjulio Enterprise. These are not to bad, though I have found while getting the impulse engines to match from a top and side view, when on a rear it out quite a bit, after resizing the picture to get it to fit it will knock something else out. So unless someone knows of better plans these will have to do
I made the saucer the B/C Deck and the roughed out the bridge.
I lost count how many times it took to get it to were it is now. I am happy with the front end it the rear I am not happy with. I can’t seem to get the shape right, but I will keep at it.
With that said, I am extremally happy with the way the B/C deck turn out, I just need to sort out the area for the large windows at the back.


-
Freak's Trek Build's
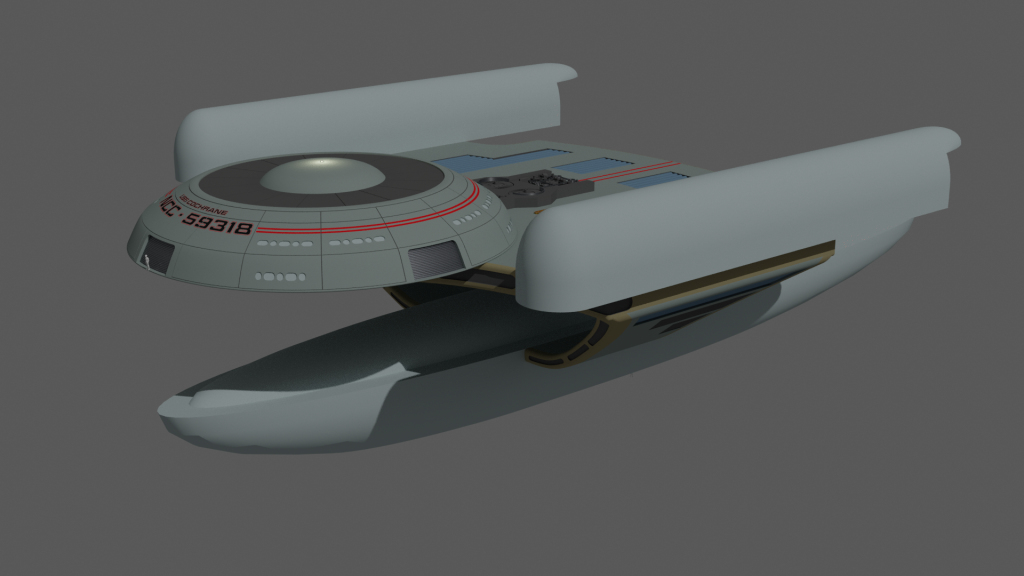
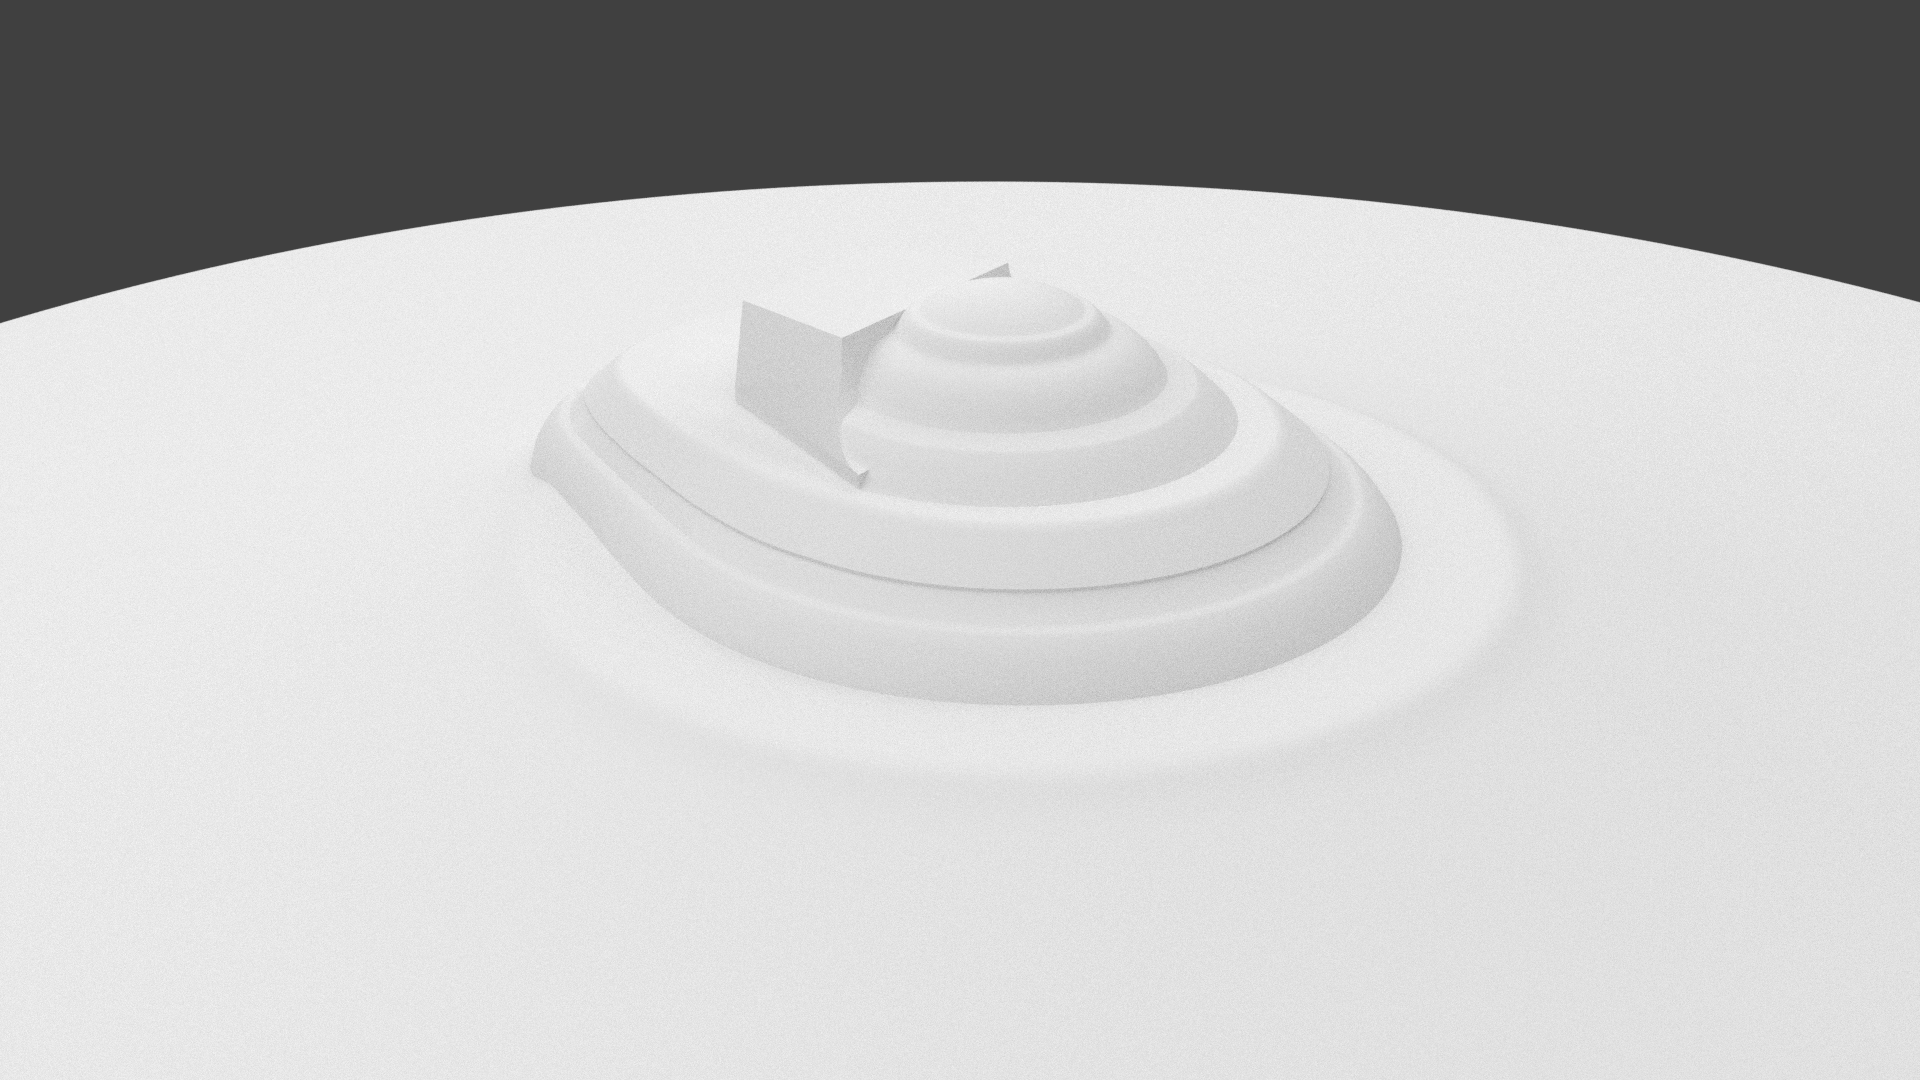
So while I am figuring out how I am going to texture the Runabout.
I though I would finally bit the bullet and have a little play around in Blender 2.8. After all I did say that I would do my next build in it.
Okay it got a new UI which is nice, but the two things that really bug me about it. Some of the shortcuts no longer work, so what you could do in seconds you now have to go hunting for and on top of that it no longer has a short cut. The other thing that bugging me is that they have change names as well.
Before If you have duplicate verts on a object and you wanted to get rid of them you simple selected all the Verts, press W and then select "Remove Doubles". Job done.
But now you got select all the Verts, click on Meshes go down to Clean up and select "Merge by Distance".
Who the F though it would be a good idea to call it "Merge by Distance"?
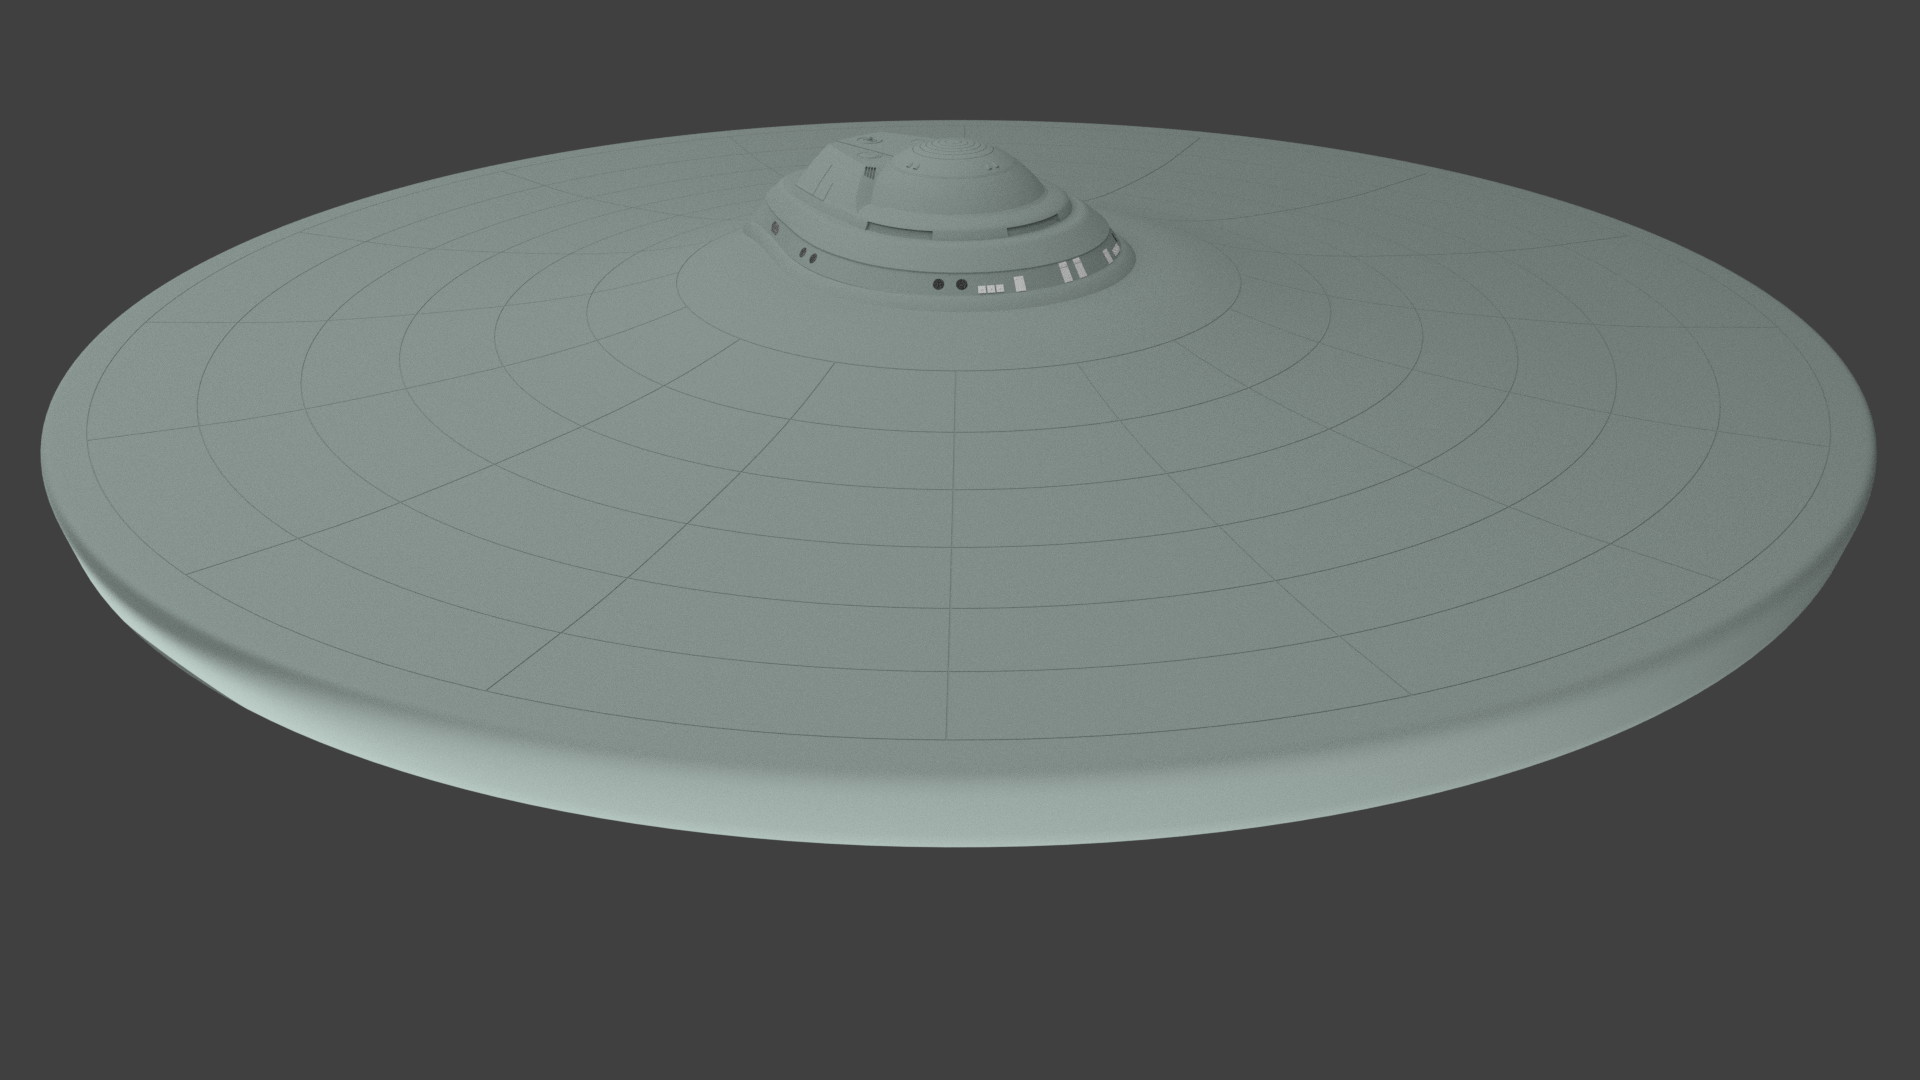
I spent 45 mins looking for Remove Doubles and finally had to look it up on youtube.
Anyway here is the results of a half a days working in Blender 2.8. (could have done this in no time in 2.79 but hopeful as I get to know 2.8 things will speed up.)
The little black dot on the saucer is the six foot man seen in my pervious scale pics. gives you an idea of the size of this thing.
-
Freak's Trek Build's
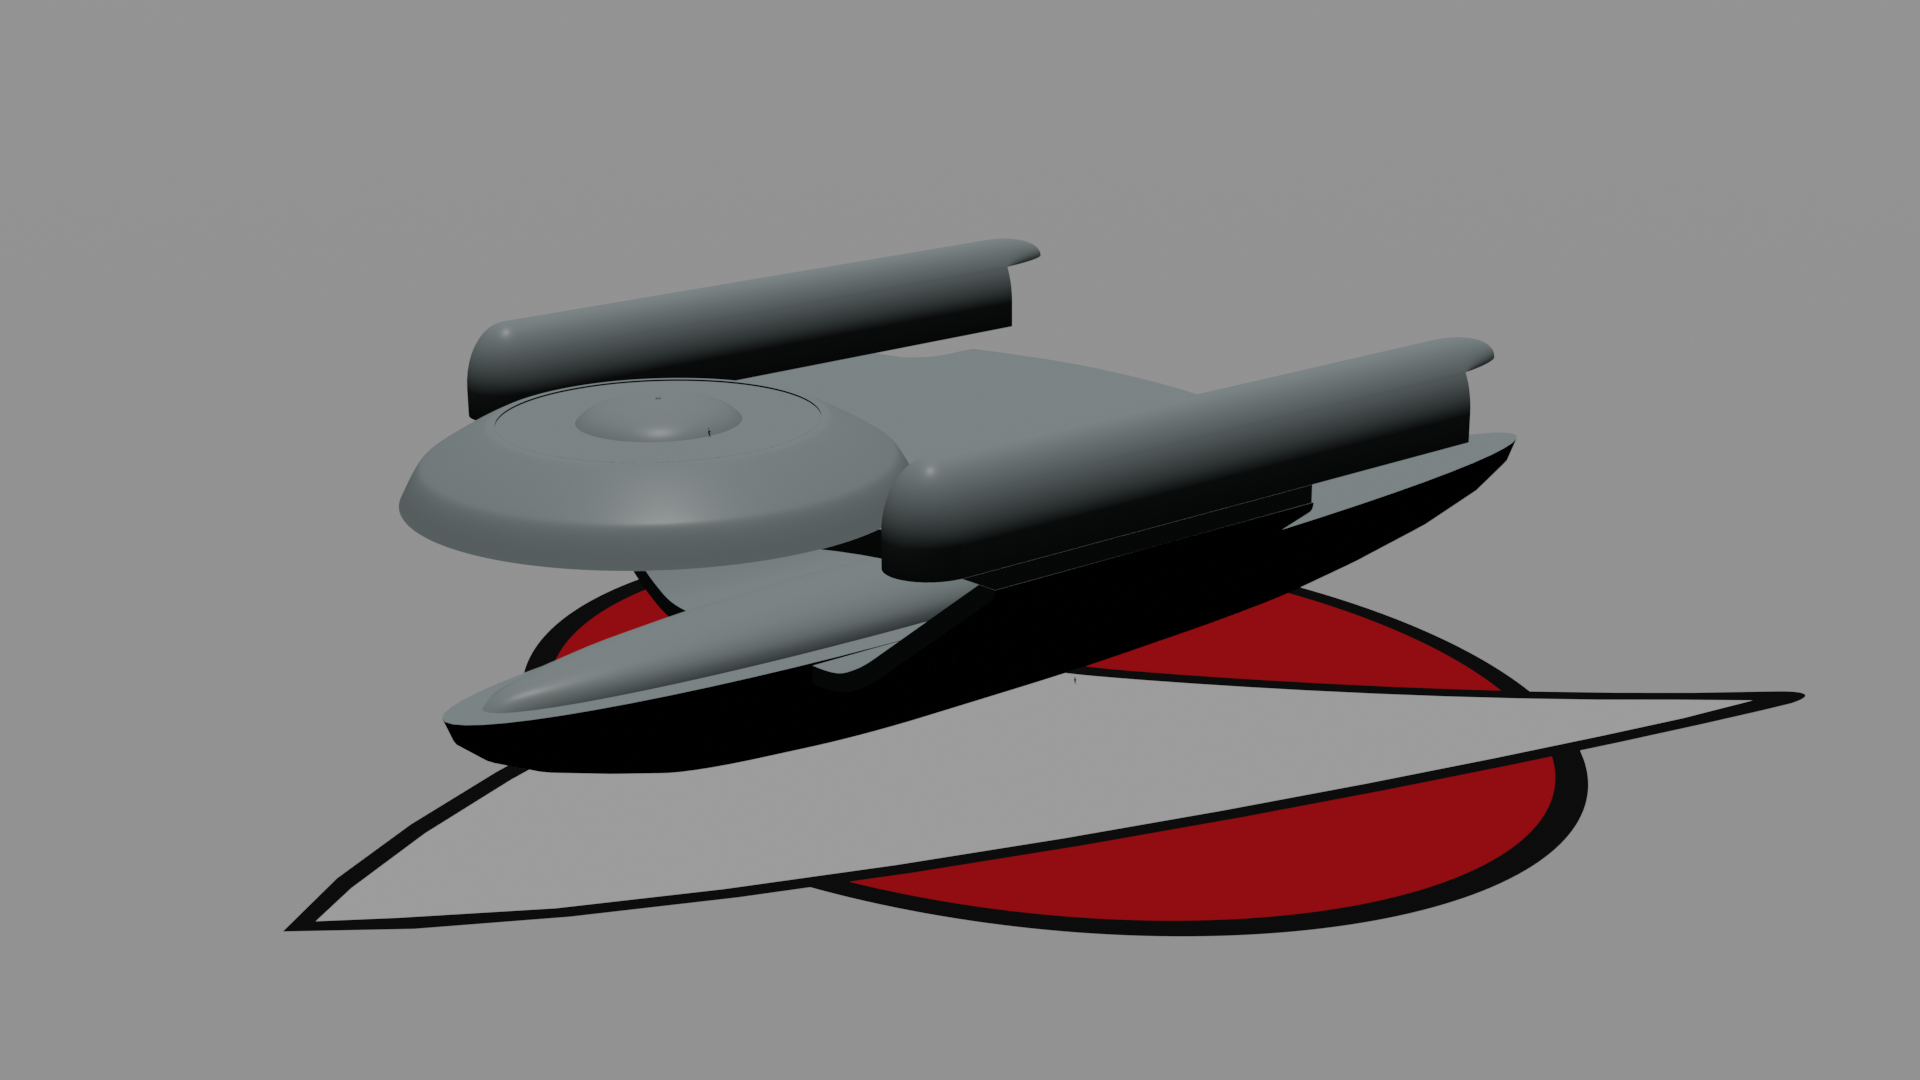
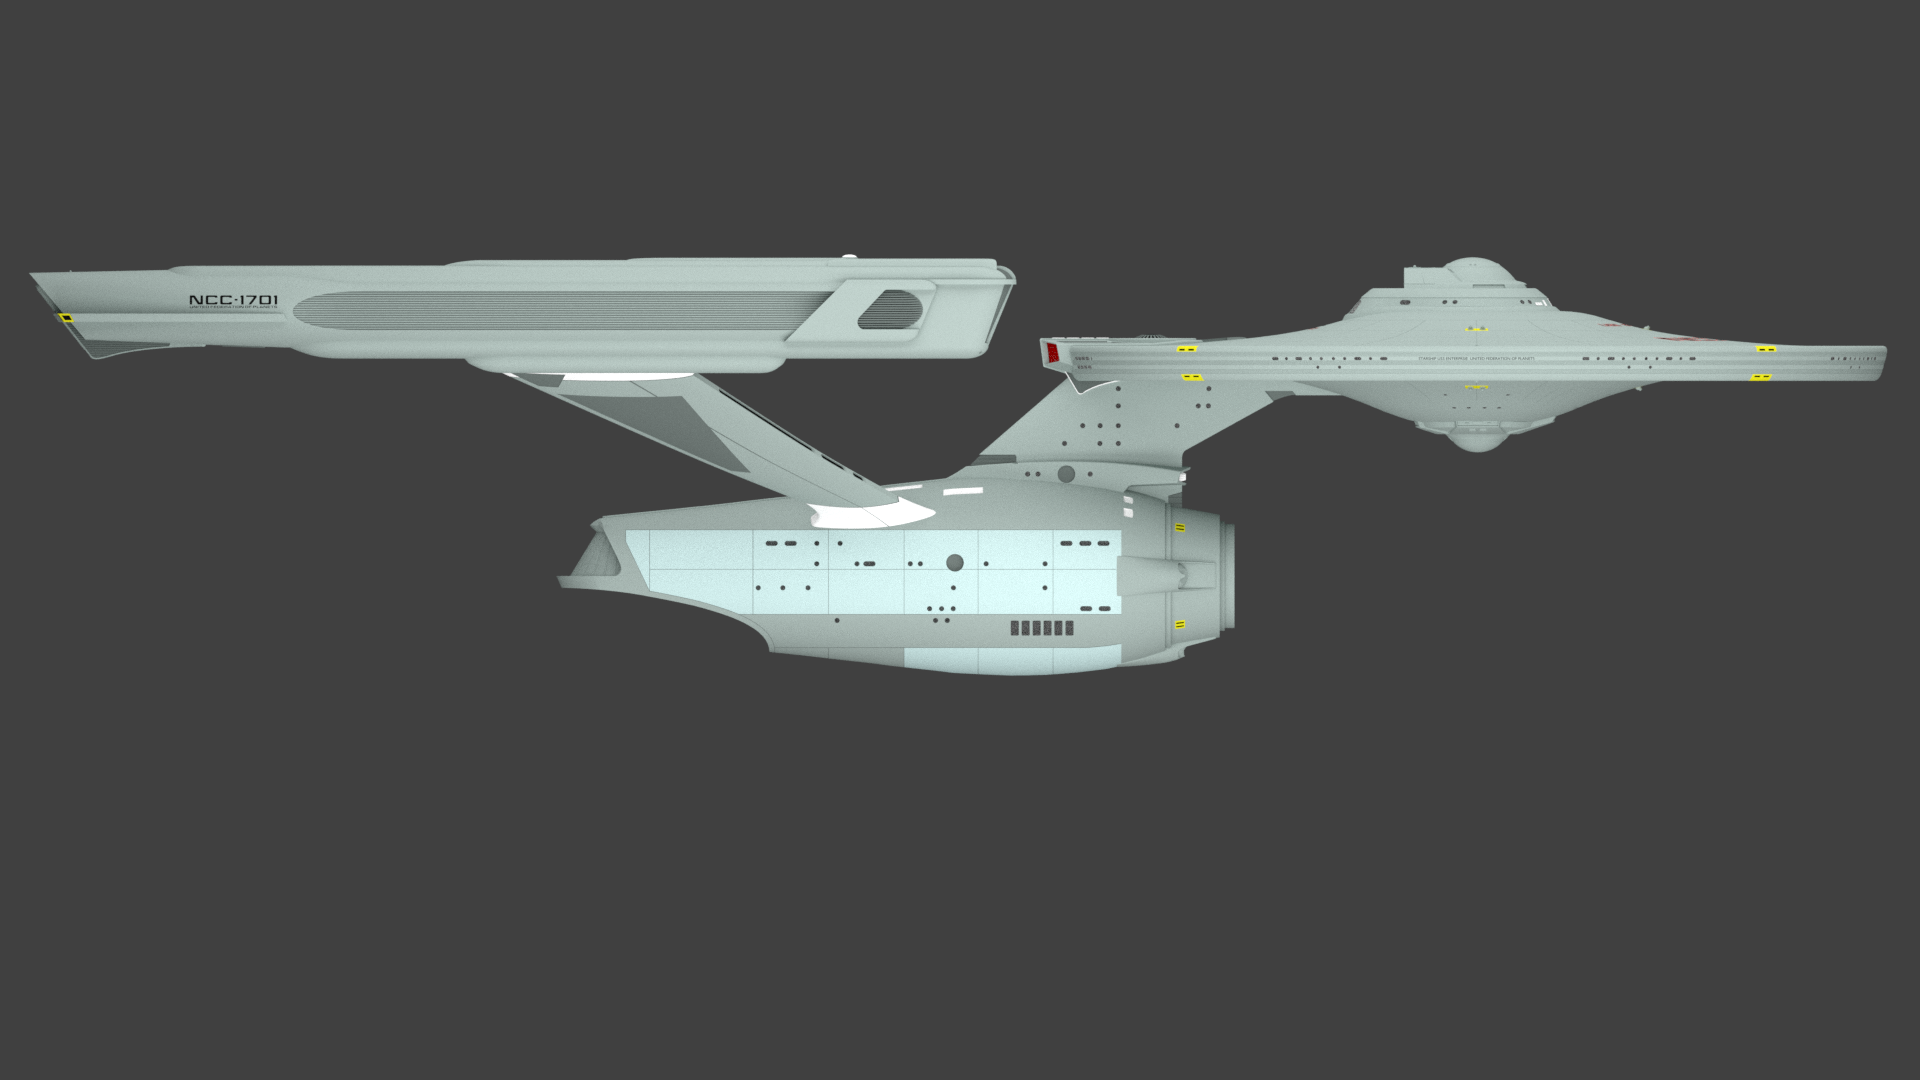
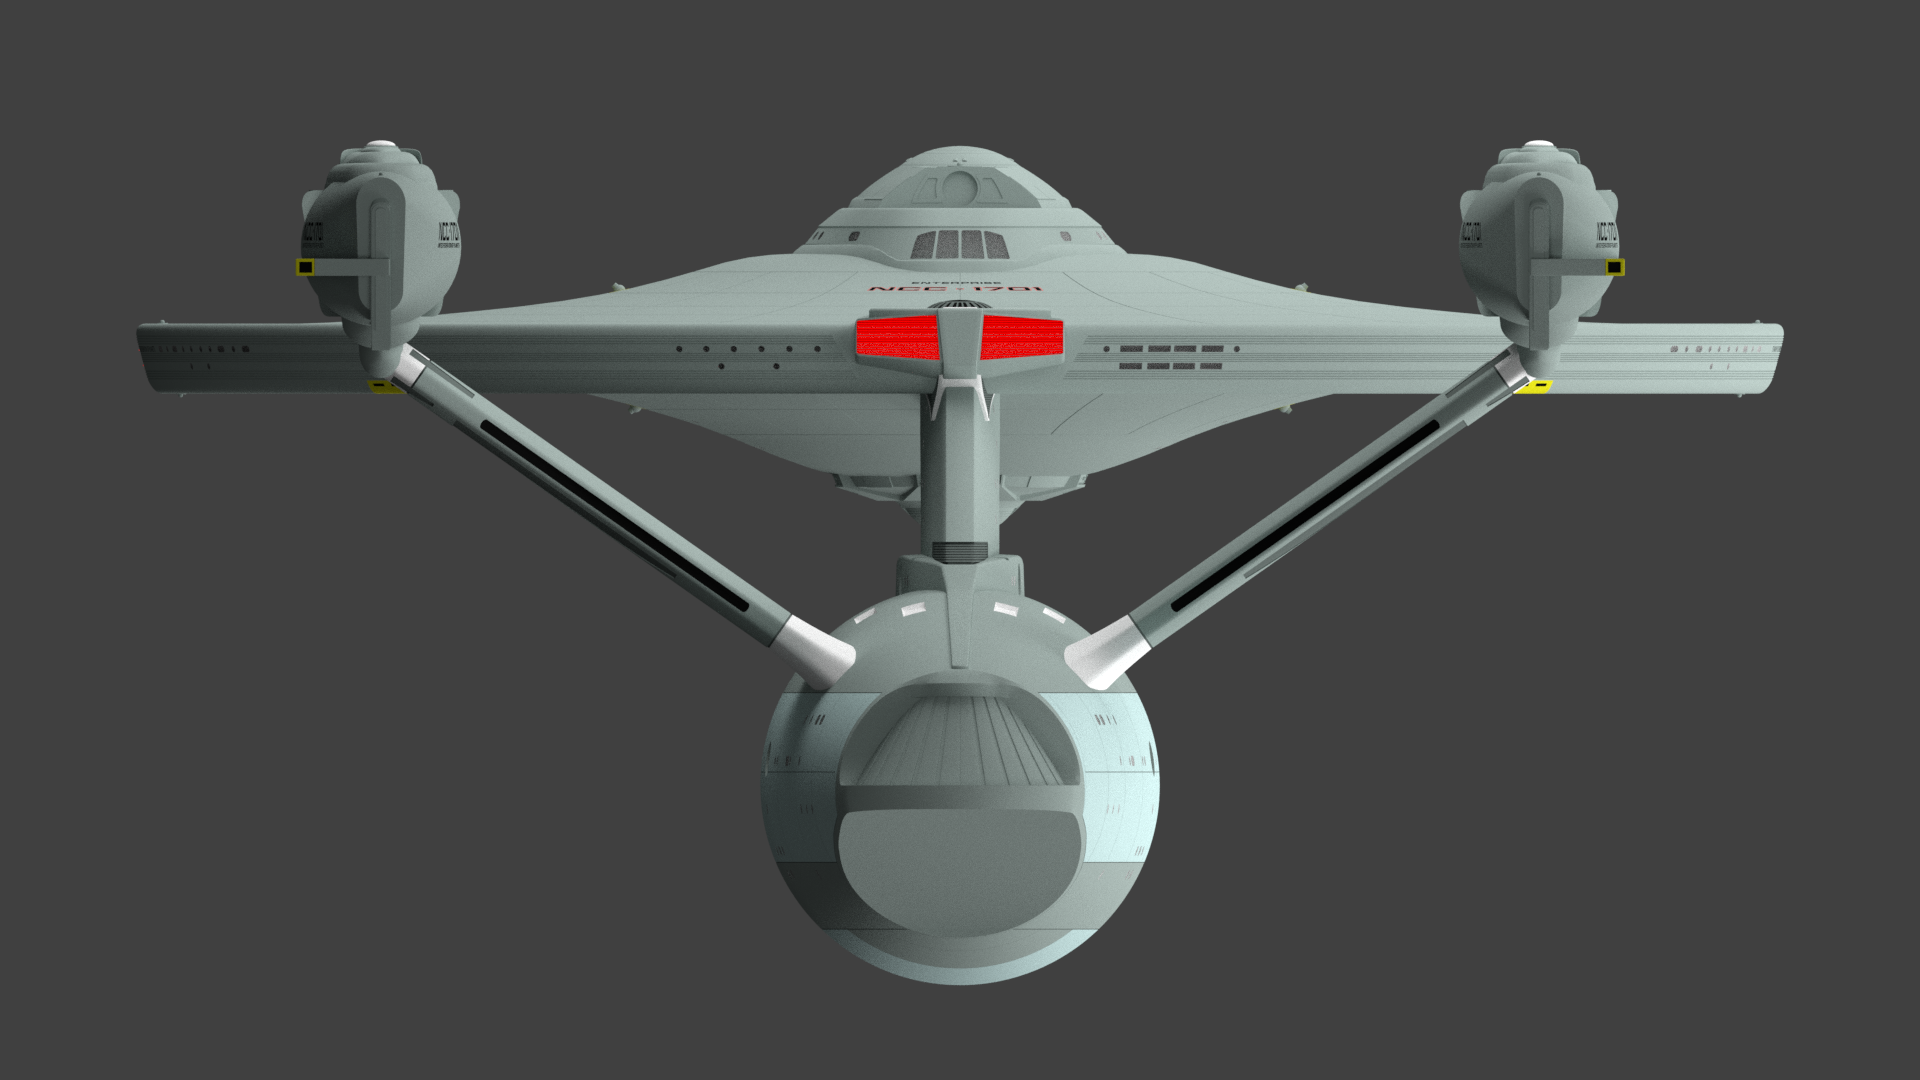
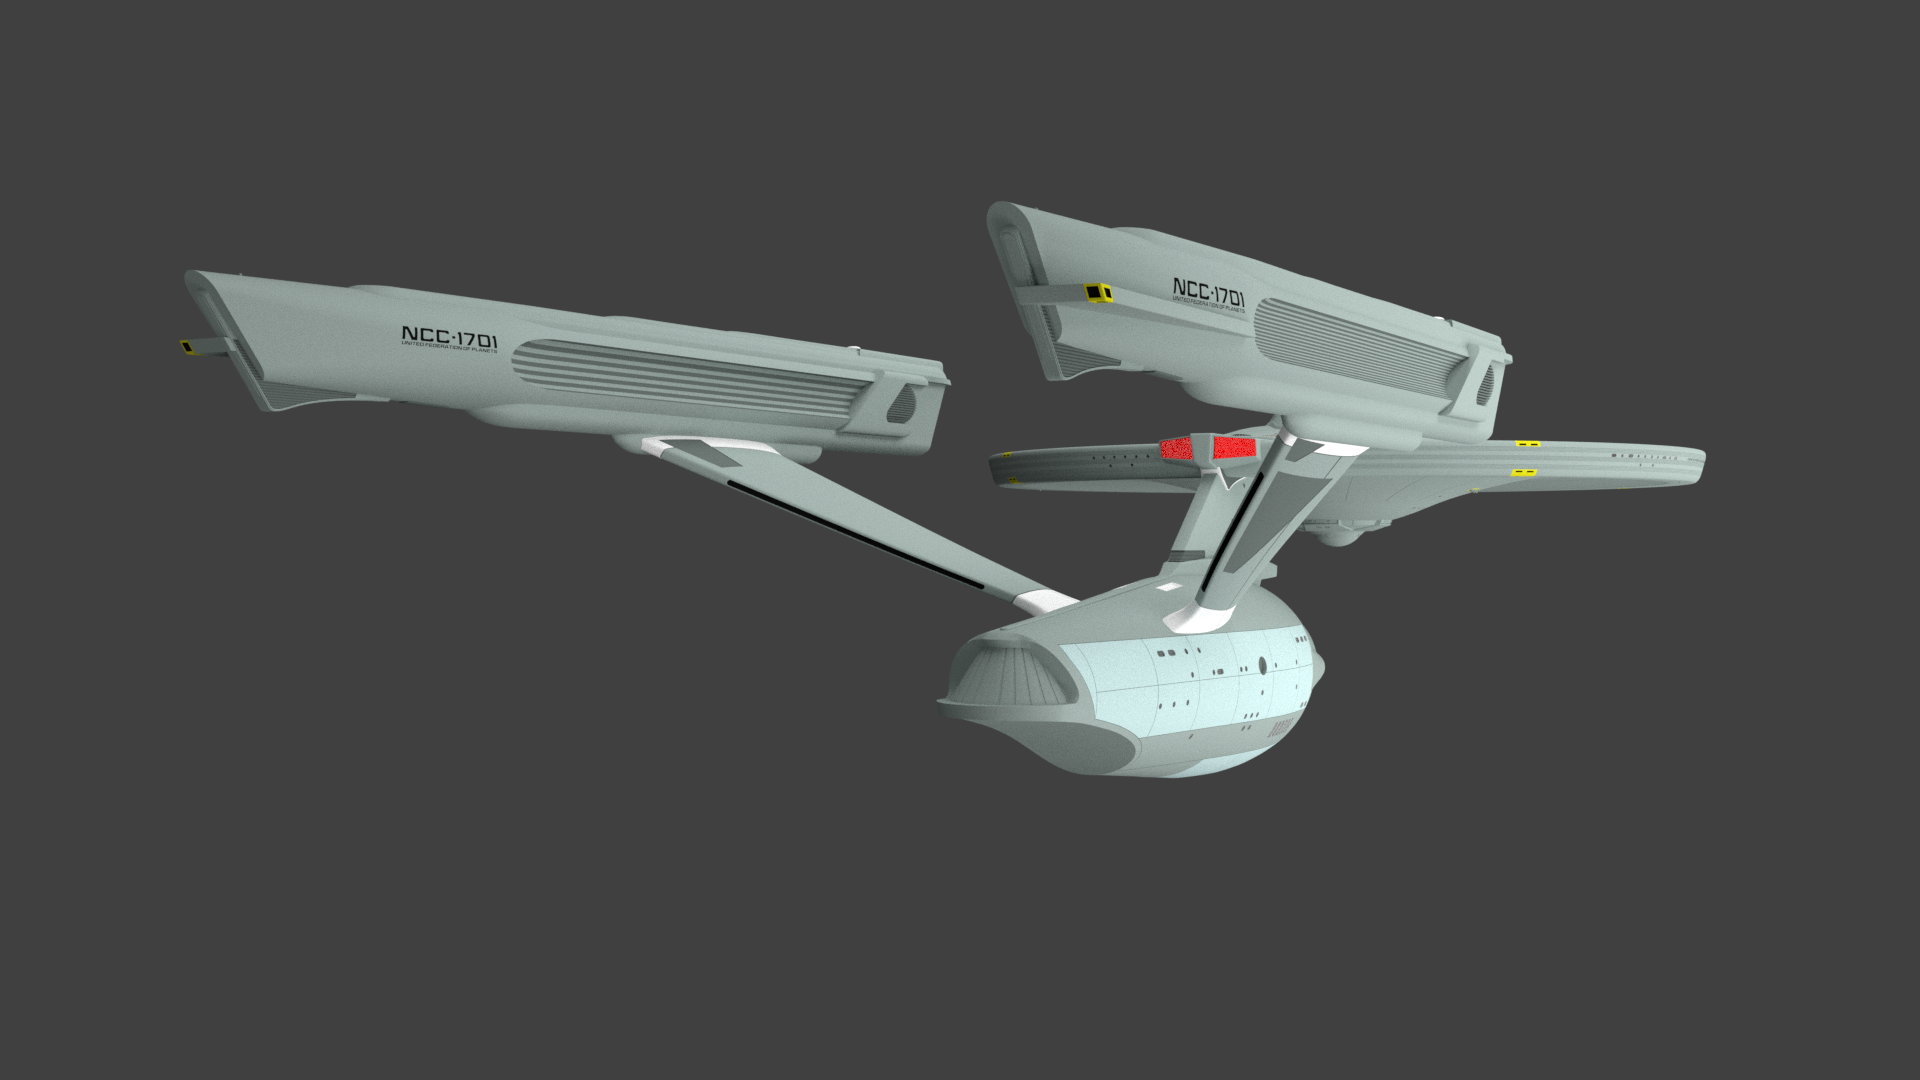
After having a little break after finishing the Runabout build, I am now back to work on the refit Connie.
Not much to show, I have resided the Reg on the nacelles and cut in the Panels, airlock and windows on the secondary hull.
I have also model the “tail” from the neck running down the secondary hull back.
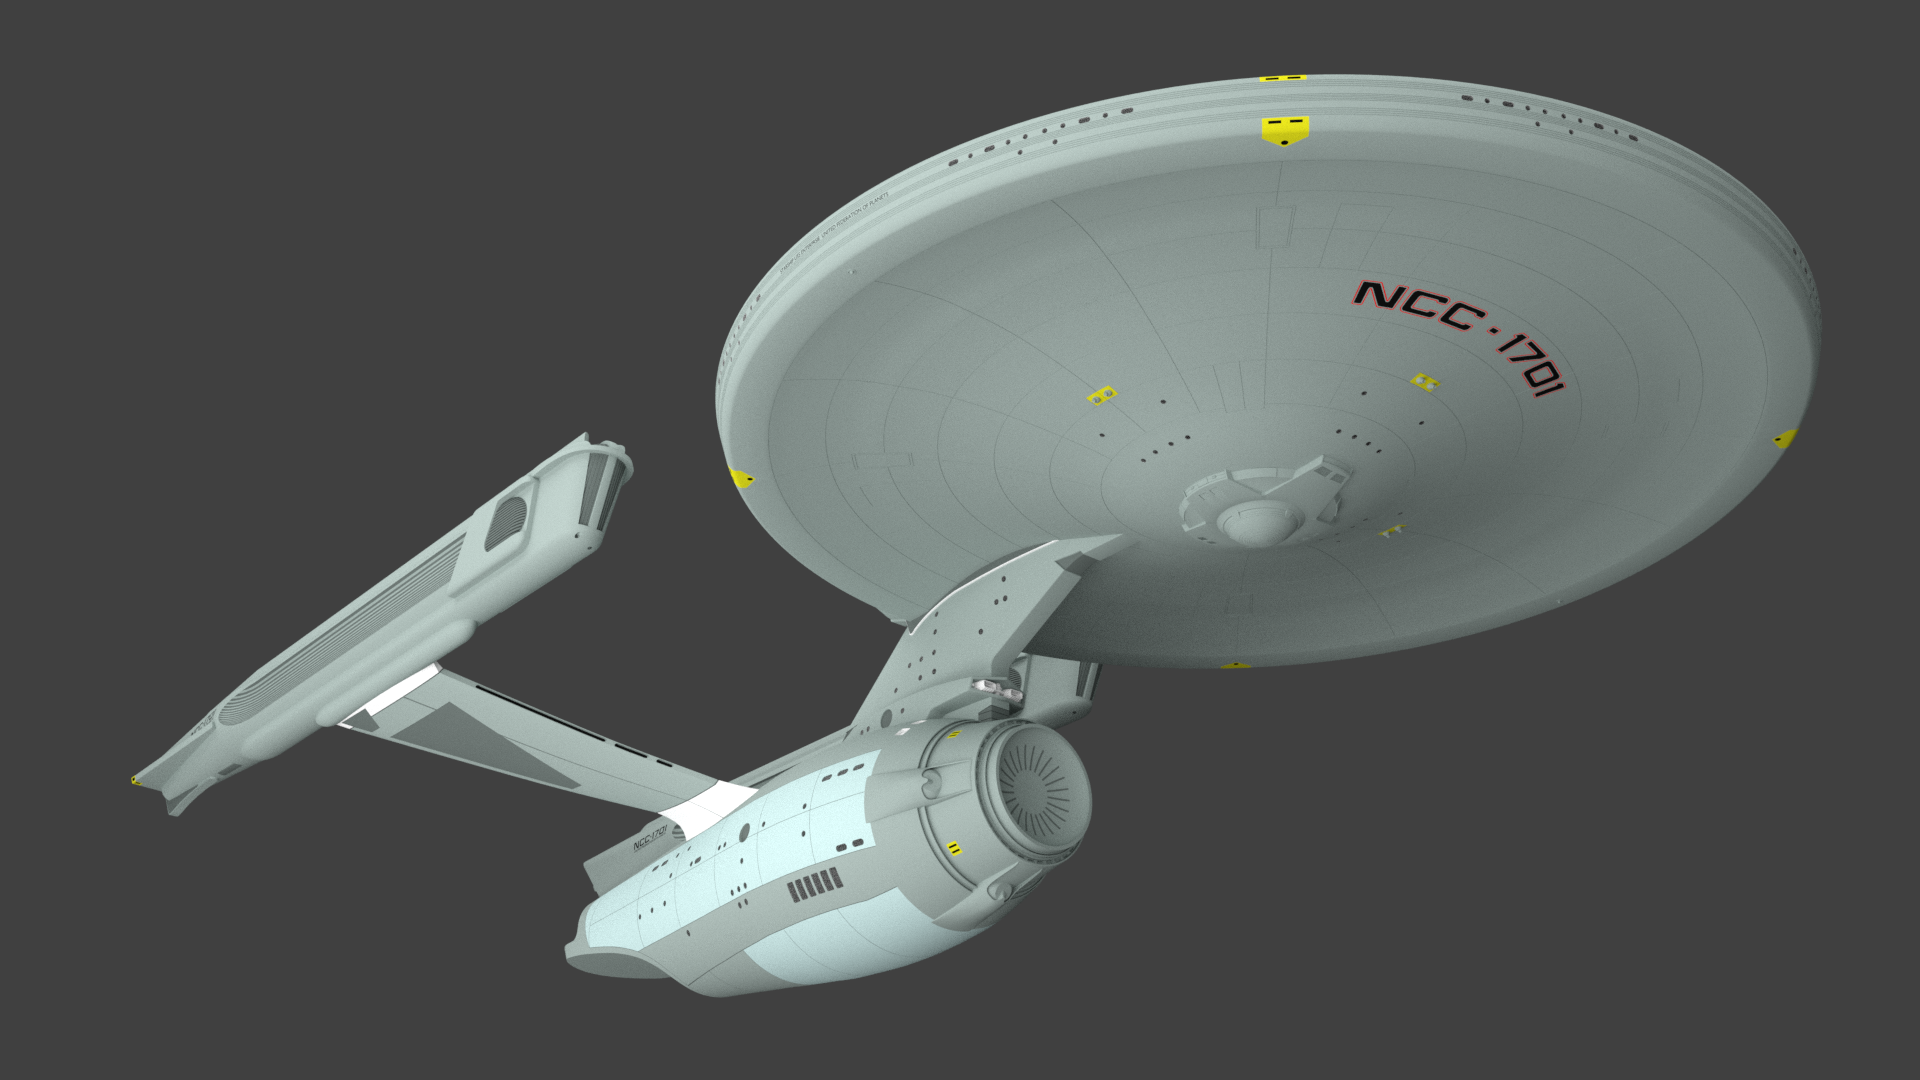
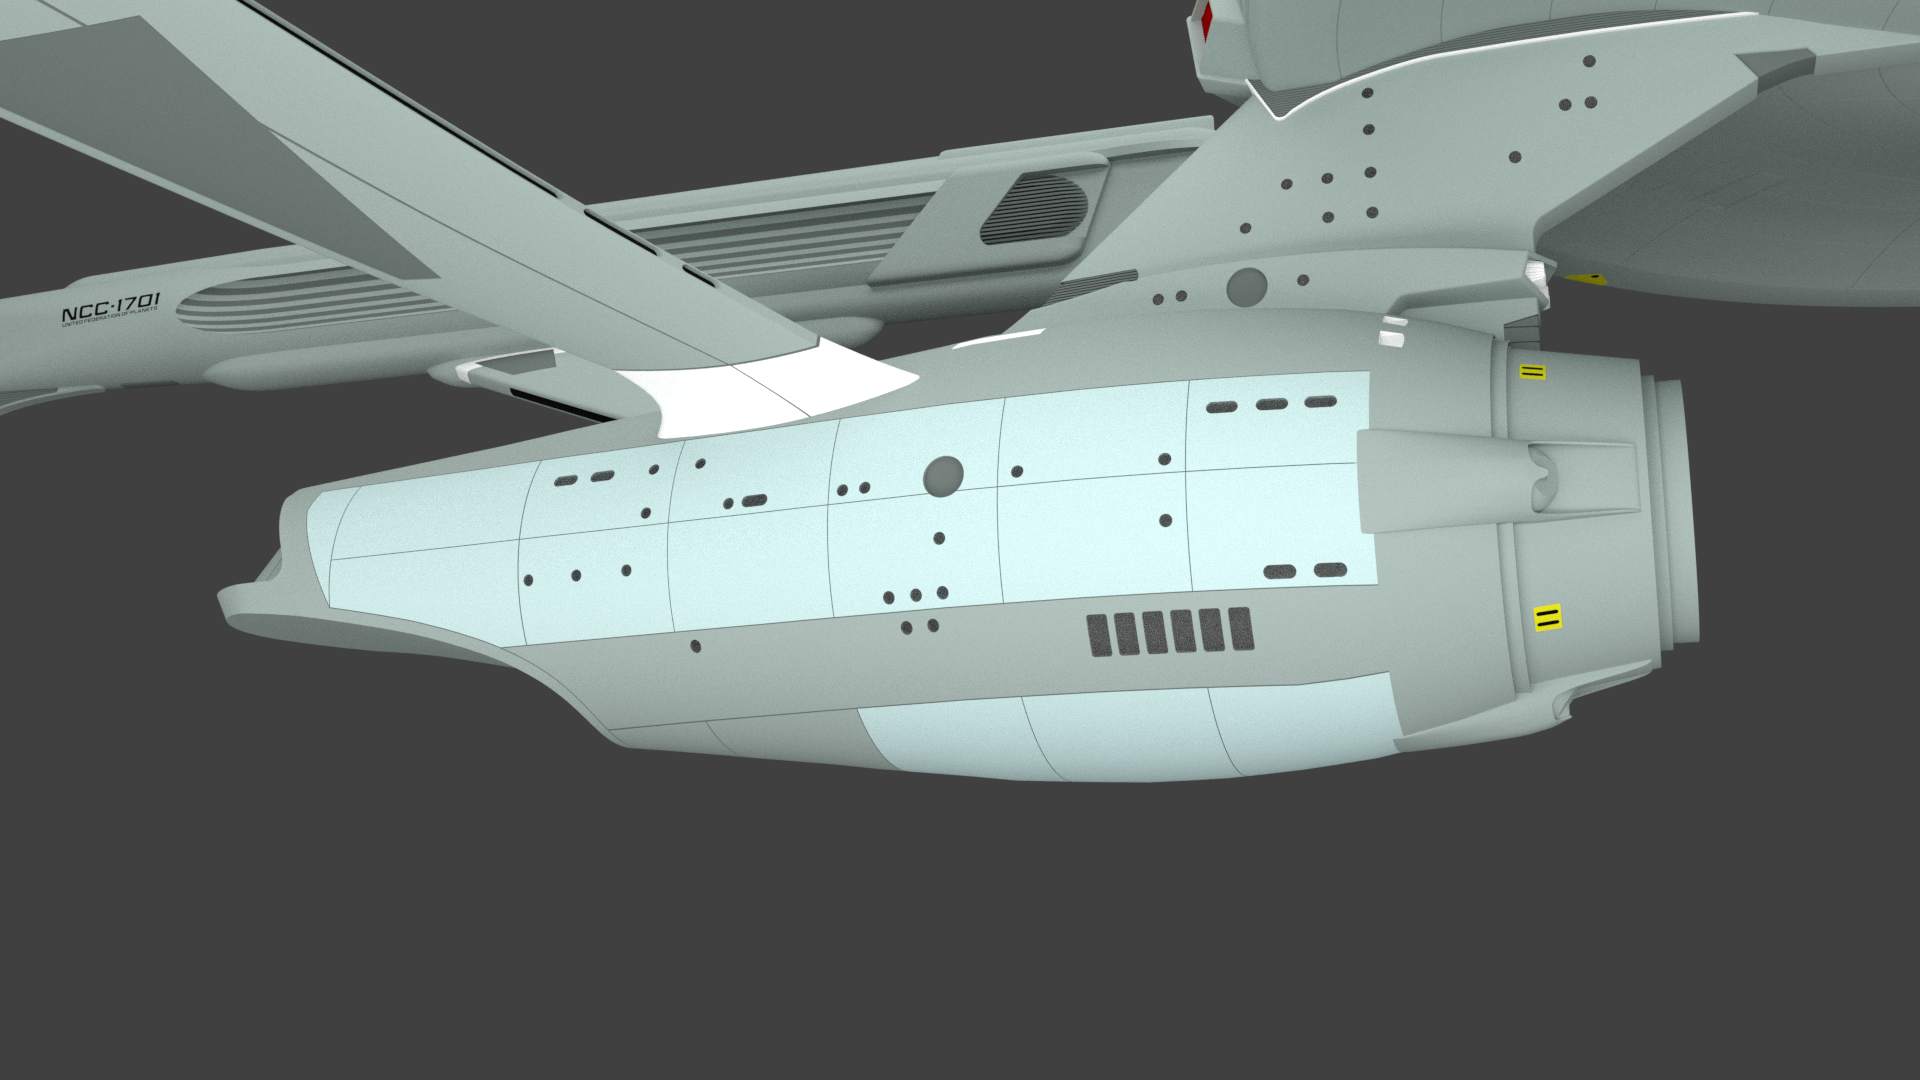
All that is left to do now is add the light cut out that shine on the pylons.
Add the phaser nibbles, detail the side of the hanger bay entrance and add the reg marking on the secondary hull.
Once I have done all that I’ll check to see if I have missed anything and get on that.
I will then install all the lights so the ship can be seen in space and box model some location behind the windows. I’ll just put a light and nothing else, though I might do something different for the arboretum.
Then I can move on to correcting the material colours and get onto the textures.
Also do another set of Reg Marking so I can swap it out for the Ent-A.
Additional credits
- Icons from Font-Awesome
- Additional icons by Mickael Bonfill
- Banner background from Toptal Subtle Patterns
© Scifi-Meshes.com 2001-2024