Greetings!
Welcome to Scifi-Meshes.com! Click one of these buttons to join in on the fun.
Quick Links
Local TutorialBeyond Principled: Tackling some of the weaknesses of the Principled BSDF


Most Blender users are familiar with the Principled shader, and probably use it as the foundation of all of their materials. The Principled shader, based on a white paper put out by Disney enumerating their principles for creating a physically-based and artist-friendly shader, was a widely welcomed update to the convoluted node networks necessary to achieve similar results in Blender up to that point.
Over time, though, cracks have appeared in the Principled shader's gleaming armor.
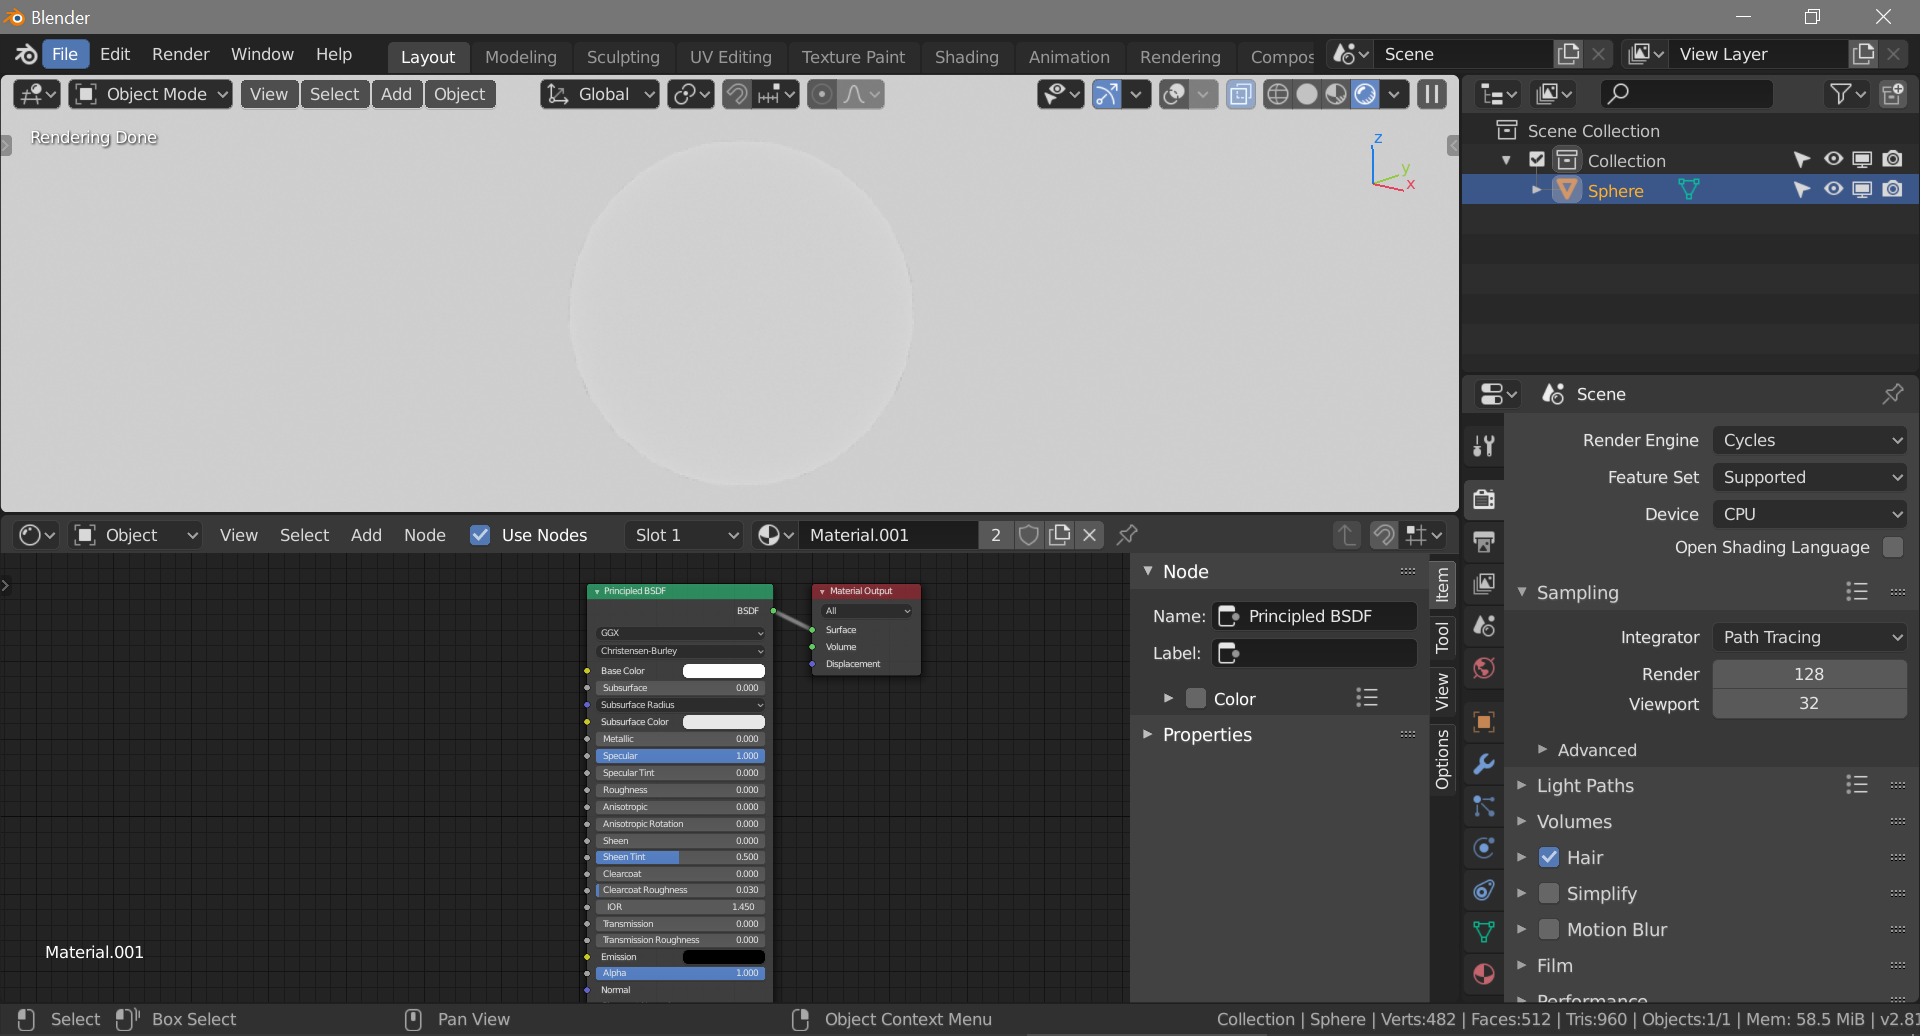
For one, it is not an "energy conserving" shader; that is, it has the potential to reflect more light than it receives, in violation of what real-world materials do. While its energy gaining properties are relatively minor, it's easy to reproduce using a "white furnace" test: create a box with its normals facing inward and give it an white emission shader with a strength of 1, then place a sphere inside it with a white Principled material applied; the edges will be brighter than the rest of the sphere.
For another, although it correctly accounts for the Fresnel effect when blending between its albedo (diffuse) and reflective (specular, glossy) at various view angles, it does not properly account for the phenomenon of rough materials to seem much more smooth at glancing angles (c.f. a rough stone building exterior that, when viewed from an extreme glancing angle, takes on a mirror-like appearance). This effect is often referred to as micro-roughness. It can be forced by including a very fine noise texture in the Normals of a material, but this solution tends to be costly and artifact-prone. YouTuber Chocofur has a good video that describes a workaround for the problem, but in particular showscases some real-world surfaces that exhibit this property. The following images are extracted from the linked video, and I extracted the relevant 45 seconds into a bite- (megabyte-?) sized mp4 here


Finally (well, for the sake of what interested me, at least!), the Principled shader granted no artistic control over the reflection color. In the "old days" of Diffuse + Glossy mix shaders, the Glossy shader's color could be independently controlled. While most dielectric (i.e. non-metal) surfaces do not exhibit colored reflections, some more-complex materials (such as interference paints!) can only be correctly represented by manipulating the reflection color. The Principled shader only allows tinting of the dielectric specular reflection, based on the Base Color input, which just isn't enough.
These three things seemed sufficiently surmountable and important to producing more physically-correct materials that I set out to create a shader mix that properly accounted for both.
>>>>> You can download the current version here. <<<<<
This is meant as a more-or-less drop-in replacement for most basic materials using the Principled BSDF. It does not (currently) account for subsurface scattering, anisotropy, clearcoat, sheen, transmission, or emission! I may eventually add those as needs arise, but so far I have not needed them.
If you don't want to know how it works and just want to give it a spin, enjoy!
If you want to know more and the theory behind it, read on!
Fundamentally, this node group does the same thing the Principled shader does in its OSL code: it computes a base color Diffuse shader, then adds (yes, adds) a Glossy shader on top of it.
The first problem with the Principled shader, though, is that it doesn't correctly damp down the Diffuse contribution where the Glossy one kicks in. That leads to the Fresnel-influenced energy gain observed in white furnace tests of the Principled shader. It does this by calculating the "F0" value of the material, based on its Index of Refraction (IOR) and using it to compute how much of the Base Color to "add" to black, before passing that color into a Diffuse BSDF.
What it does with the Glossy shader is a lot more involved. Rather than using a plain Fresnel term driven only by surface Normals, a "perturbed" Fresnel component, driven by the surface Roughness, is used as the Normal input to a Fresnel node. It also feeds the derived view angle (arccos of the dot product of the surface normal dot and the incoming camera vector) into a pair of albedo response curves, based on data from the Disney white paper, mapping between them depending on whether the surface is smooth (roughness < 0.1) or rough (roughness > 0.1). The albedo response curve for roughness > 0.1 adjusts the roughness down starting at around 60 degrees off-normal, reaching a minimum value of around 40% of the input roughness. This models the micro-roughness effect.

And, because it's a Glossy BSDF, you have control over the reflection color the whole way.
Actually mixing in the reflection color isn't solely the purview of the adjusted Fresnel calculation, though. The supplied Glossy color is "normalized" against the Fresnel (by multiplying the Glossy color by 1/Fresnel), which in turn is fed into a node that governs dielectic vs. metallic reflectance value. The Specular slider on the Principled shader goes from 0 to 1; this actually maps to a surface reflectance of 0% to 8%, corresponding to dielectric IORs of 1 (air) to about 1.79. The same effect results. When the surface is metallic, this control does nothing.
The Fresnel component is then used as a factor that adds the computed Glossy color to black, which is at last fed into the Gossy BSDF.
With both the Diffuse and Glossy BSDF accounting for the F0 "weight" they should each contribute in addition to the usual Fresnel component, energy is conserved. With micro-roughness accounted for, rough surfaces appear much more reflective at glancing angles. With a controllable Glossy shader, reflection color can be manipulated for complex material effects. Thus, you get a more physically correct, more controllable material.
I'm always learning more and constantly striving to improve, so it's entirely possible that I'll revise how I have this shader assembled as time goes on. It's also possible that the needs it addresses will disappear as Blender continues to grow and evolve.
I hope this has been informative and useful!
Over time, though, cracks have appeared in the Principled shader's gleaming armor.
For one, it is not an "energy conserving" shader; that is, it has the potential to reflect more light than it receives, in violation of what real-world materials do. While its energy gaining properties are relatively minor, it's easy to reproduce using a "white furnace" test: create a box with its normals facing inward and give it an white emission shader with a strength of 1, then place a sphere inside it with a white Principled material applied; the edges will be brighter than the rest of the sphere.
For another, although it correctly accounts for the Fresnel effect when blending between its albedo (diffuse) and reflective (specular, glossy) at various view angles, it does not properly account for the phenomenon of rough materials to seem much more smooth at glancing angles (c.f. a rough stone building exterior that, when viewed from an extreme glancing angle, takes on a mirror-like appearance). This effect is often referred to as micro-roughness. It can be forced by including a very fine noise texture in the Normals of a material, but this solution tends to be costly and artifact-prone. YouTuber Chocofur has a good video that describes a workaround for the problem, but in particular showscases some real-world surfaces that exhibit this property. The following images are extracted from the linked video, and I extracted the relevant 45 seconds into a bite- (megabyte-?) sized mp4 here
Finally (well, for the sake of what interested me, at least!), the Principled shader granted no artistic control over the reflection color. In the "old days" of Diffuse + Glossy mix shaders, the Glossy shader's color could be independently controlled. While most dielectric (i.e. non-metal) surfaces do not exhibit colored reflections, some more-complex materials (such as interference paints!) can only be correctly represented by manipulating the reflection color. The Principled shader only allows tinting of the dielectric specular reflection, based on the Base Color input, which just isn't enough.
These three things seemed sufficiently surmountable and important to producing more physically-correct materials that I set out to create a shader mix that properly accounted for both.
>>>>> You can download the current version here. <<<<<
This is meant as a more-or-less drop-in replacement for most basic materials using the Principled BSDF. It does not (currently) account for subsurface scattering, anisotropy, clearcoat, sheen, transmission, or emission! I may eventually add those as needs arise, but so far I have not needed them.
If you don't want to know how it works and just want to give it a spin, enjoy!
If you want to know more and the theory behind it, read on!
Fundamentally, this node group does the same thing the Principled shader does in its OSL code: it computes a base color Diffuse shader, then adds (yes, adds) a Glossy shader on top of it.
The first problem with the Principled shader, though, is that it doesn't correctly damp down the Diffuse contribution where the Glossy one kicks in. That leads to the Fresnel-influenced energy gain observed in white furnace tests of the Principled shader. It does this by calculating the "F0" value of the material, based on its Index of Refraction (IOR) and using it to compute how much of the Base Color to "add" to black, before passing that color into a Diffuse BSDF.
What it does with the Glossy shader is a lot more involved. Rather than using a plain Fresnel term driven only by surface Normals, a "perturbed" Fresnel component, driven by the surface Roughness, is used as the Normal input to a Fresnel node. It also feeds the derived view angle (arccos of the dot product of the surface normal dot and the incoming camera vector) into a pair of albedo response curves, based on data from the Disney white paper, mapping between them depending on whether the surface is smooth (roughness < 0.1) or rough (roughness > 0.1). The albedo response curve for roughness > 0.1 adjusts the roughness down starting at around 60 degrees off-normal, reaching a minimum value of around 40% of the input roughness. This models the micro-roughness effect.
And, because it's a Glossy BSDF, you have control over the reflection color the whole way.
Actually mixing in the reflection color isn't solely the purview of the adjusted Fresnel calculation, though. The supplied Glossy color is "normalized" against the Fresnel (by multiplying the Glossy color by 1/Fresnel), which in turn is fed into a node that governs dielectic vs. metallic reflectance value. The Specular slider on the Principled shader goes from 0 to 1; this actually maps to a surface reflectance of 0% to 8%, corresponding to dielectric IORs of 1 (air) to about 1.79. The same effect results. When the surface is metallic, this control does nothing.
The Fresnel component is then used as a factor that adds the computed Glossy color to black, which is at last fed into the Gossy BSDF.
With both the Diffuse and Glossy BSDF accounting for the F0 "weight" they should each contribute in addition to the usual Fresnel component, energy is conserved. With micro-roughness accounted for, rough surfaces appear much more reflective at glancing angles. With a controllable Glossy shader, reflection color can be manipulated for complex material effects. Thus, you get a more physically correct, more controllable material.
I'm always learning more and constantly striving to improve, so it's entirely possible that I'll revise how I have this shader assembled as time goes on. It's also possible that the needs it addresses will disappear as Blender continues to grow and evolve.
I hope this has been informative and useful!
WIP: [ SDF-1 Macross ] Done: [ Coronado | Ambassador (original) | T'Varo ]
Books: [ Ashes of Alour-Tan | Embers of Alour-Tan ] | Blender Tutorials | Blog
Books: [ Ashes of Alour-Tan | Embers of Alour-Tan ] | Blender Tutorials | Blog


Tagged:
Additional credits
- Icons from Font-Awesome
- Additional icons by Mickael Bonfill
- Banner background from Toptal Subtle Patterns
© Scifi-Meshes.com 2001-2024
Posts
https://www.youtube.com/channel/UCqRhLEHgwgTKxsalM5YznYQ
Formerly furswift