Home › psCargile › Best Of...

Greetings!
Welcome to Scifi-Meshes.com! Click one of these buttons to join in on the fun.
Badges


psCargile
About
- Username
- psCargile
- Joined
- Visits
- 472
- Last Active
- Roles
- Member
- Points
- 417
- Posts
- 620
- Badges
- 8
-
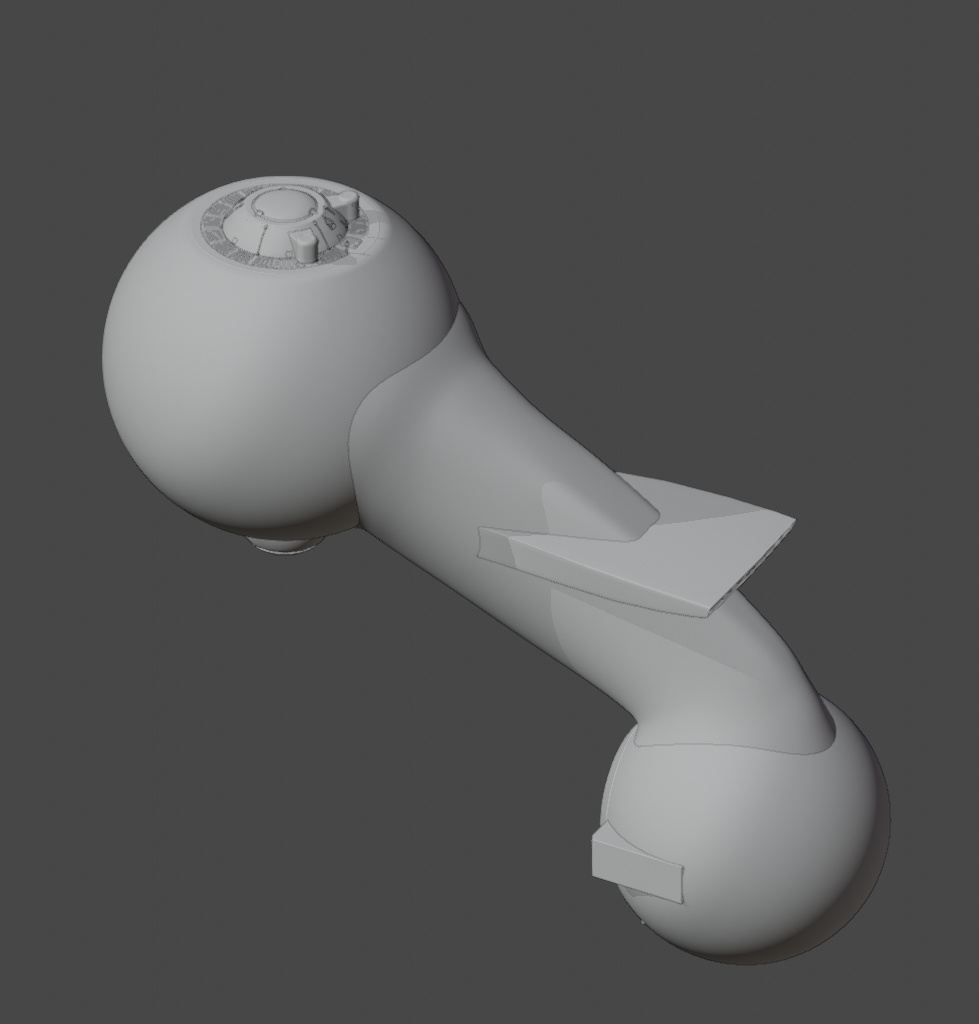
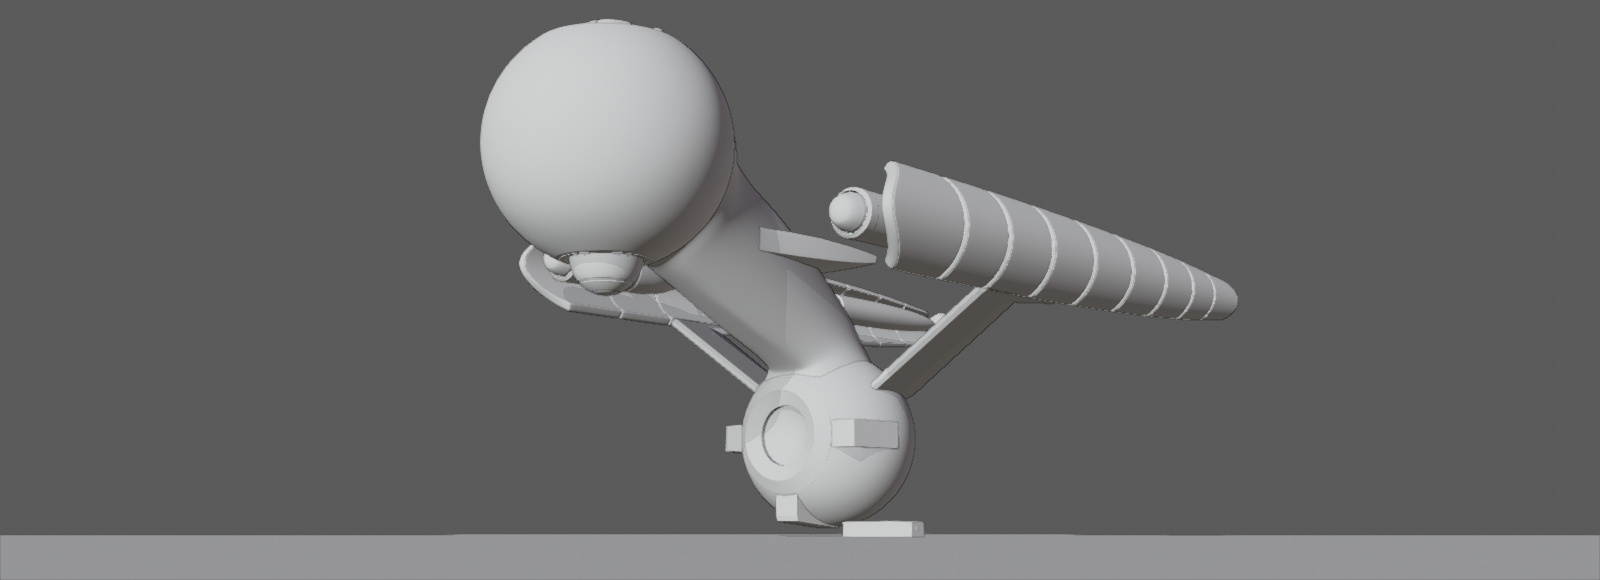
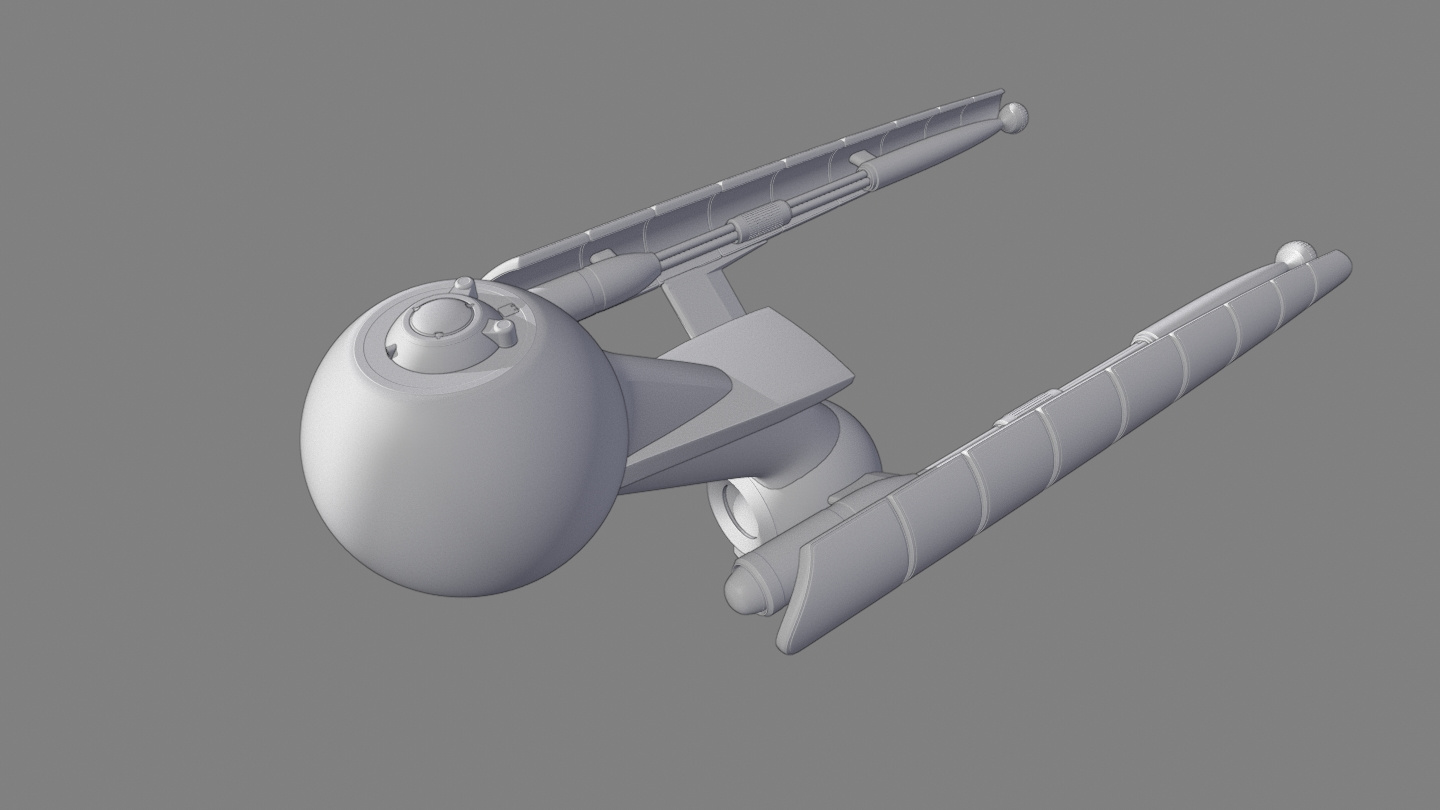
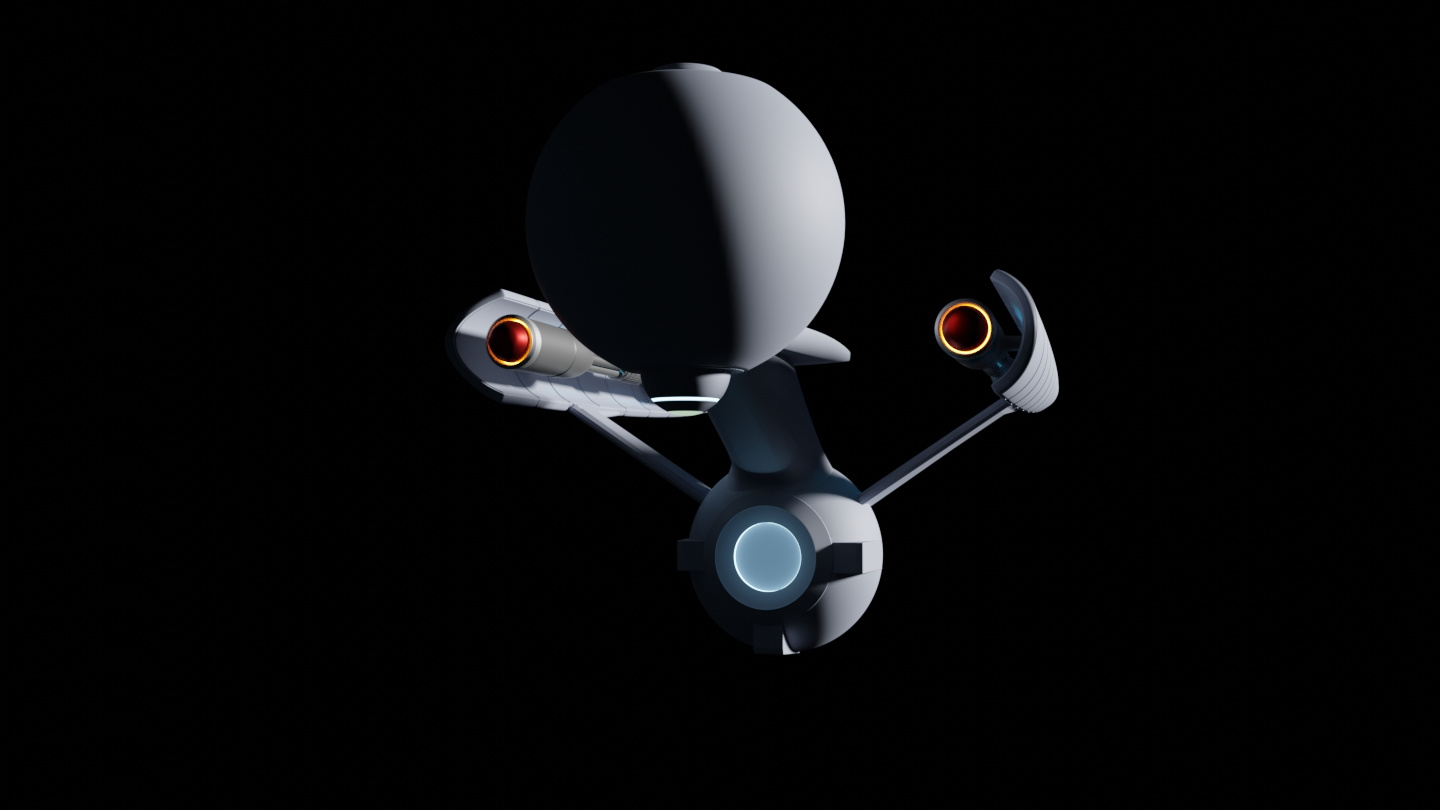
Alt Trek Spherical hulls
I wasn't able to find anything that let you opt for the 2.79 GUI. 2.8 is better organized, it doesn't take long to get used to it. I also have 2.79 as the character modeler ManuelbastioniLAB ended at version 1.61a as is not a compatible addon to 2.8.
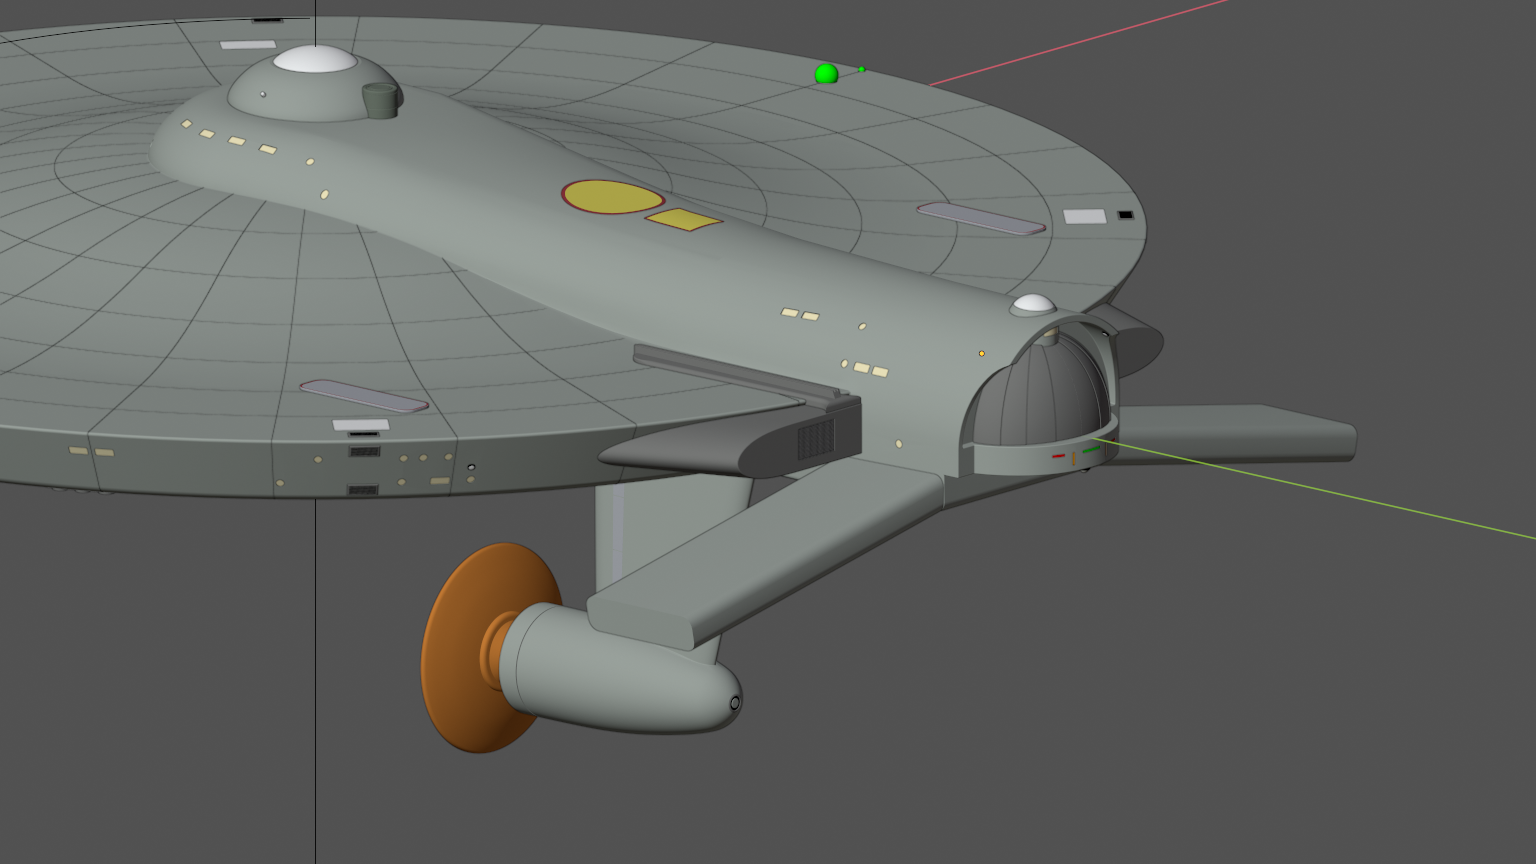
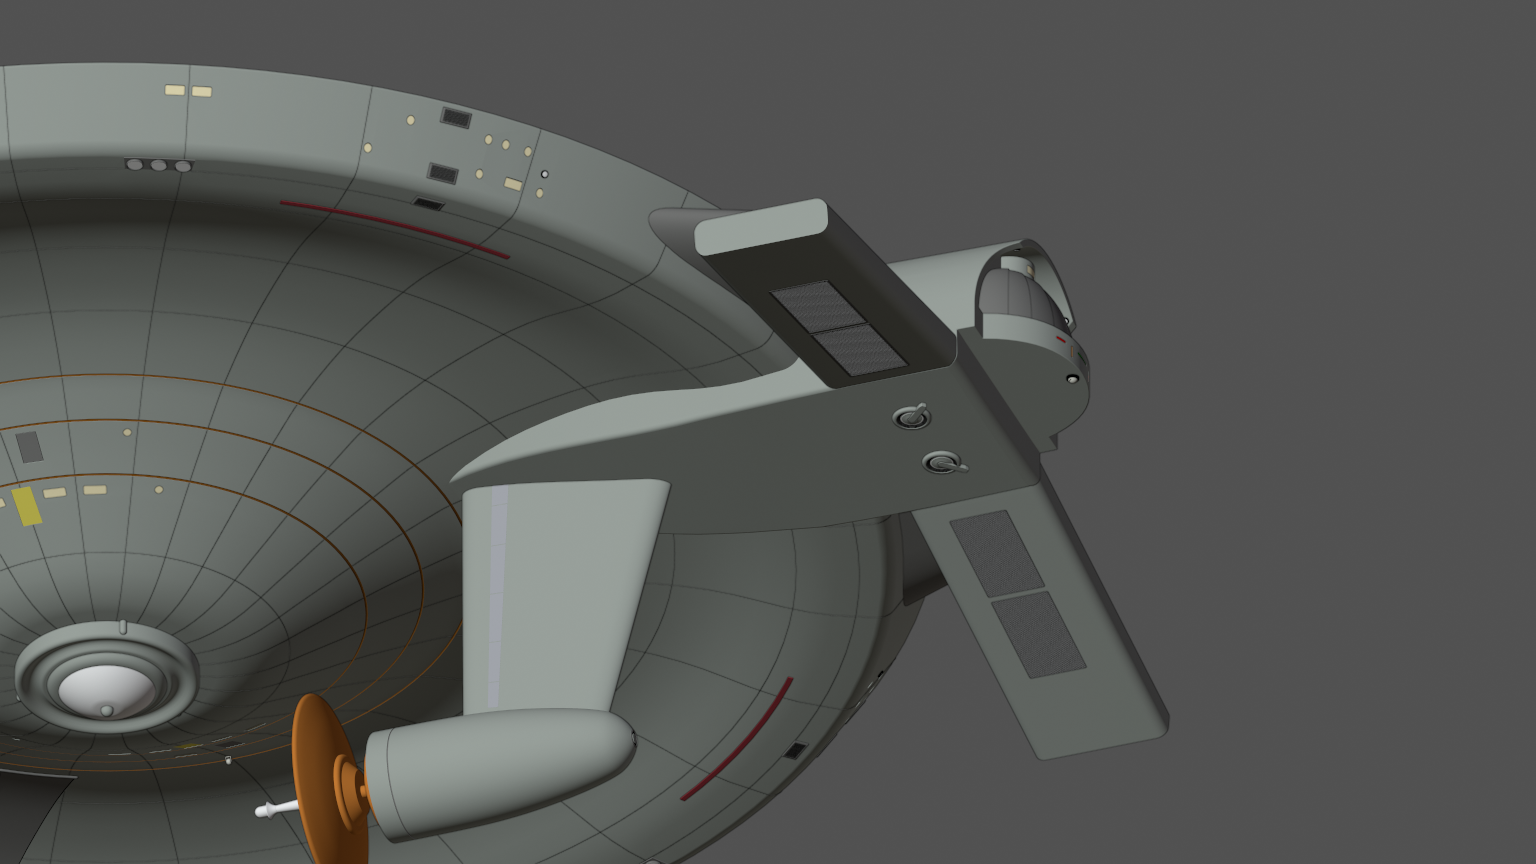
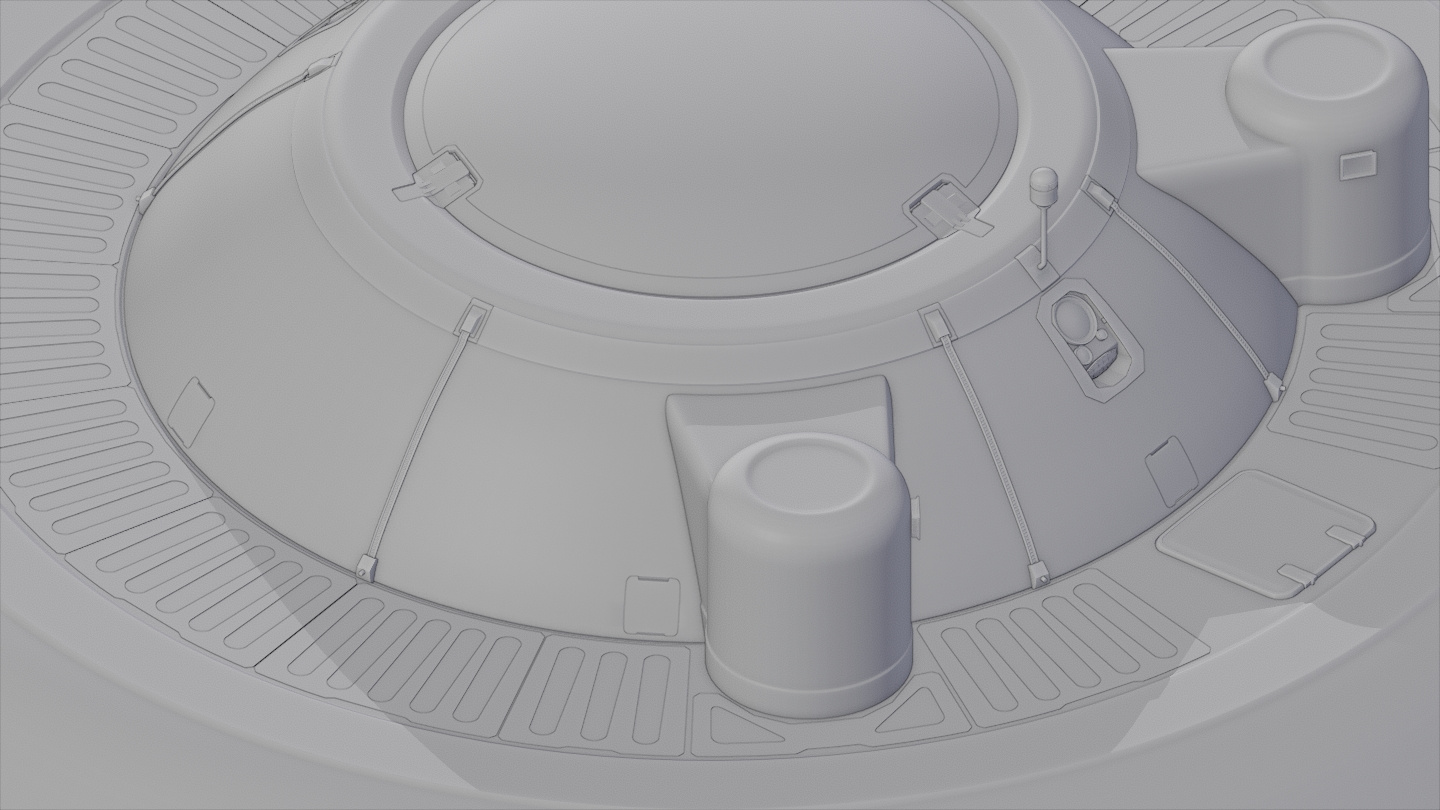
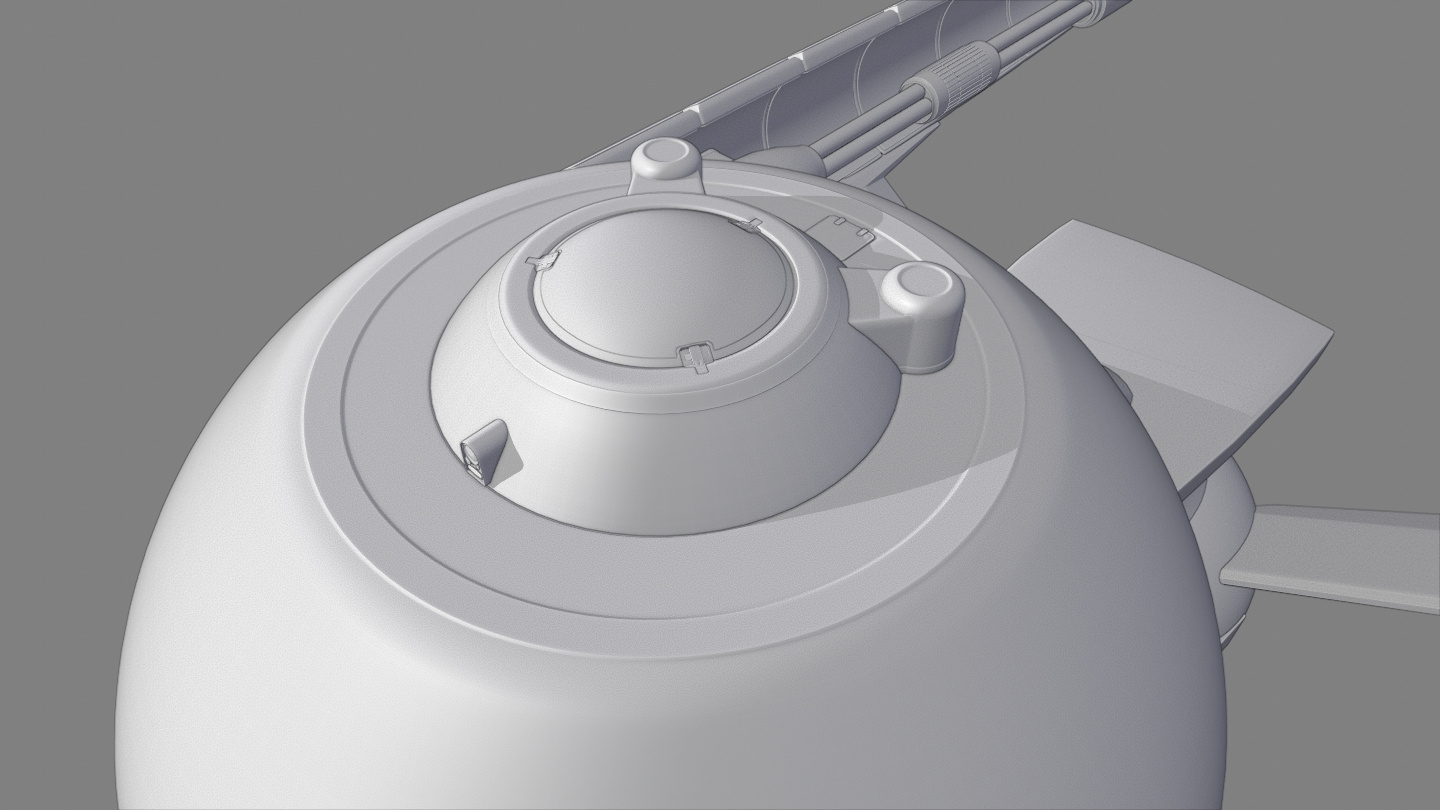
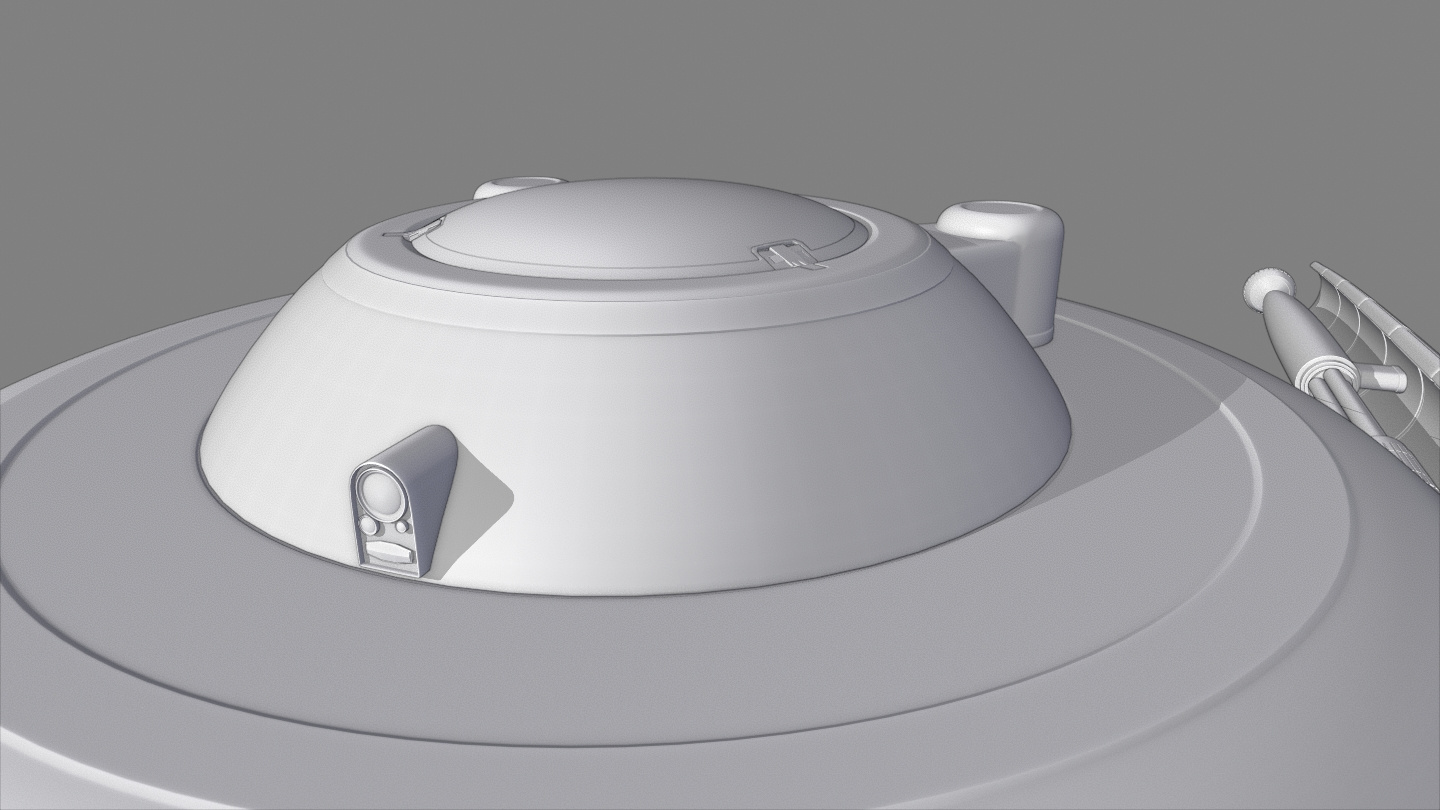
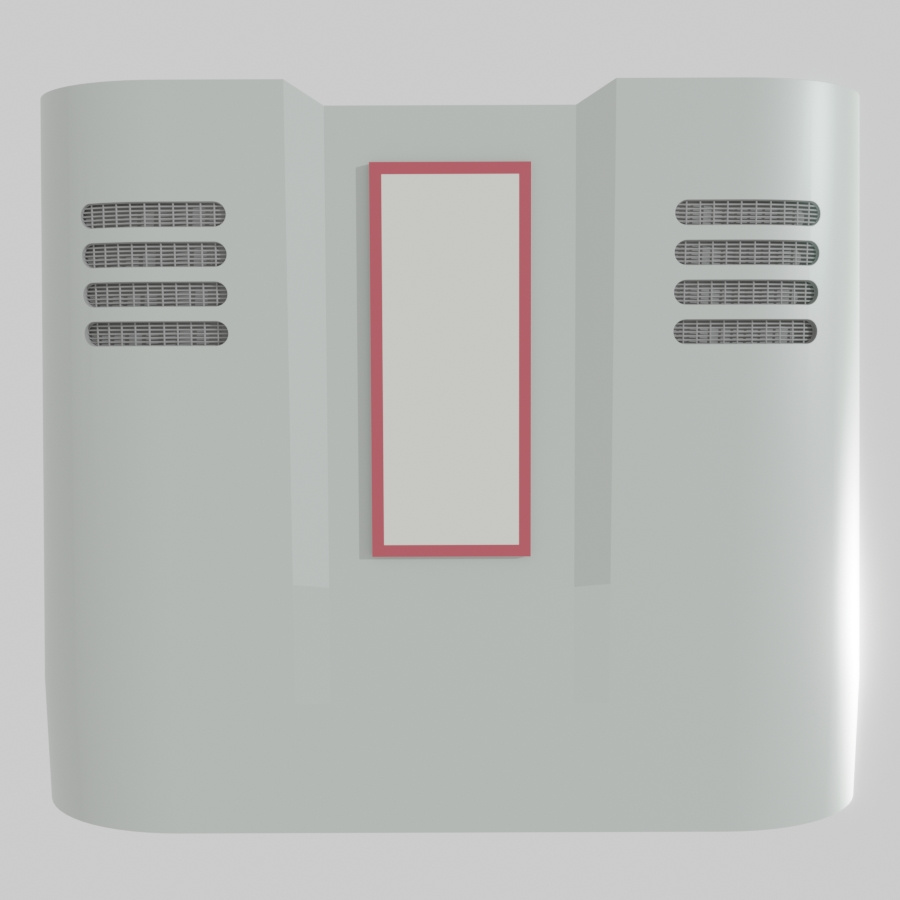
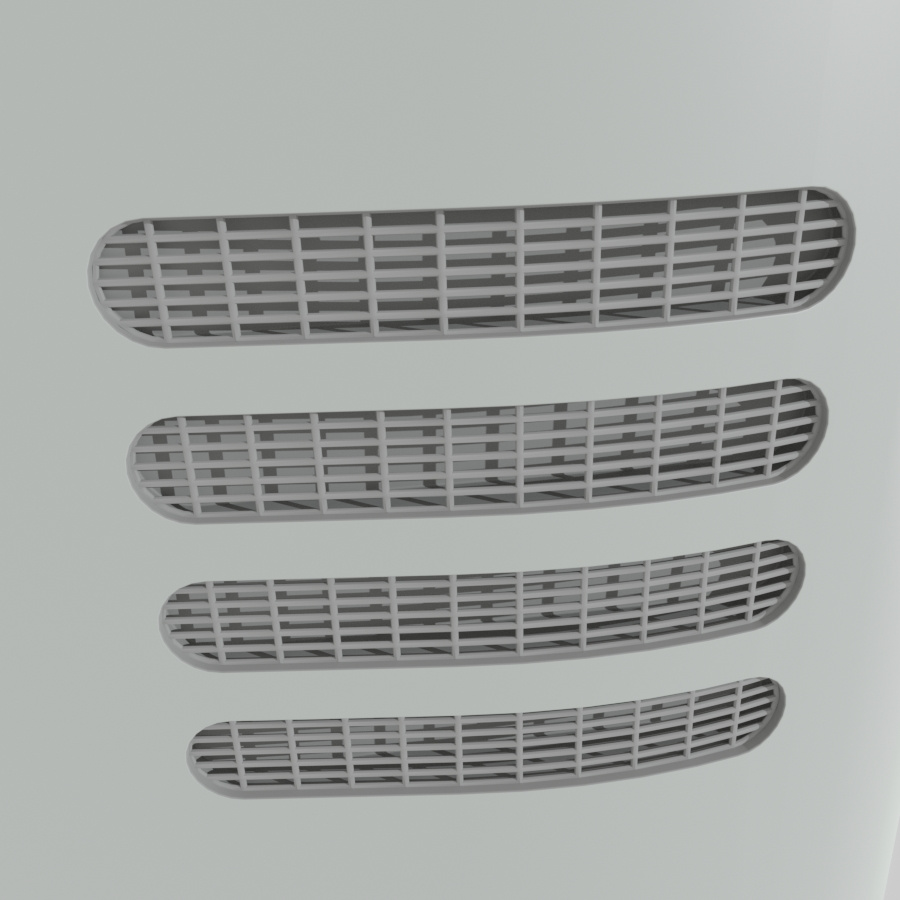
Inset sensor clusters, and added bridge module latching system covers.
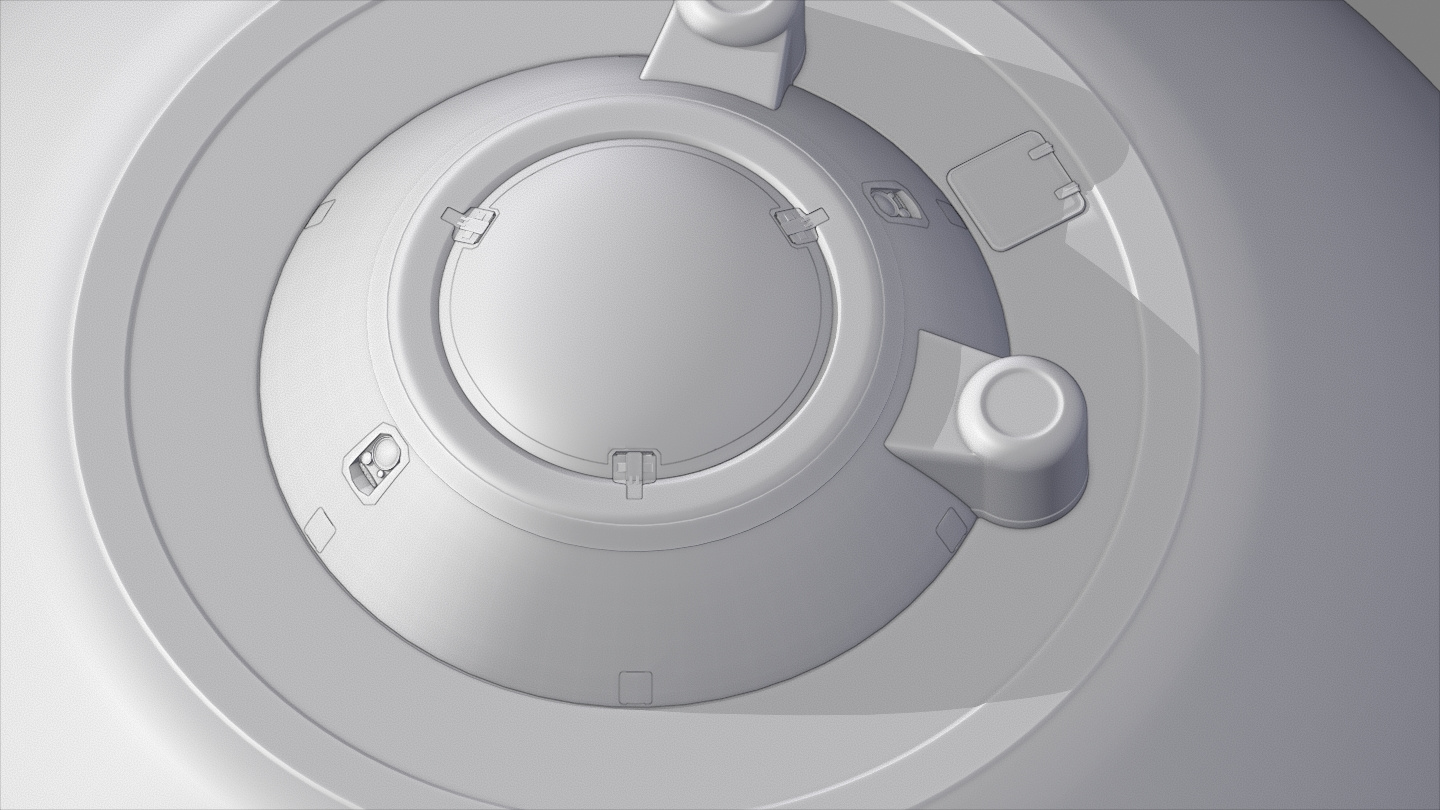
Panel made by drawing shape by extruding verts, creating faces, with solidify and bevel modifiers. Method works well for small panels on curved surfaces.


-
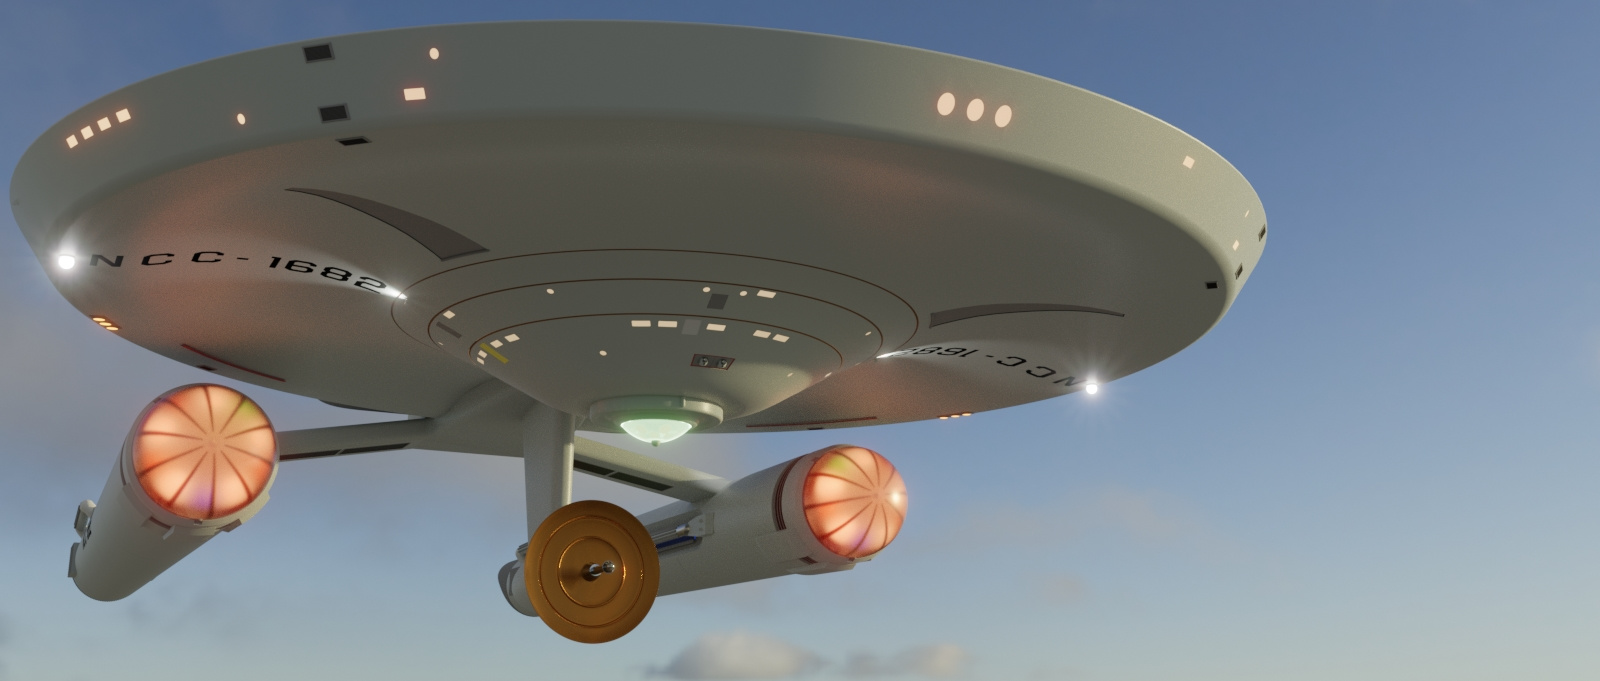
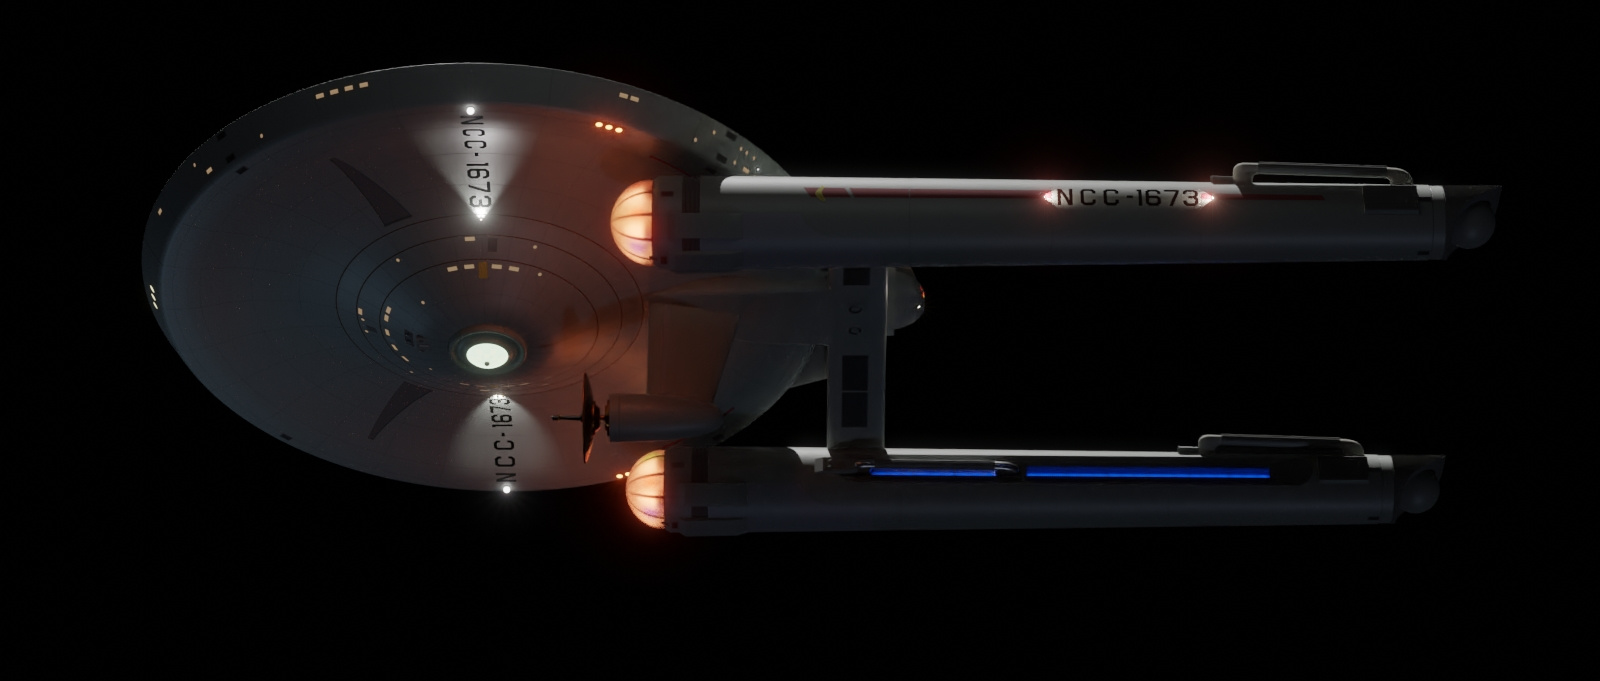
Percheron class (tos era)
Decided against doing boolean unions. Instead, (as suggested) trimmed away some sections, joined to the two meshes together, and proceeded with the bridging and face building, and topo clean up. In the process, discovered I had some window boolean cutter normals facing inward, so I had to fix those so they would show the 30 cm walls.
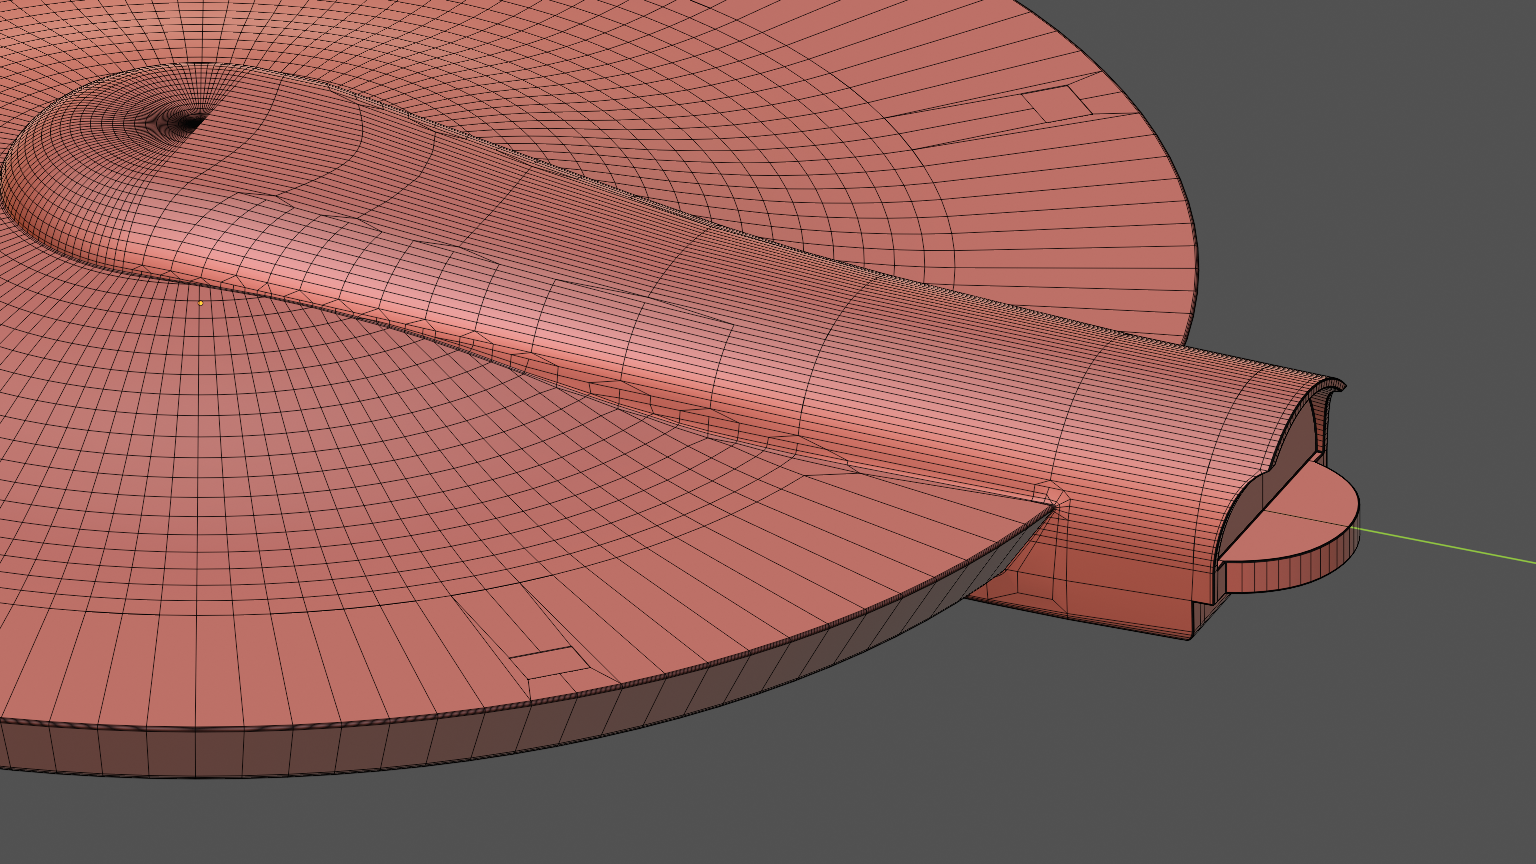
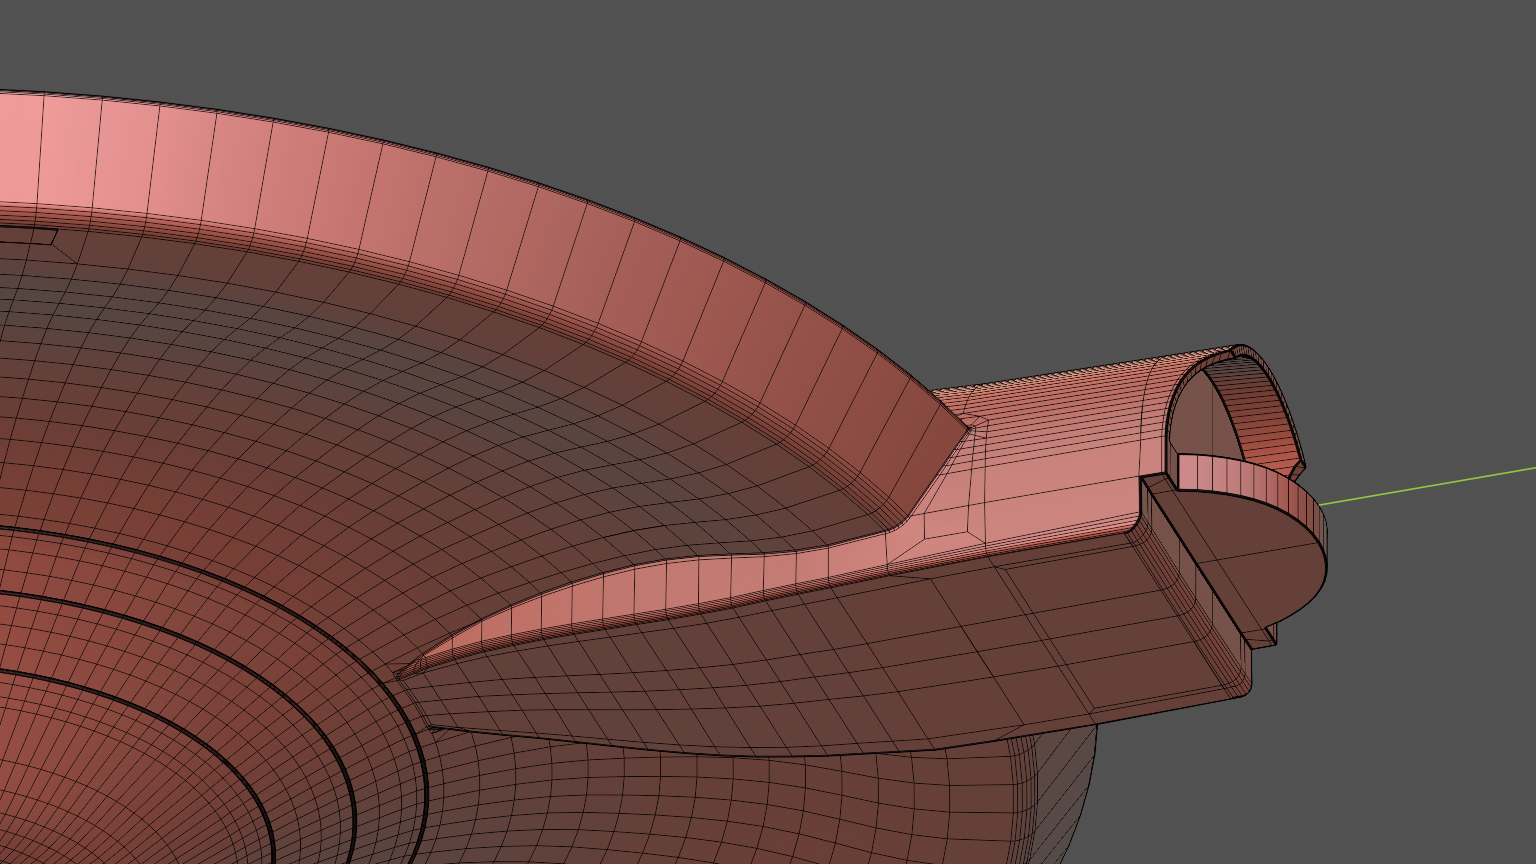
Probably not going to merge the pylons, impulse engines, and sensor fin to the hull. Wish there was a way to make an edge loop at two mesh intersections.
-
Alt Trek Spherical hulls
Thank's McC for your suggestions.
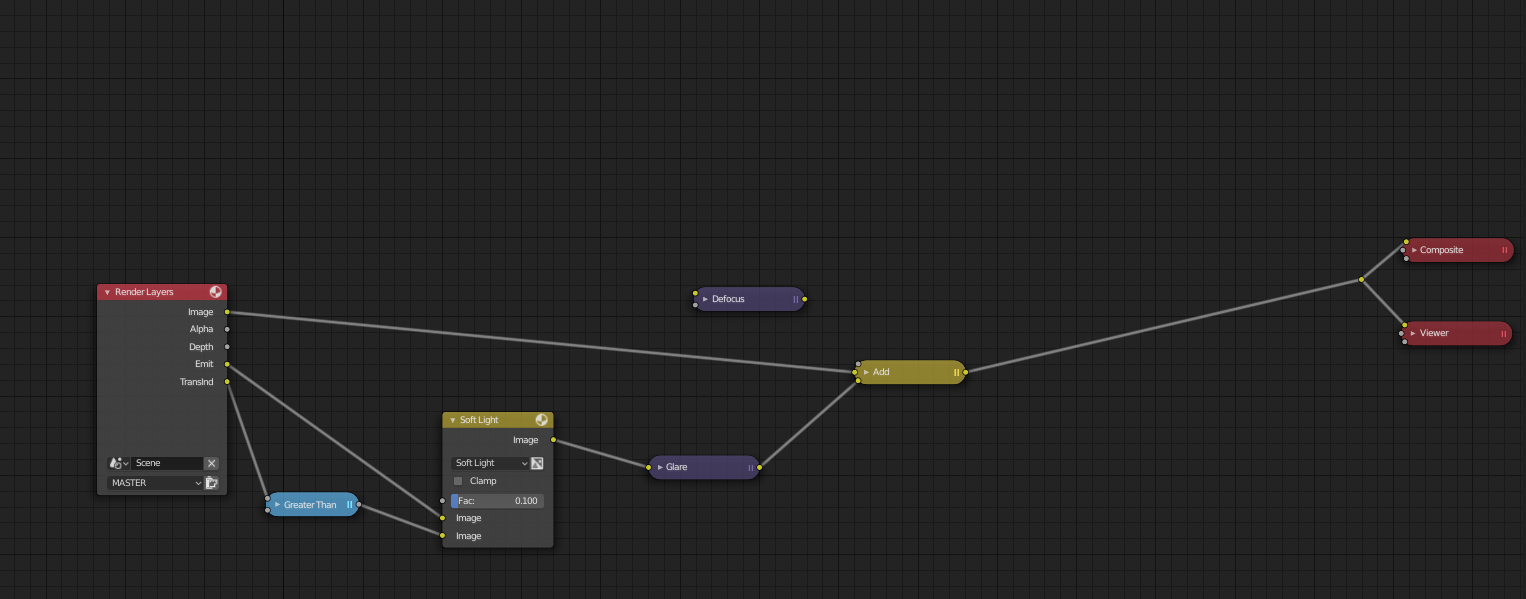
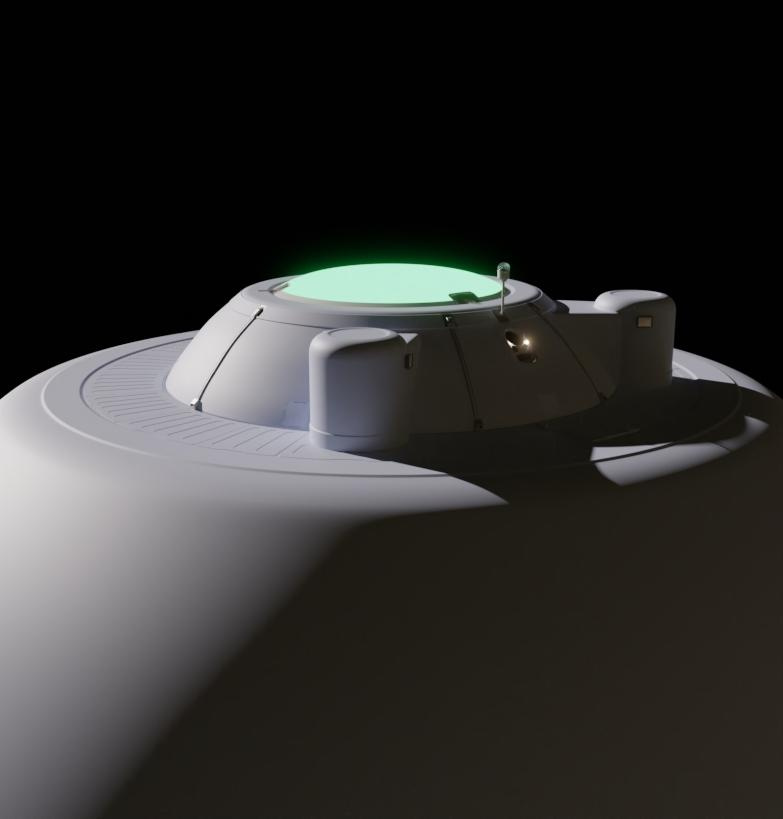
The nodes for the glow. Soft Light worked best of the options.
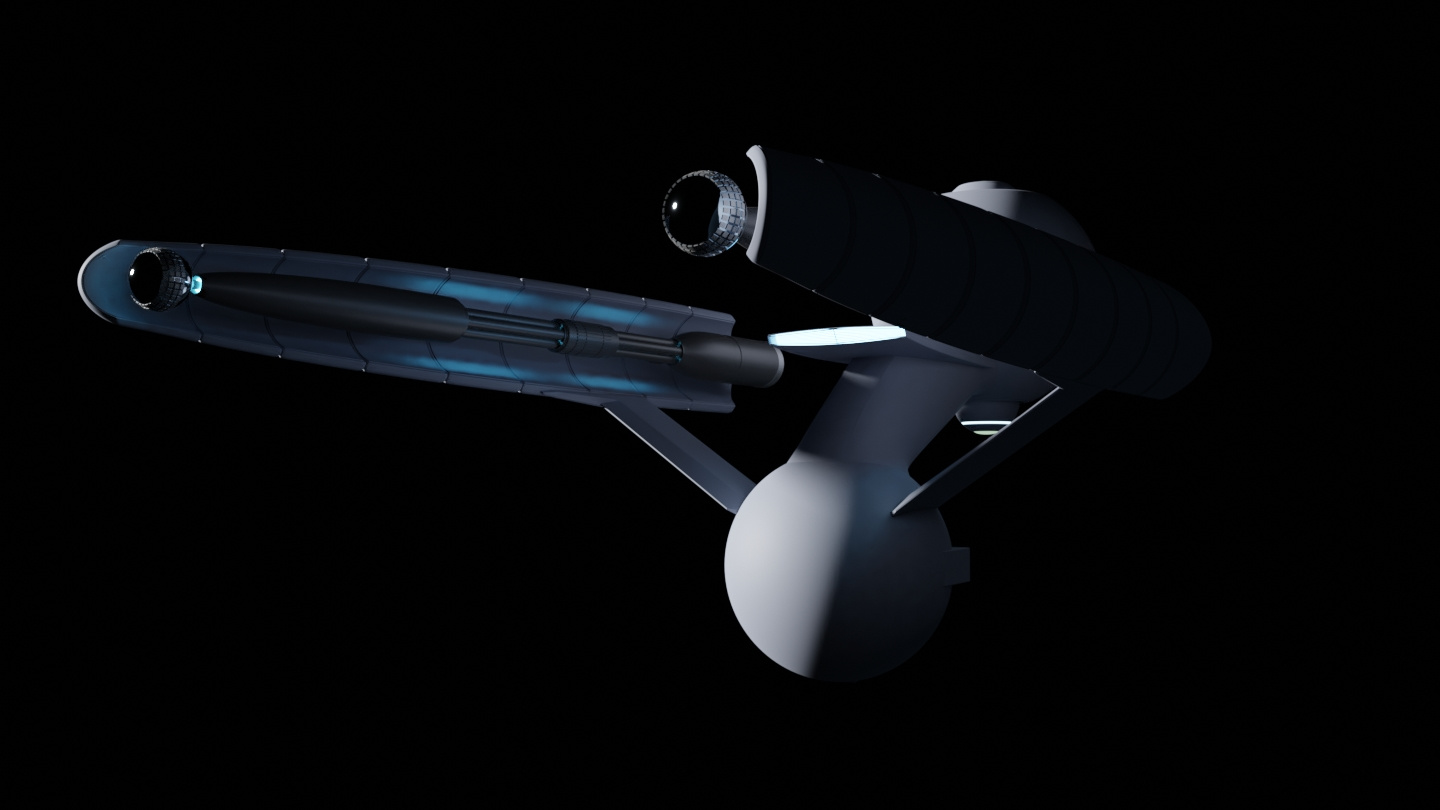
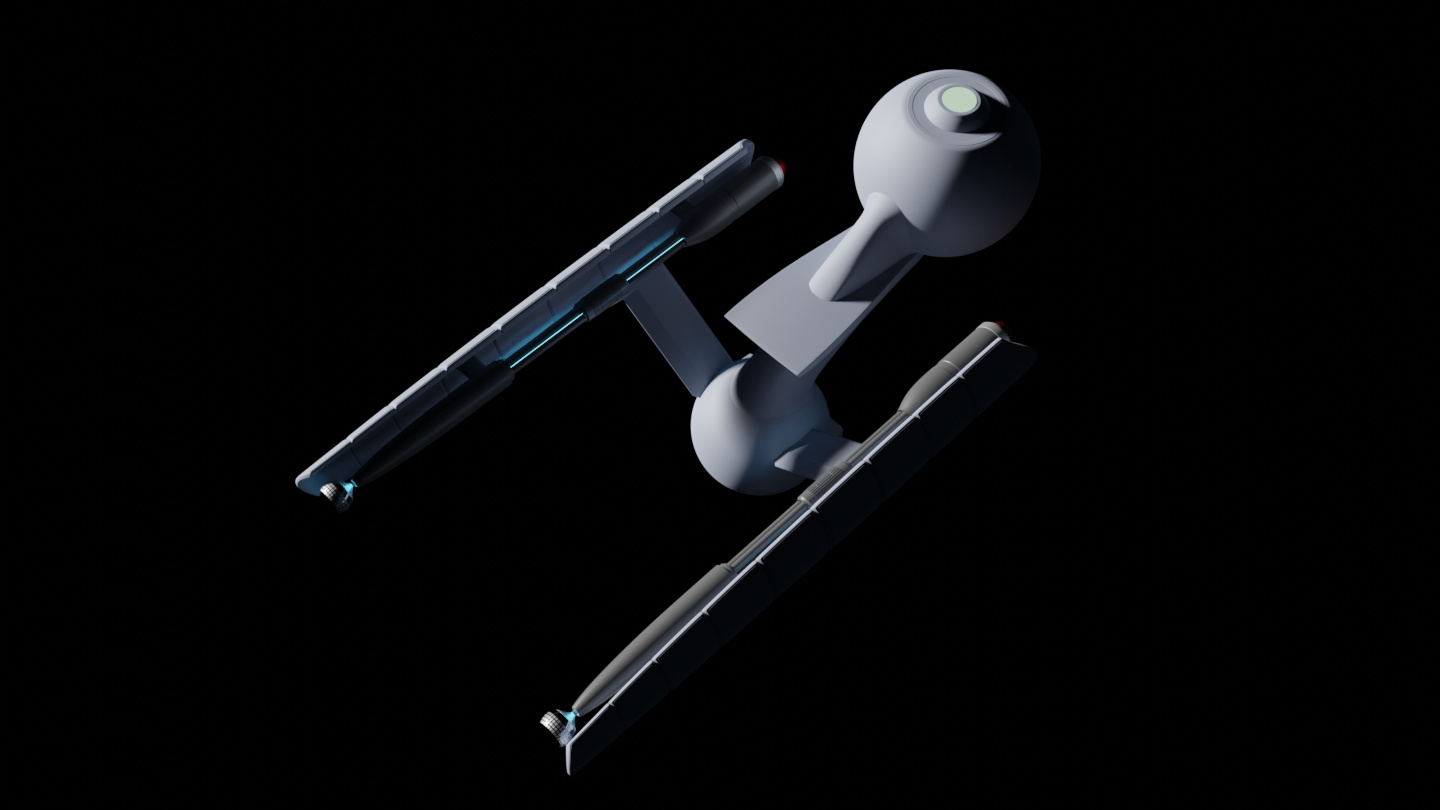
Did some work on the neck, adjusting its geometry using vertex grouped shrink wrap. Played around with Boolean union-ing it to hulls, but its a mess of vertices to slide, and dissolve. It would have been better to start out with two low poly spheres first. Tried Boolean differenc-ing the hulls from the neck, but would have had to crank up the subsurface to remove the poor shading effects. So no Boolean operations for you neck, since you look okay as it is just penetrating the spheres.
I'm thinking the neck is mostly remass tankage.
Captain Stern hanging out back by the turbolift sneaking a cigarette, giving a good impression of the scale of the bridge.

Playing around with HDR textures, though that one is a basic jpeg. I like that you can make your own HDRs in Blender, and I have a few, but none of them looked good for this. I need to make one that with a white background.
I made the trailer as a scale object for another project's floorplan/habitat section and I needed something of approximate size. Until there are windows, there's a singlewide mobile home.
-
Alt Trek Spherical hulls
Ok. Who knew downloading and playing with D-NOISE would take up so much of an evening. Oh, yeah... Blender, right? The wonderful world of change parameter, render, change parameter render, repeat, repeat, still looks kinda crappy, repeat, the hell with it. Why does Gleb Alexandrov's renders look so good in his videos? Better computer? (Probably)

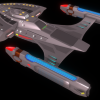
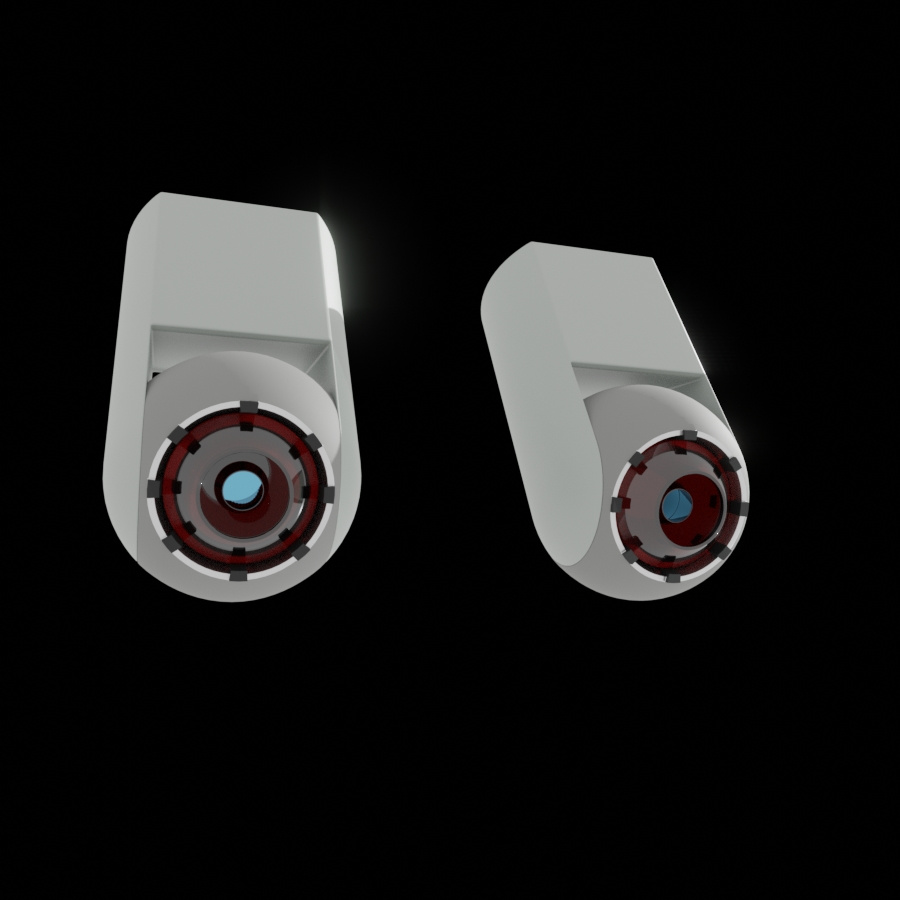
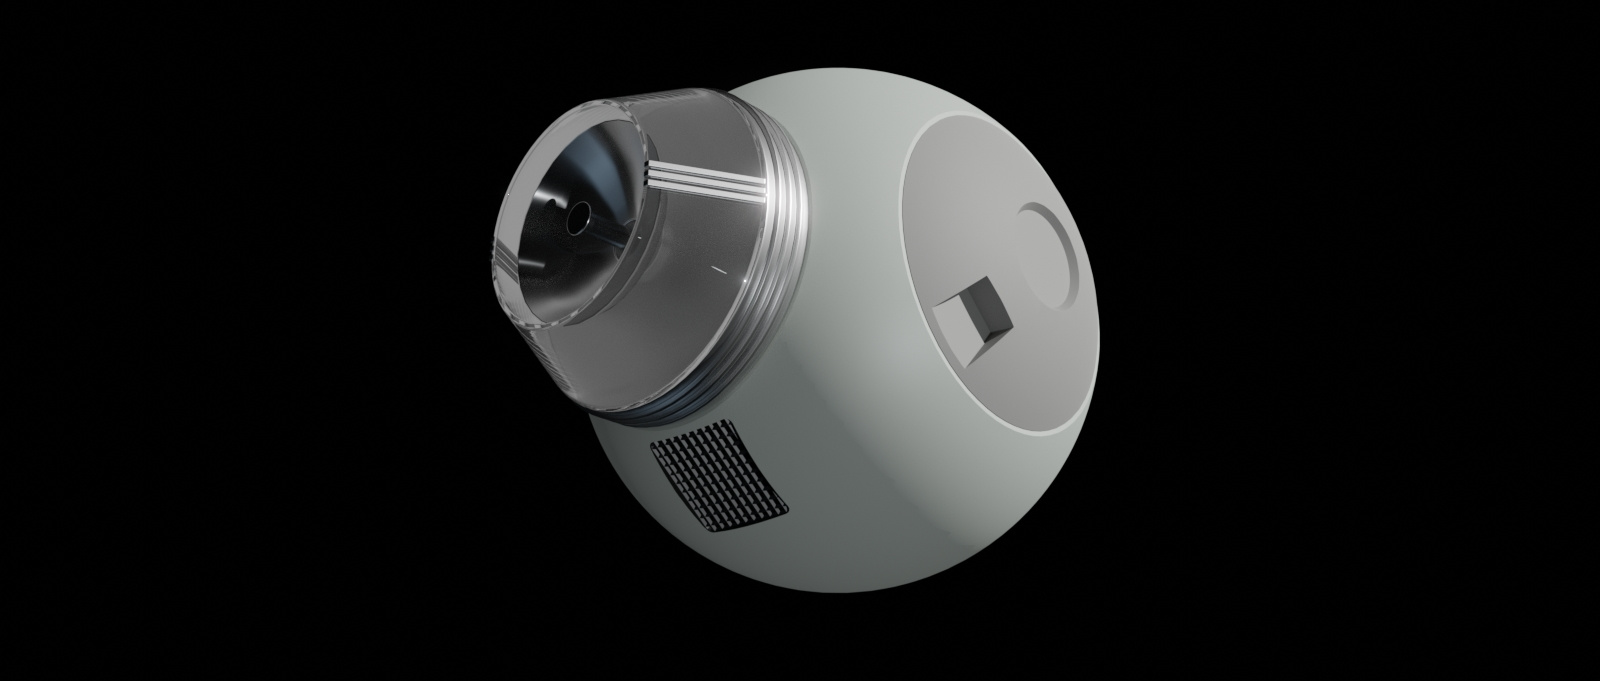
Tinkering around with a external shield grid array.

D-NOISE test. Still some artifacts like wrinkled paint in the render. Used McC's suggestion for blooming. I haven't played around with passes much as they haven't come up often in the tutorials I've viewed. A lot easier than dealing with a number of different render layers. You'd think in the future they would have better cameras to avoid blooming, but maybe retro images are trendy.
Blender does better with well lit scenes, or maybe with a few light sources. The D-NOISE denoising doesn't look bad here. I think Blender is telling me that for darker scenes, if I don't want splotches and blotches from its denoiser, I'll have to run a billion samples.
-
Alt Trek Spherical hulls
Love the 2.8 viewport shading options and render.
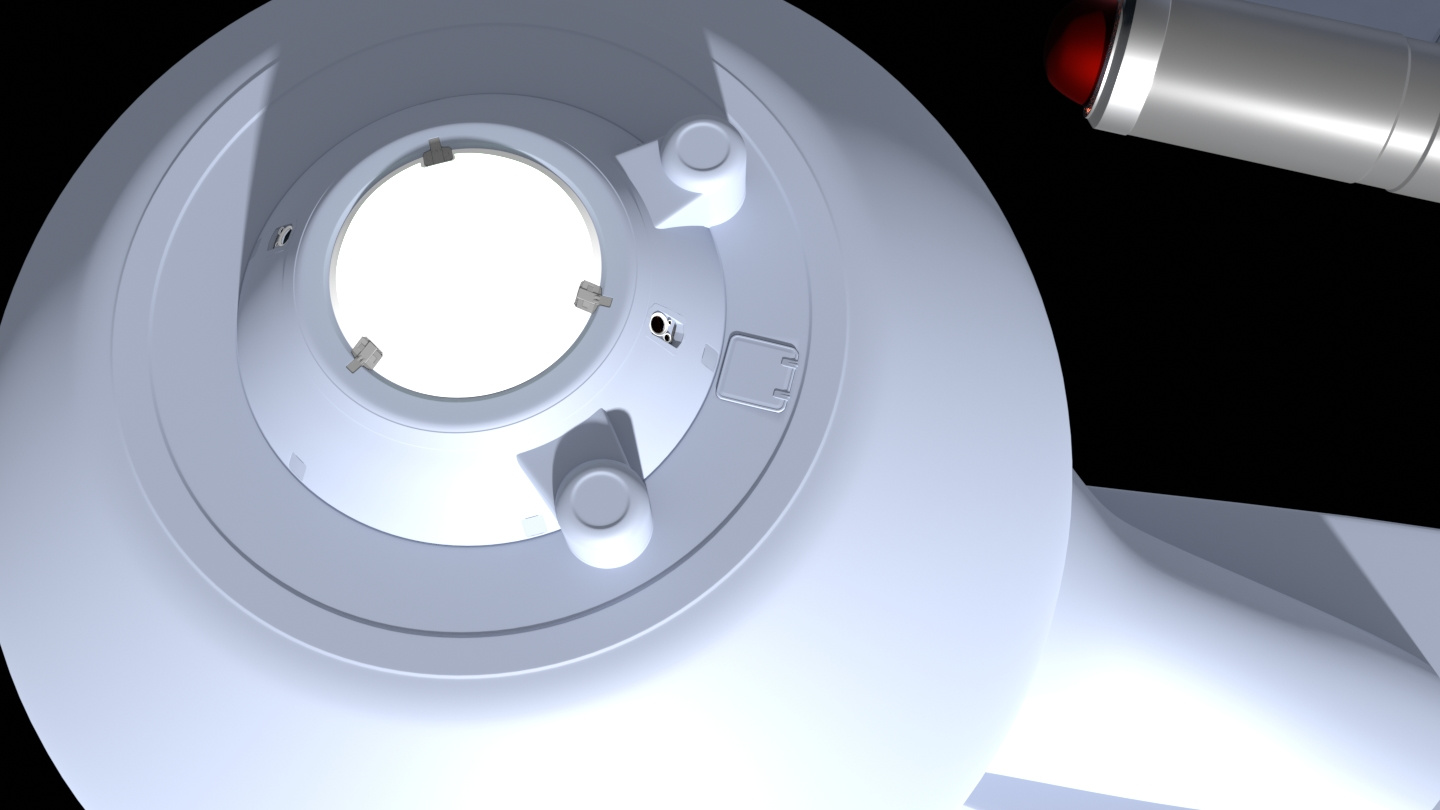
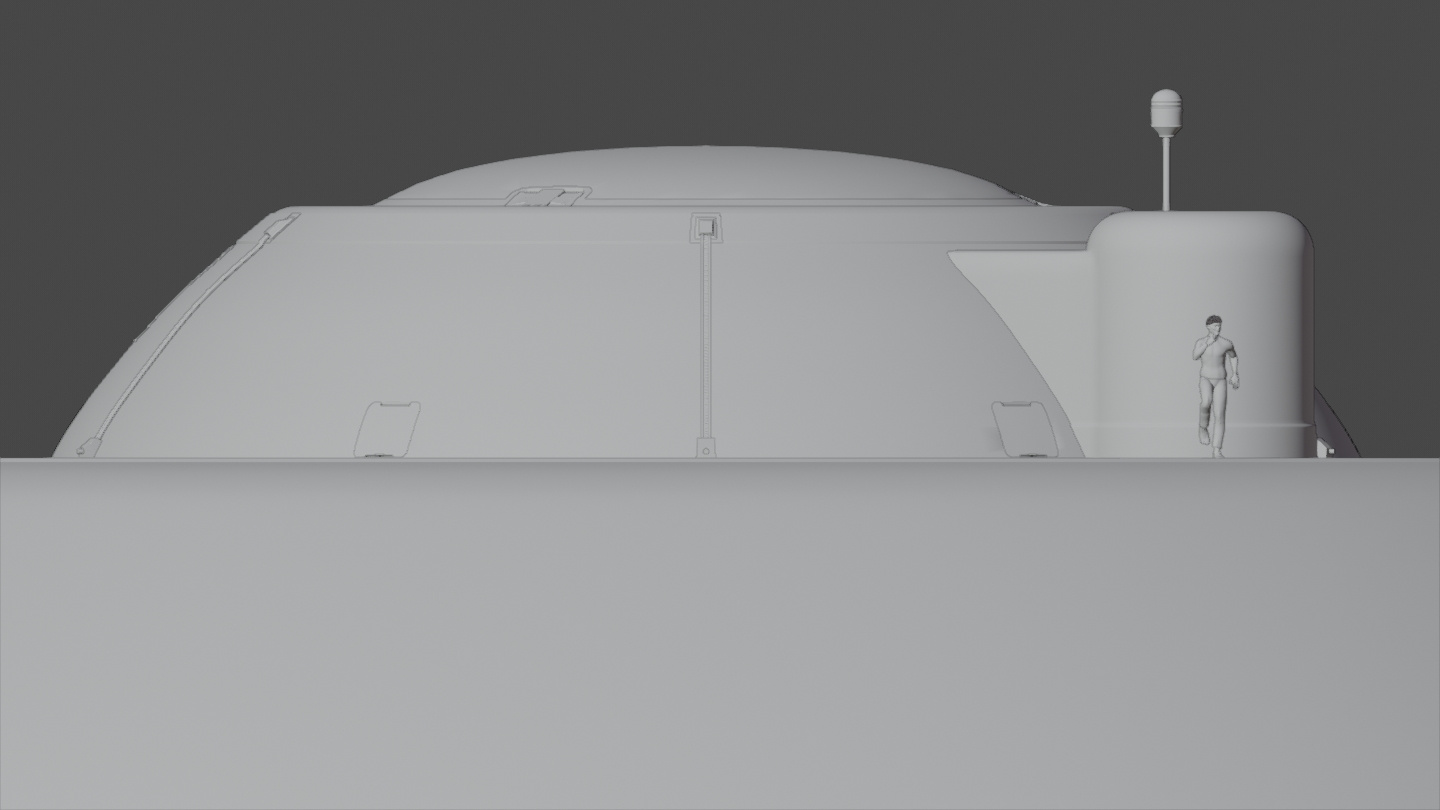
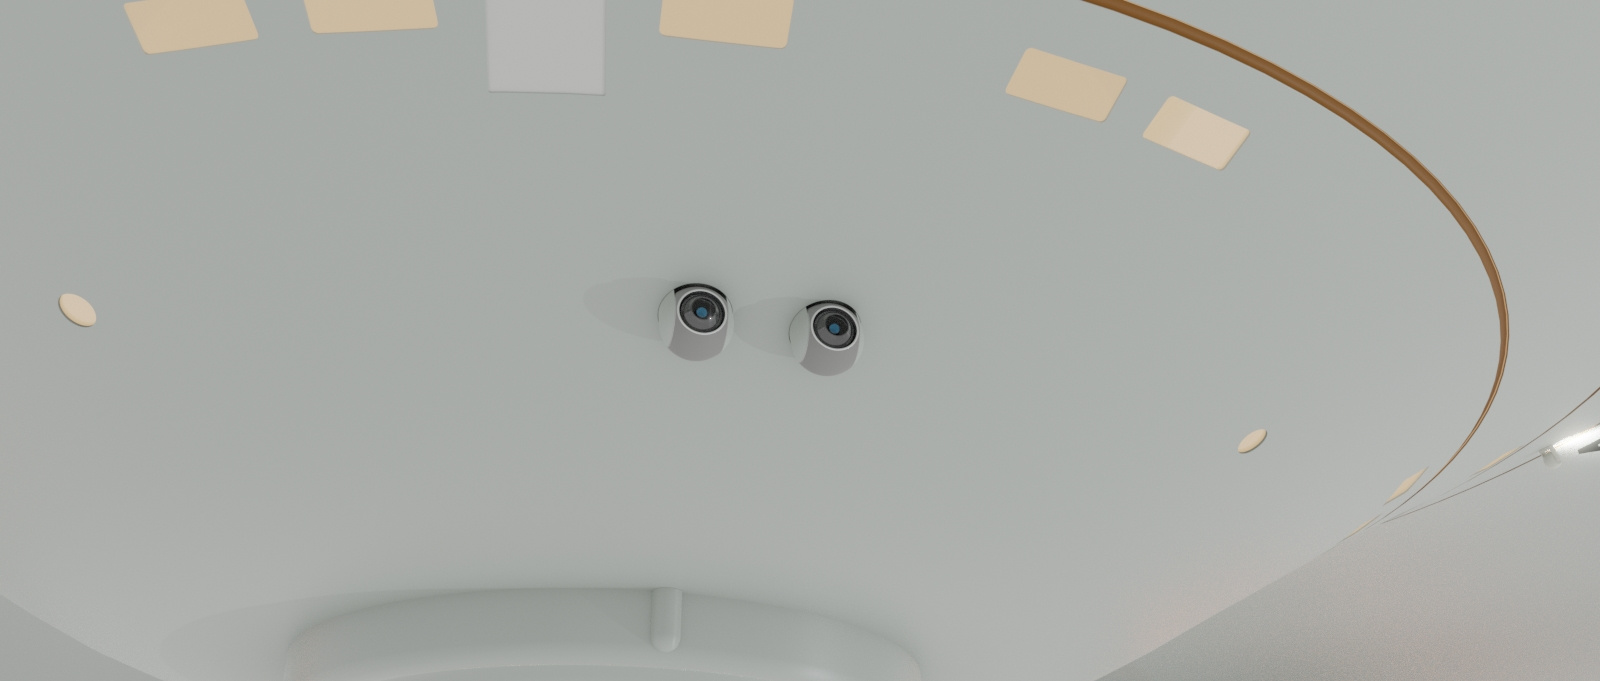
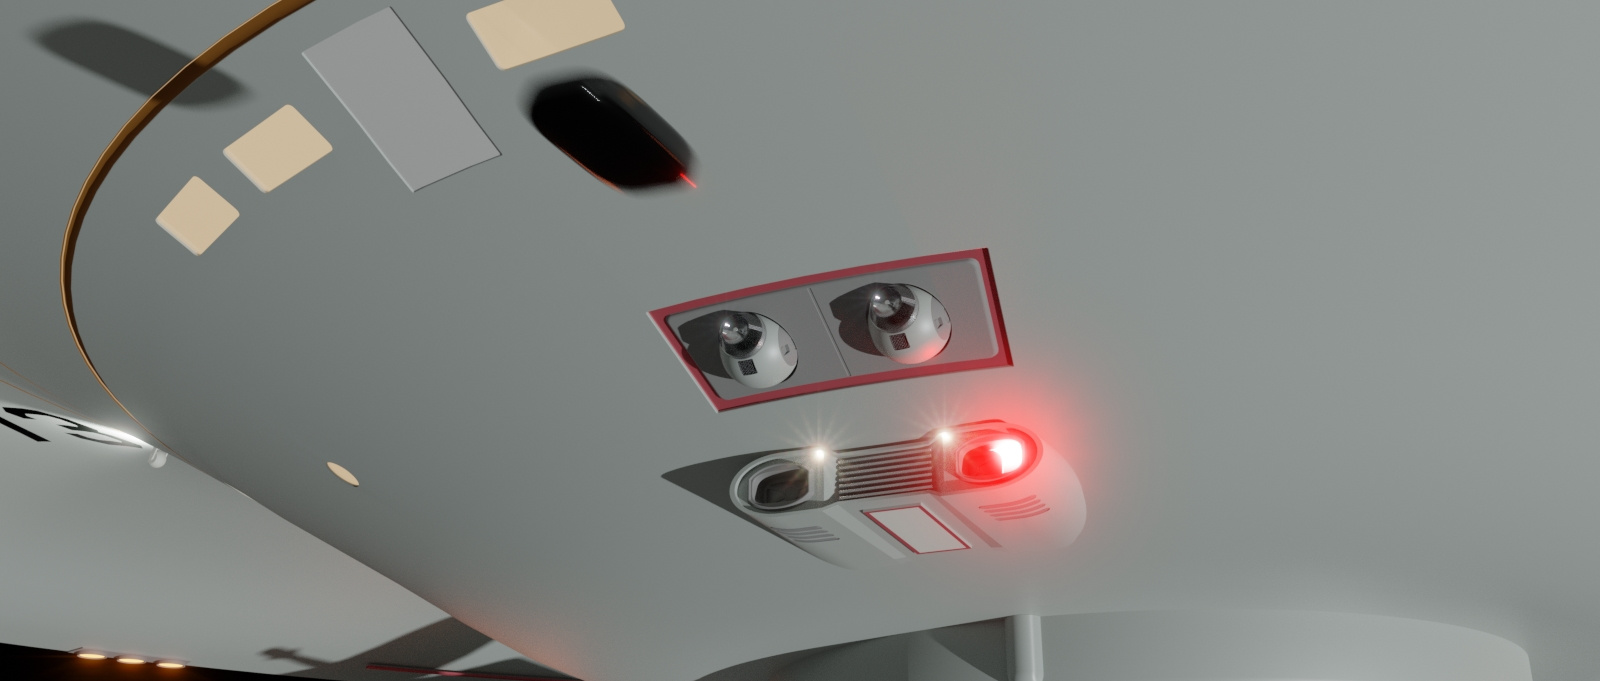
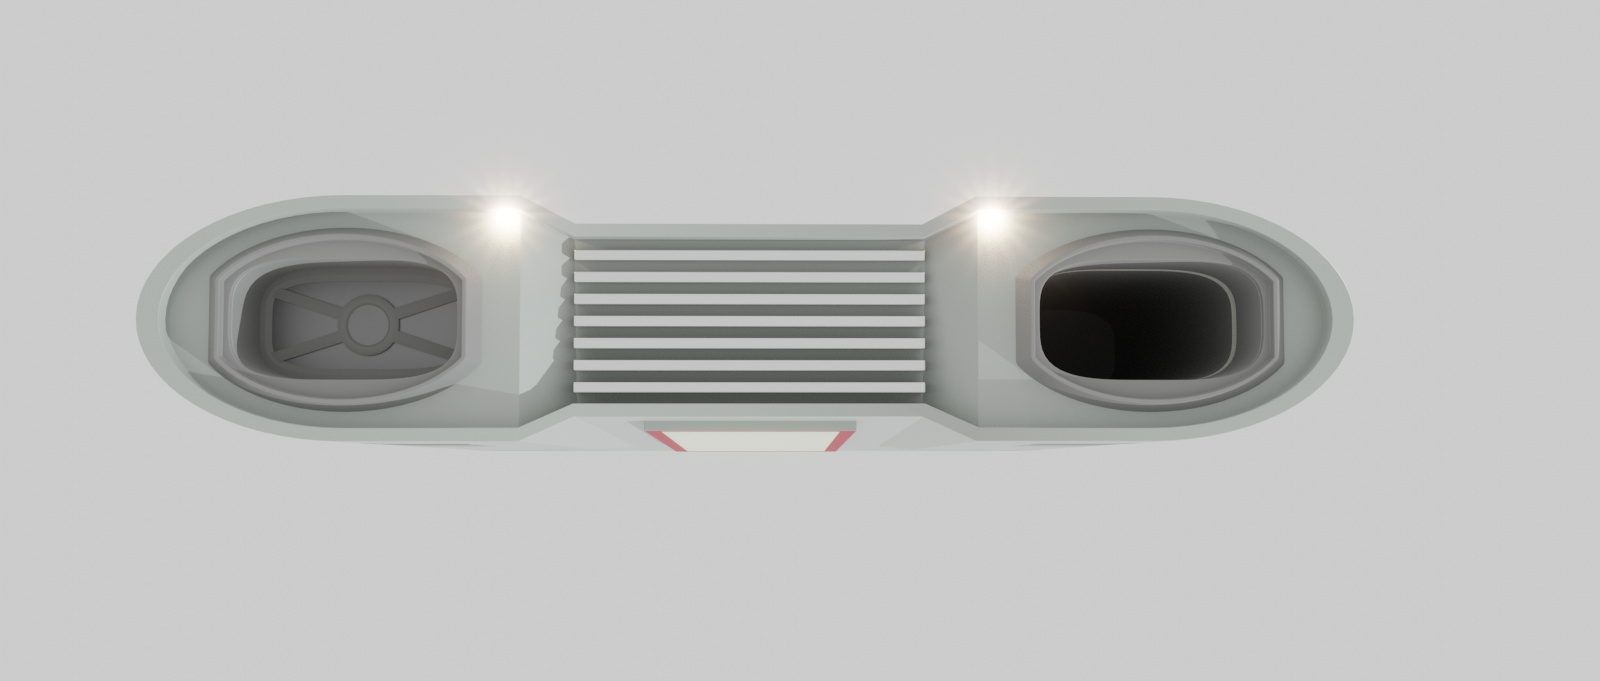
Last night and today's work: Sensor dome details, EVA hatch, turbolifts, and foward sensor assembly.
-
Percheron class (tos era)
It's been five days? Wow. Anyway, phaser bank work. That's the thing about TOS phaser and torpedoes, where they come from is up to interpretation. I've looked. Somewhere on the bottom. I figured the refit phaser banks would be an appropriate place to start.
I did these first, using some modern laser pods for the design. And while they look functional. . . .
They looked like googly eyes. That's just not the look I want. Plus they looked too modern and not enough TOS. I want to keep to the TOS aestetic, so I took some elements from both the phaser rifle and pistol.

HDRI lighting isn't really realistic, but I how it shows transparencies better than the Blender lamps.
Torpedo tubes are next on the list.

-
Percheron class (tos era)
Some HDRI environment lighting.

Working on some minor details like the "hatches" on the underside of the saucer. Had my "Duh!" moment doing the text for the nacelles. Idiot, put a subsurface modifier before the shrinkwrap, and set it to simple. So I did that to all the text, remember I want to keep them text objects so I can edit them for different ships.
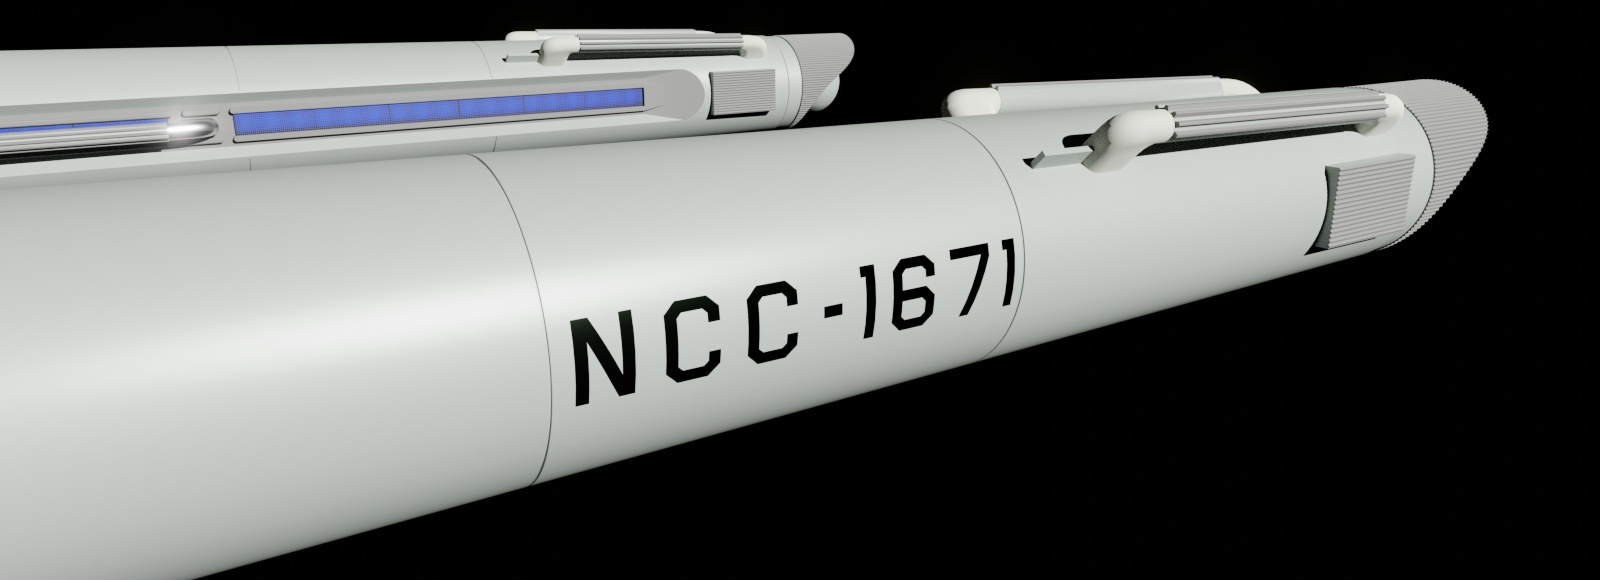
Because the Sinclair prints have the details showing the starboard nacelle, I have everything in that collection (layer(s) for non-Blender users), and I'm using a collection instance for the port nacelle. I couldn't mirror the text for the port nacelle, so I had to make new text objects, but you can't use a collection instance as a shrinkwrap target, so I first I made the instance real objects, which of course works, but if I was to add anything to the starboard nacelle, or in that collection, it would copy over to the port nacelle, and I want that option. So I undid making the instance real, and copied the faces of the nacelle under the text and flipped it to the port side to use it as a shrinkwrap target with it hidden from view and rendering. A neat trick to shrink something to something that isn't really there.

-
Alt Trek Spherical hulls
-
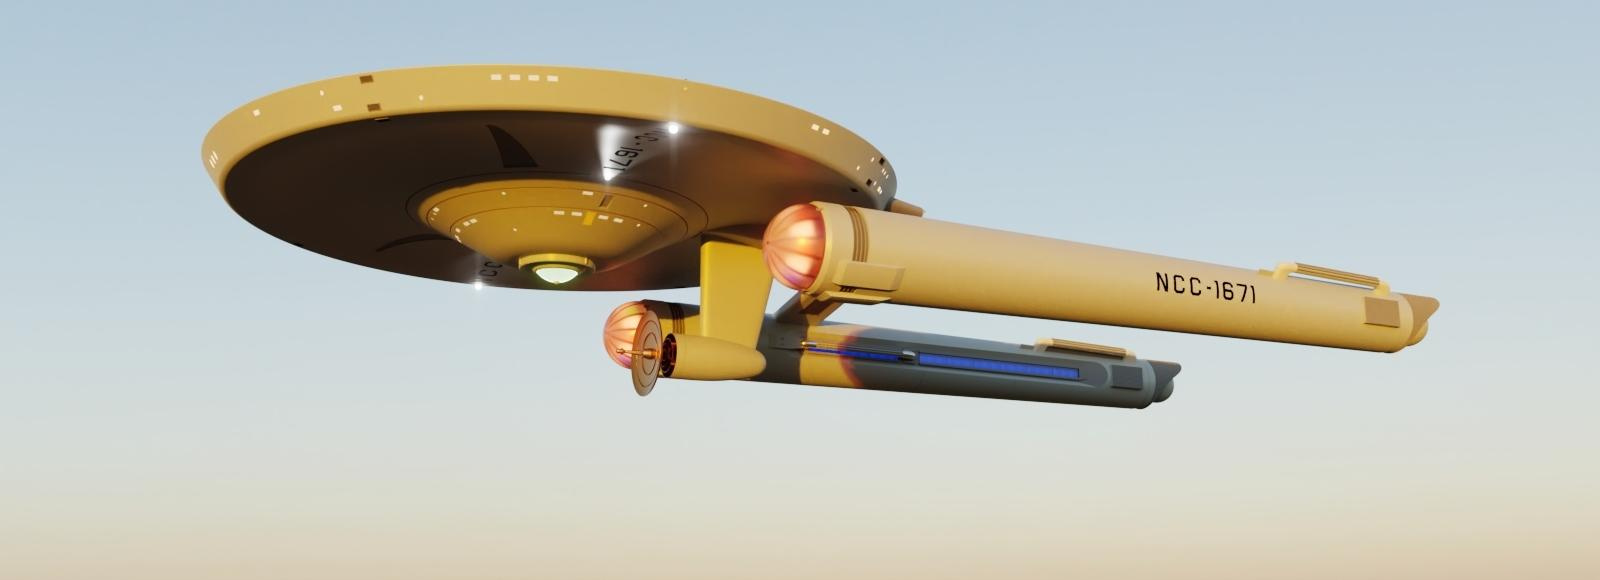
Percheron class (tos era)

Just a few added details, some rollbar pylon attachment point covers, RCS thrusters on the nacelles, some "things" on the pylon sled.
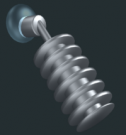
Warp core idea.
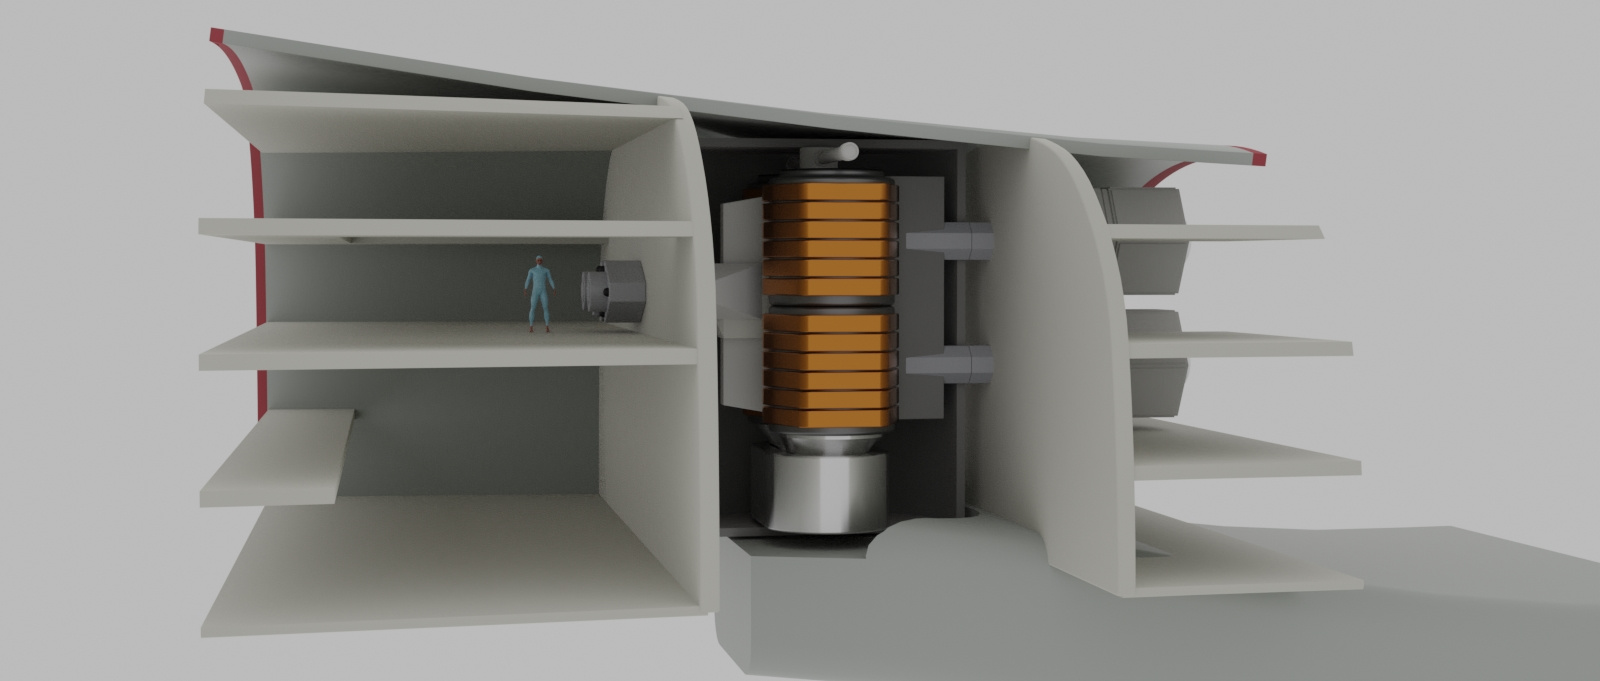
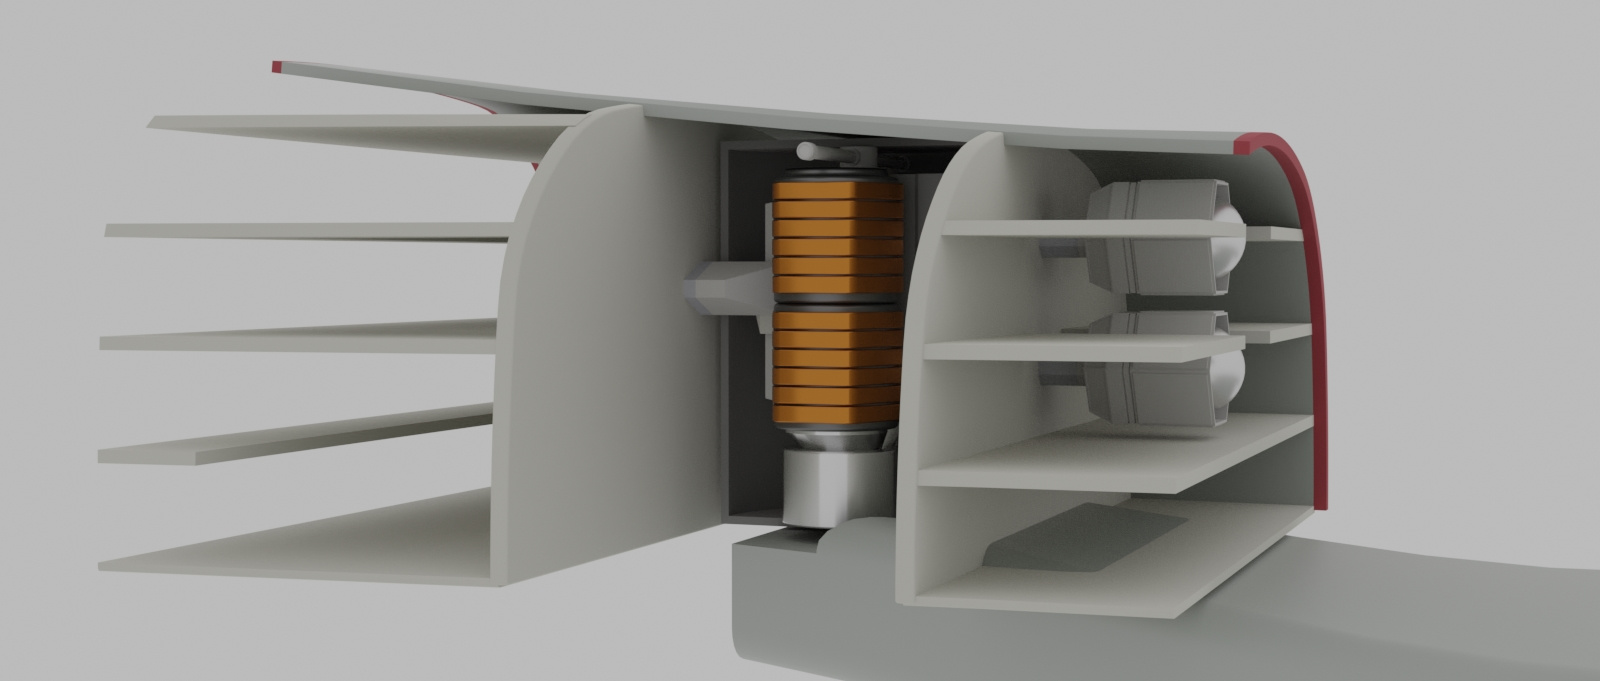
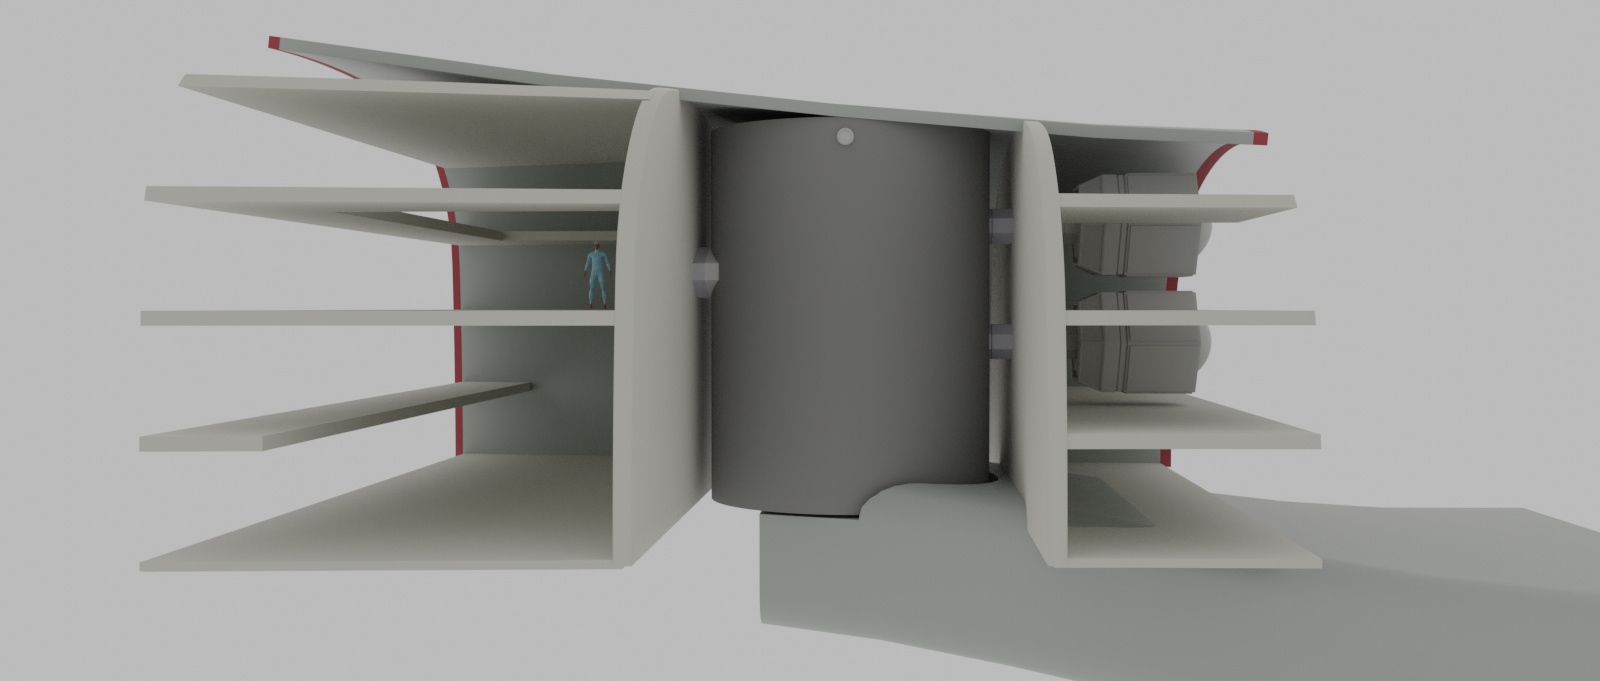
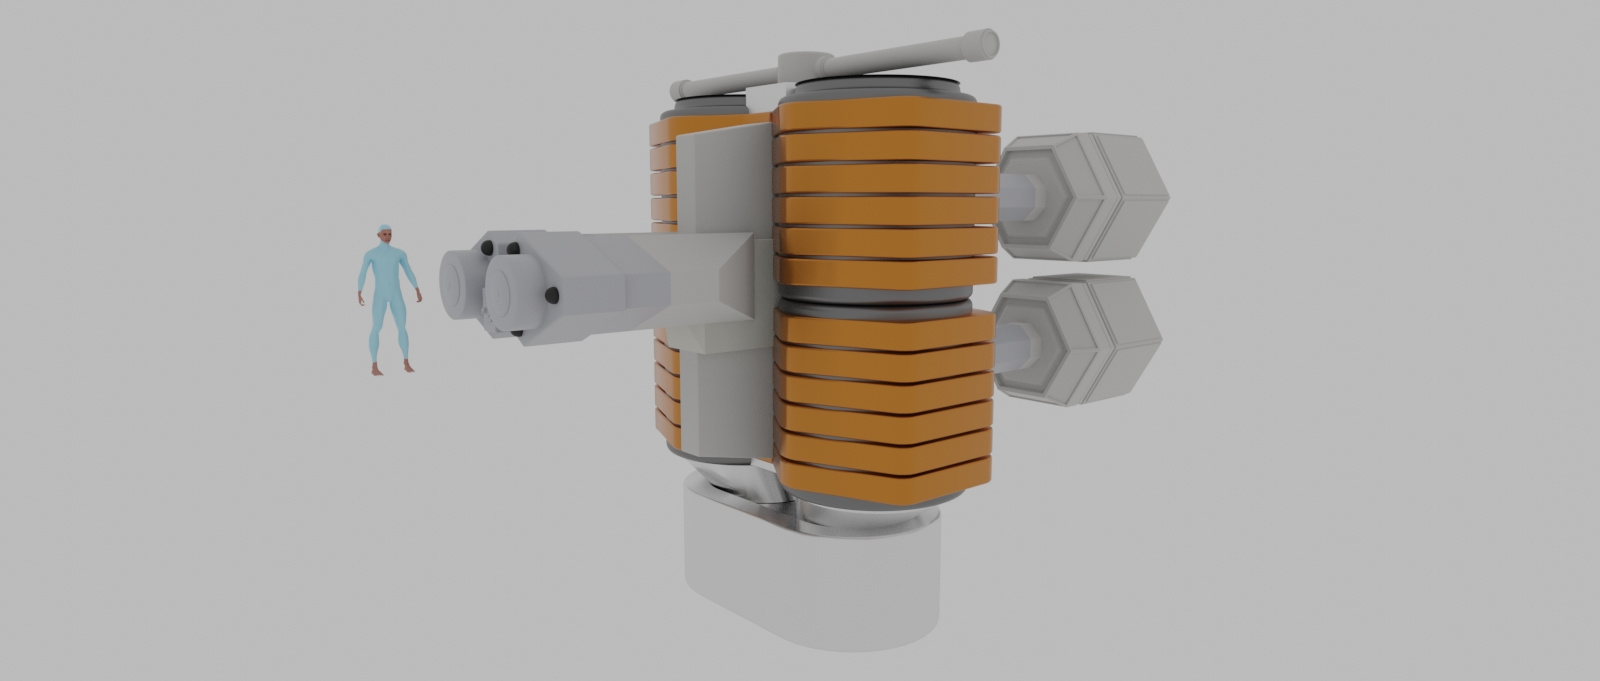
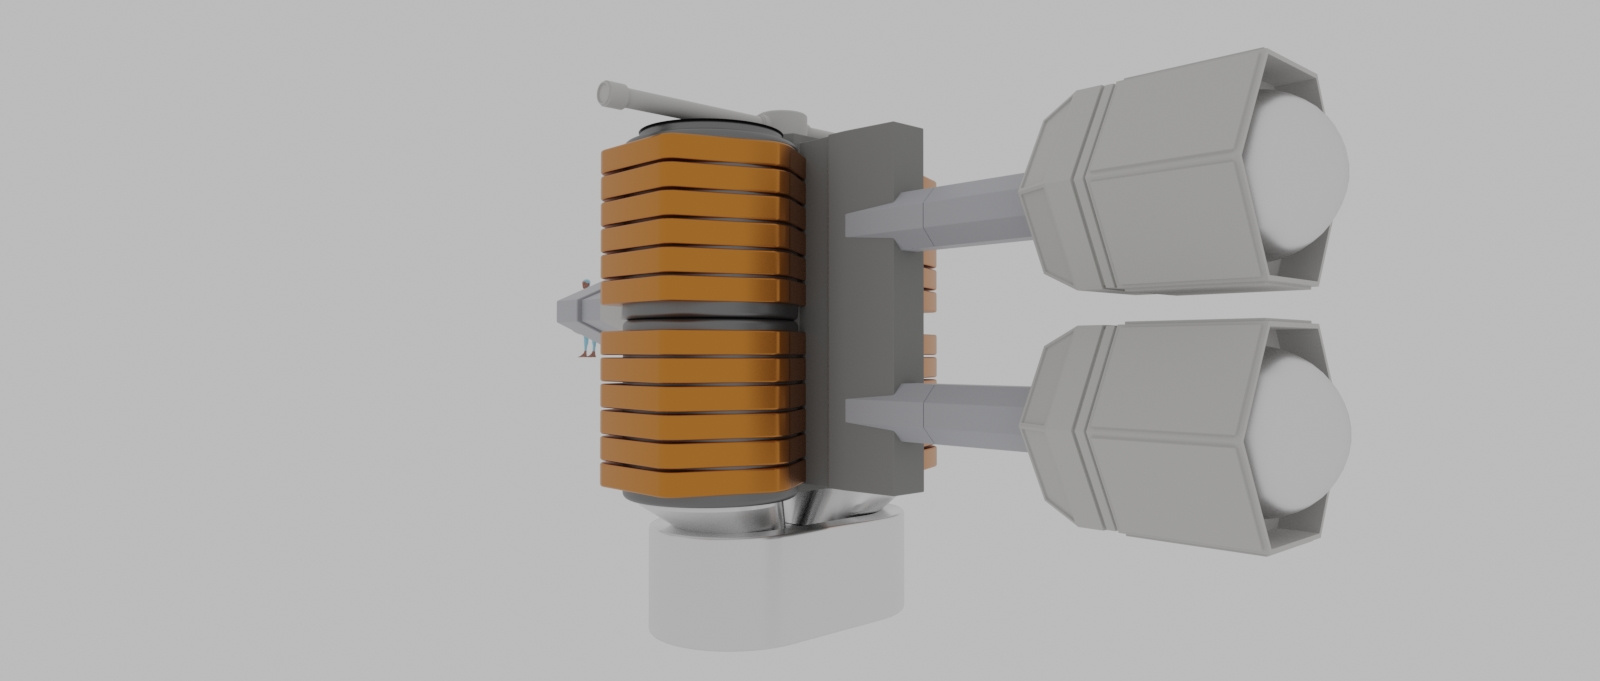
Just the general idea. After mulling over what a TOS core might look like, I decided instead of taking cues from the TMP and TNG cores, go the other direction toward the NX-01 core. It's compact, and I needed something that could be installed, removed, or jettisoned in the best likely place. This is just a rough proof of concept. I don't have any plans to do a full up engineering room, just wanted to know how it would all fit together. What's missing is the plasma conduits that would run out of the bottom.
-
Percheron class (tos era)
Photon torpedo launcher.
After punching holes into the lower saucer with Boolean cutters under the phaser turrets, and seeing how ugly they came out as stretched ovals, I began to realize why putting them on the neck of the refit made a lot more sense other than just a good place from which to fire torpedoes. I thought about putting launchers on the nav deflector pod fin, but that fin only serves as a boom for the pod. I figured I'd make a launcher and put it under the phasers.
First one I made was boxy, and I thought it didn't match the style, so I made something that visually rhymed with the impulse deck. The torpedo is stand-in for a better model. It it slightly smaller than the standard (2m x 0.75m x 0.4m), and is simply a beveled cube without the scale applied until after the bevel modifier was applied. It was the easiest way to get the shape. Animated for motion blur.
Using shape keys to animate the doors.
Having to fix stuff while I make this post. . .
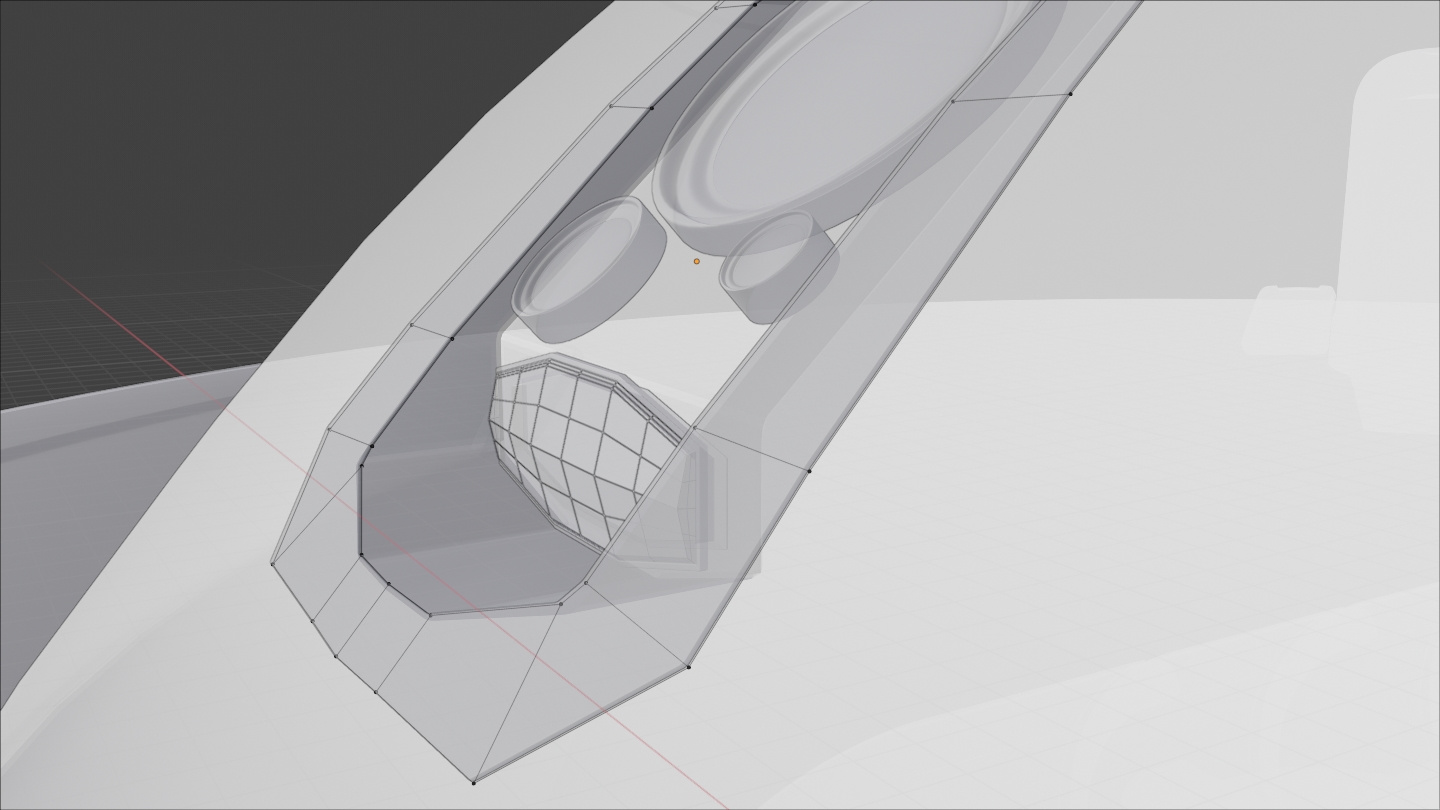
The arrayed method I used on the impulse and nacelle grills would be a challenge to match the curvature of this moldline penetration, so I used the wireframe modifier with a bevel of 2 segments and angle limit set to 89 degrees to make it flat and rectangular as opposed to the usual mess a wireframe makes. The grill faces were taken from the boolean cutter that was arrayed and mirrored but did not take into account the slope of the bottom of the launcher, so when I was adjusting the height, the arrayed grills were deeper inset in the back. I want them at a uniform depth from the hull surface. I had to apply the array, and in edit mode use link select to move each grill into place. But I also want them at the same distance, so I put the cursor on the lowest vertex of the forward grill and added a single arrow empty, and rotated it to match the fore to aft angle of the forward grill, and used it as a guide to adjust the height of the other three. Arrow empties always come in handy as guides. Will not be discernible from a distance, but why be sloppy if you can be meticulously accurate?


Additional credits
- Icons from Font-Awesome
- Additional icons by Mickael Bonfill
- Banner background from Toptal Subtle Patterns
© Scifi-Meshes.com 2001-2024