Greetings!
Welcome to Scifi-Meshes.com! Click one of these buttons to join in on the fun.
Quick Links
Conforming phaser arrays to odd curved surfaces


Like the title says, I'm looking for a way to create phaser arrays that conform to an odd curvature of the hull. Is there a script or plugin for Max that will allow me to do this or am I just gonna need use the heck out of modifiers to get it to work?
I've attached a pic of the area I'm talking about. Please give me some guidance on this because I'm frustrated and about ready to give up at this point.
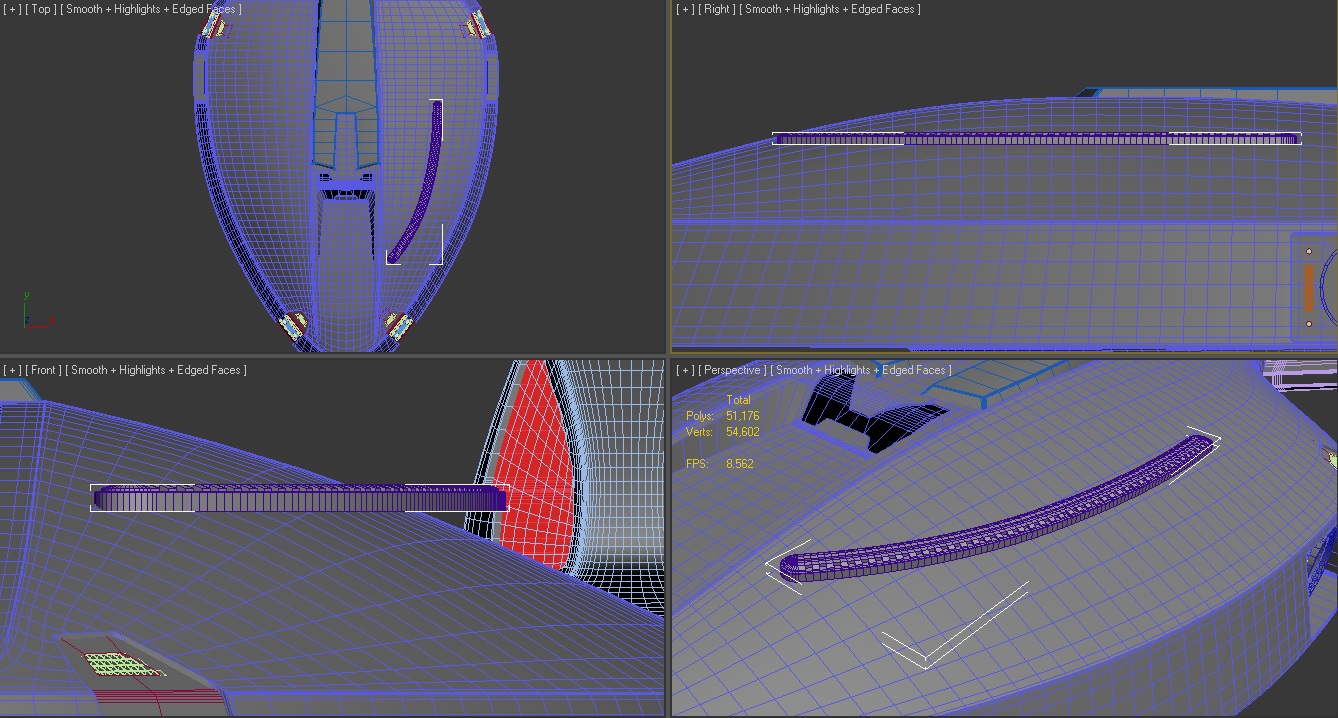
I've attached a pic of the area I'm talking about. Please give me some guidance on this because I'm frustrated and about ready to give up at this point.
Post edited by Schimpfy on
Additional credits
- Icons from Font-Awesome
- Additional icons by Mickael Bonfill
- Banner background from Toptal Subtle Patterns
© Scifi-Meshes.com 2001-2024
Posts
I draw a spline where I want the phaser bank, then I shapemerge it into the mesh (and make sure the number of subdivision looks dense enough for the grooves I want).
So with the cut in spline that conforms to the hull, I select the edges, I turn those edges back into a spline and clean up the vertices that came from intersections with the mesh and try to only keep the ones from the original subdivisions.
Then I set the spline renderable, and make it 4 sided (i.e. an elongated box following the spline)
Now you should be able to use the "angle" property of the spline's geometry to align this boxish thing close to upright to most of your surface.
the particular model you have there looks to have a gentle enough curve for this to work.
Then I build my phaser strip off of that box. the round ends are easy, cut the quads on the end in half, delete half of them, then hinge from edge around 180A° and delete the remaining backface, weld.
Then use extrude and chamfer on egdes all around to modify the shape consistently.
Not exactly a strict method and slightly timeconsuming, might also not work all the time.
One thing that could possibly simplify this is the use of the "glue" plugin which lets you glue a spline to a surface (but remaining a spline) with set numbers of subdivisions, which would be great for keeping the subdivs equally spaced without much cleanup, don't know if the angle to align them to surface normals will still work then though, so you might not be able to match the rotation of the spline geometry to the surface everywhere.
A possible different solution I could think of is building your phaser strip straight, then using a spline and the Path Deform (or WSM Path Deform) modifier to align it to that spline. Again, making the rotation work could be tricky, but if you manage to build your phaser strip by having a simple object that is possibly subD'ed and with a couple editPoly modifiers ontop, then you could align it with the path deform, and twist a few sections of the control mesh to align the subD'ed and edited end results orientation.
I hope that makes some sense, its 5AM here :shiner:
Edit: tried out that last idea, simple proof of concept:
simple box, meshsmooth and path deform stacked ontop.
While the path deform has a twist setting too, that seemed to affect different parts of the object differently, so instead I stuck with twising the control mesh with "show end result" on to see when it looks about right. If your surface is more warped the control mesh might turn out more twisted and warped that here.
Might not be the most exact method, you'll probably have to fiddle with the axis, percent and stretching parameters to get it close to what you wanted, (I thing the WSM variant of the modifier works more relaibly) so maybe its a good idea to start building your phaser strips from this after you are done collapsing the path deform
first I stencil the footprint of the phaser into the hull
phaser stencil.jpg
then I bevel out the main shape of the phaser
phaser bevel.jpg
then I select a loop of points from the beveled phaser, make a spline out of it, model one of the ribs, and use the spline to rail clone it around the shape of the phaser
phaser cloning.jpg
finally I cut and paste the ribs onto the beveled phaser
phaser finished.jpg
with this method you can also add more complex ribs like is seen on the galaxy class
phaser galaxy.jpg
Gigabyte RTX 3080 Gaming OC 12GB
1TB NVMe SSD, 2 x 1GB SATA SSD, 4TB external HDD
32 GB RAM
Windows 11 Pro
If I could make a properly fitted guide object to stencil/cut in the outline, I could just as well build the phaser directly off that. That seems to be the only difference in how the strip is made really - but the issue is getting *something* aligned the way we need it in the first place
just a boolean basically
stencil.jpg