Greetings!
Welcome to Scifi-Meshes.com! Click one of these buttons to join in on the fun.
Quick Links
Local TutorialPanelling in Blender, the Freaky way.


I found it very hard to find a decent tut, on how you do a decent panels in Blender, the are some great tutA’s out there for Max, Lightwave and a few others, but not so many for Blender.
So to help fellow Blender users, that are in the same boat as me or just starting out. Here is how I do it.
This tut can be used for flat panels or curved. As curved panels can be a right pain in the ass. This will show you how easy it can be. (please note the final pic is of a ship I am currently building.)
Okay let get started.
You have modelled your ship but you now what to panel it.

Fig 1: the hull of the ship that will be panelled.
1. In object mode select your meshes, that is the main Hull. Press Shift D to duplicate it and hit return.
2. Press M and move it to another layer. This will be helpful later on to see how your panels look on your ship.
3. Go to the layer you have just moved the new meshes to. You should still be in Object mode. Now press Alt and C. and select Delete Original Meshes.
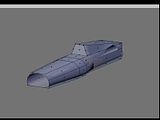
Fig 2: The way your ship looked before you turned it into a new meshes. (Please note this pic was done in edit mode.)
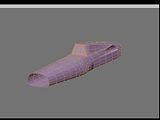
Fig 3: The way your ship will look after turning it into a new meshes.
4. (You donA’t have to do this part, but I found it helpful.) Press A to select all the meshes. Press S to resize your meshes. Type in 1.01 and hit return. This will make your panels sit on top of your hull. Without any gapes.
5. Now you are ready to start making panels. At this point I change the colour of meshes to something that stand out. I do this so when I add them to the hull I can see any errors.
6. Makes sure you have faces selected. If you donA’t have too many faces to work with, you can press Ctrl R and cut some new faces user the loop cutting tool.
7. Start selecting the faces you want for a pattern, normally an S or L in shape.
8. Once you have selected the faces you want for you first panel Press P and click on SELECTED. This will separate the selected area.
9. (This next part you donA’t have to do, but I do my panels bit by bit to make sure I have the right look) Press TAB and select the area you have just cut and move it to another layer.
10. Once you have created first panel, you can go and do the rest.
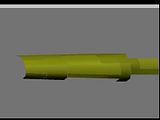
Fig 4: panels cut but no gapes.
Once all your panels have been created, you will want to put a little gape between them. To do this, it is very simple.
11. Select one of the new panels you have created. Now go into Edit Mode by pressing TAB.
12. Select all the edges on side and Press G to grab them. Then press Z, X or Y for the direction you want them to be moved in, type in 0.01 or 0.02 to give you the small gape. You wont have to do this to all the edges of a panel as the gape will be to big.
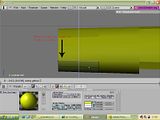
Fig 5: making the gapes
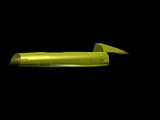
Fig 6: all panels with the gape added.
13. If you had followed step 10 and doing your panels bit by bit, or if you have finished creating your panels and reshaping them. Go into object mode and Press SHIFT and the layer the original hull on. Create your location for the camera and lighting rig. (I normal have a camera and lighting rig set up on another layer)
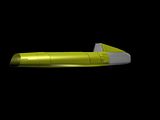
Fig 7: Panels added to the ship. (This is a render)
14. Press F12, you ship will render with your new panels. At this point you may notice that some of the original meshes can be seen through the panels.
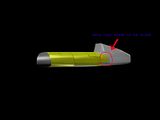
Fig 8: area that needs to be fixed.
15. If the are any error, just follow step 12 again, but this time move the edge away form the ship. not to much as it will create a gape between the panel and the hull, where you donA’t want one.
Fig 9: area fixed.
That it you are done and you now have a ship with panels that are flat as well as curved.
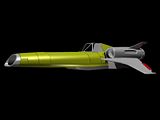
Fig 10: Panels finished and added to the rest of the ship.
I hope this was helpful, if you have any question please ask.
So to help fellow Blender users, that are in the same boat as me or just starting out. Here is how I do it.
This tut can be used for flat panels or curved. As curved panels can be a right pain in the ass. This will show you how easy it can be. (please note the final pic is of a ship I am currently building.)
Okay let get started.
You have modelled your ship but you now what to panel it.
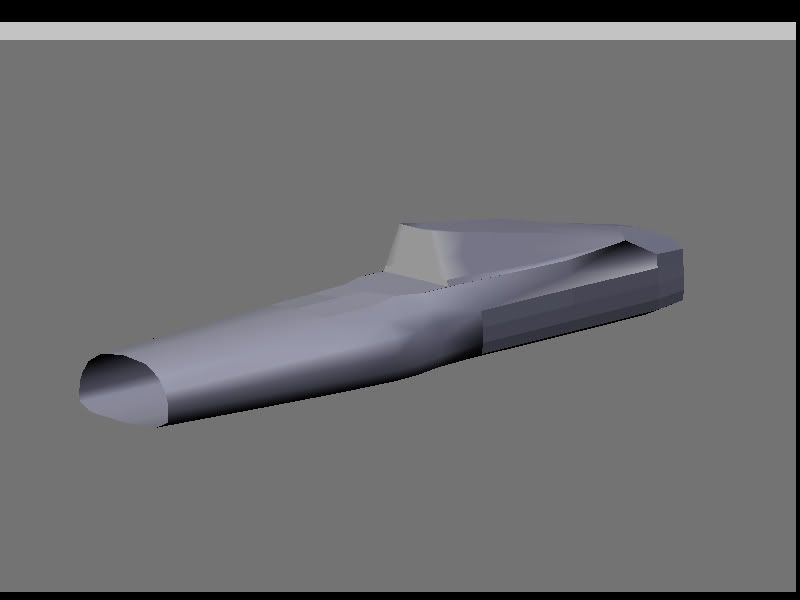
Fig 1: the hull of the ship that will be panelled.
1. In object mode select your meshes, that is the main Hull. Press Shift D to duplicate it and hit return.
2. Press M and move it to another layer. This will be helpful later on to see how your panels look on your ship.
3. Go to the layer you have just moved the new meshes to. You should still be in Object mode. Now press Alt and C. and select Delete Original Meshes.

Fig 2: The way your ship looked before you turned it into a new meshes. (Please note this pic was done in edit mode.)

Fig 3: The way your ship will look after turning it into a new meshes.
4. (You donA’t have to do this part, but I found it helpful.) Press A to select all the meshes. Press S to resize your meshes. Type in 1.01 and hit return. This will make your panels sit on top of your hull. Without any gapes.
5. Now you are ready to start making panels. At this point I change the colour of meshes to something that stand out. I do this so when I add them to the hull I can see any errors.
6. Makes sure you have faces selected. If you donA’t have too many faces to work with, you can press Ctrl R and cut some new faces user the loop cutting tool.
7. Start selecting the faces you want for a pattern, normally an S or L in shape.
8. Once you have selected the faces you want for you first panel Press P and click on SELECTED. This will separate the selected area.
9. (This next part you donA’t have to do, but I do my panels bit by bit to make sure I have the right look) Press TAB and select the area you have just cut and move it to another layer.
10. Once you have created first panel, you can go and do the rest.
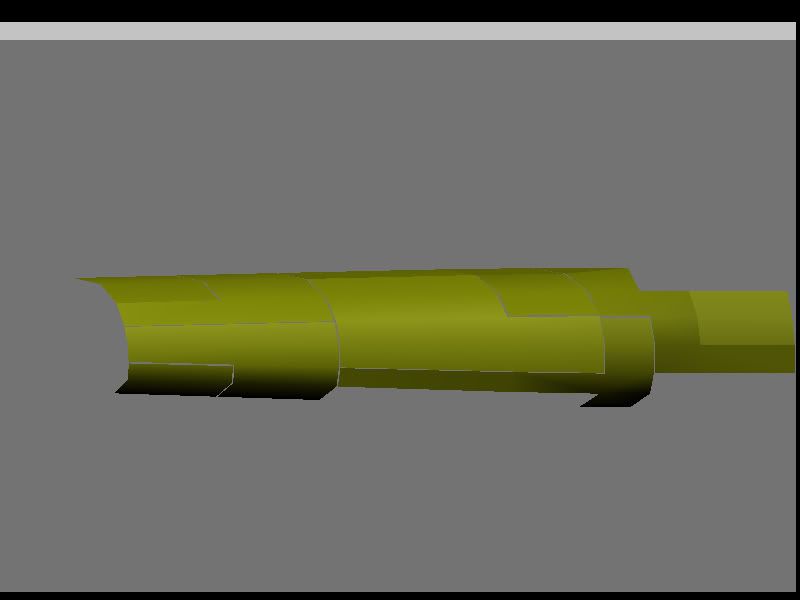
Fig 4: panels cut but no gapes.
Once all your panels have been created, you will want to put a little gape between them. To do this, it is very simple.
11. Select one of the new panels you have created. Now go into Edit Mode by pressing TAB.
12. Select all the edges on side and Press G to grab them. Then press Z, X or Y for the direction you want them to be moved in, type in 0.01 or 0.02 to give you the small gape. You wont have to do this to all the edges of a panel as the gape will be to big.
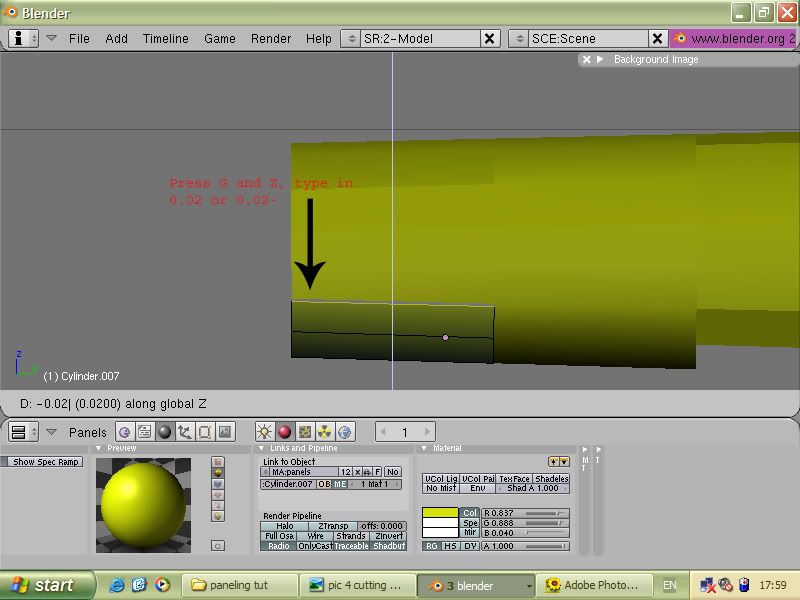
Fig 5: making the gapes
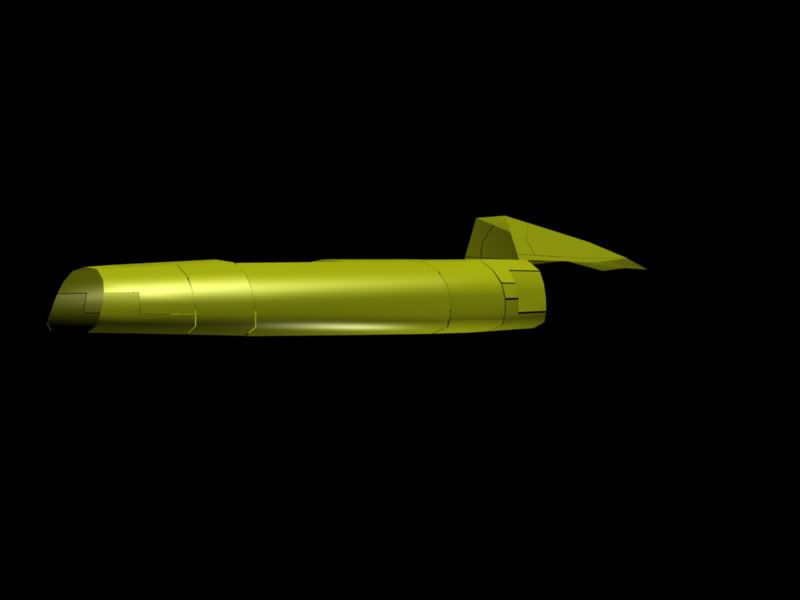
Fig 6: all panels with the gape added.
13. If you had followed step 10 and doing your panels bit by bit, or if you have finished creating your panels and reshaping them. Go into object mode and Press SHIFT and the layer the original hull on. Create your location for the camera and lighting rig. (I normal have a camera and lighting rig set up on another layer)

Fig 7: Panels added to the ship. (This is a render)
14. Press F12, you ship will render with your new panels. At this point you may notice that some of the original meshes can be seen through the panels.

Fig 8: area that needs to be fixed.
15. If the are any error, just follow step 12 again, but this time move the edge away form the ship. not to much as it will create a gape between the panel and the hull, where you donA’t want one.
Fig 9: area fixed.
That it you are done and you now have a ship with panels that are flat as well as curved.
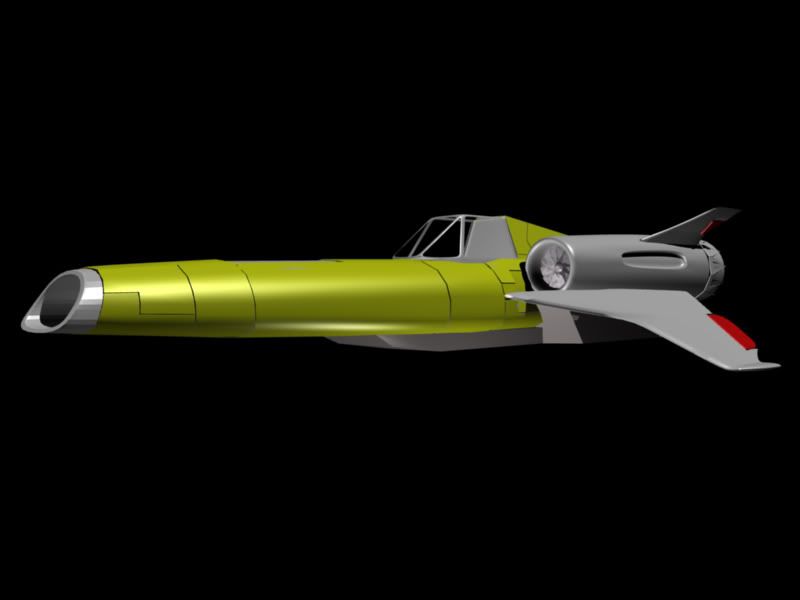
Fig 10: Panels finished and added to the rest of the ship.
I hope this was helpful, if you have any question please ask.
Post edited by Freak on
Additional credits
- Icons from Font-Awesome
- Additional icons by Mickael Bonfill
- Banner background from Toptal Subtle Patterns
© Scifi-Meshes.com 2001-2024
Posts
DAve
Thanks Freak! La Tut est Chic!
Actually not a bad way of doing it, but I'll stick with my method, I don't have that much patience.
Step 1: Don't forget to recalculate normals (Ctrl+N), and remove doubles (W > Remove doubles) in edit mode. It's useful to have clean mesh.
Step 4: instead of ordinary scaling, use Alt+S. This moves faces on their normal, so it's usable also for concave shapes.
Step 15: If you have the gap too wide, it's good to give the panel some thickness. Select desired faces (maybe all) press E to extrude, cancel the operation (RMB) and again use Alt+S. Then remove any unnecessary faces.
I’ll get round to making the changes to the tut at some point. Don’t have the time these days.