Greetings!
Welcome to Scifi-Meshes.com! Click one of these buttons to join in on the fun.
Quick Links
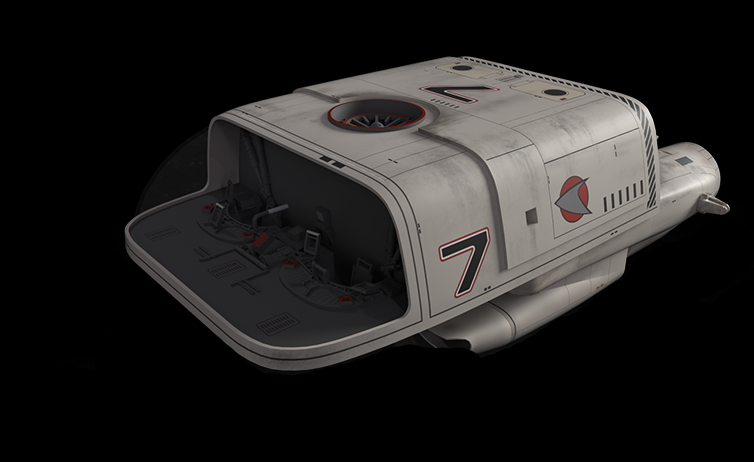
3DST III Spacedock Tug


 1278
PNWPosts: 269Member
1278
PNWPosts: 269Member


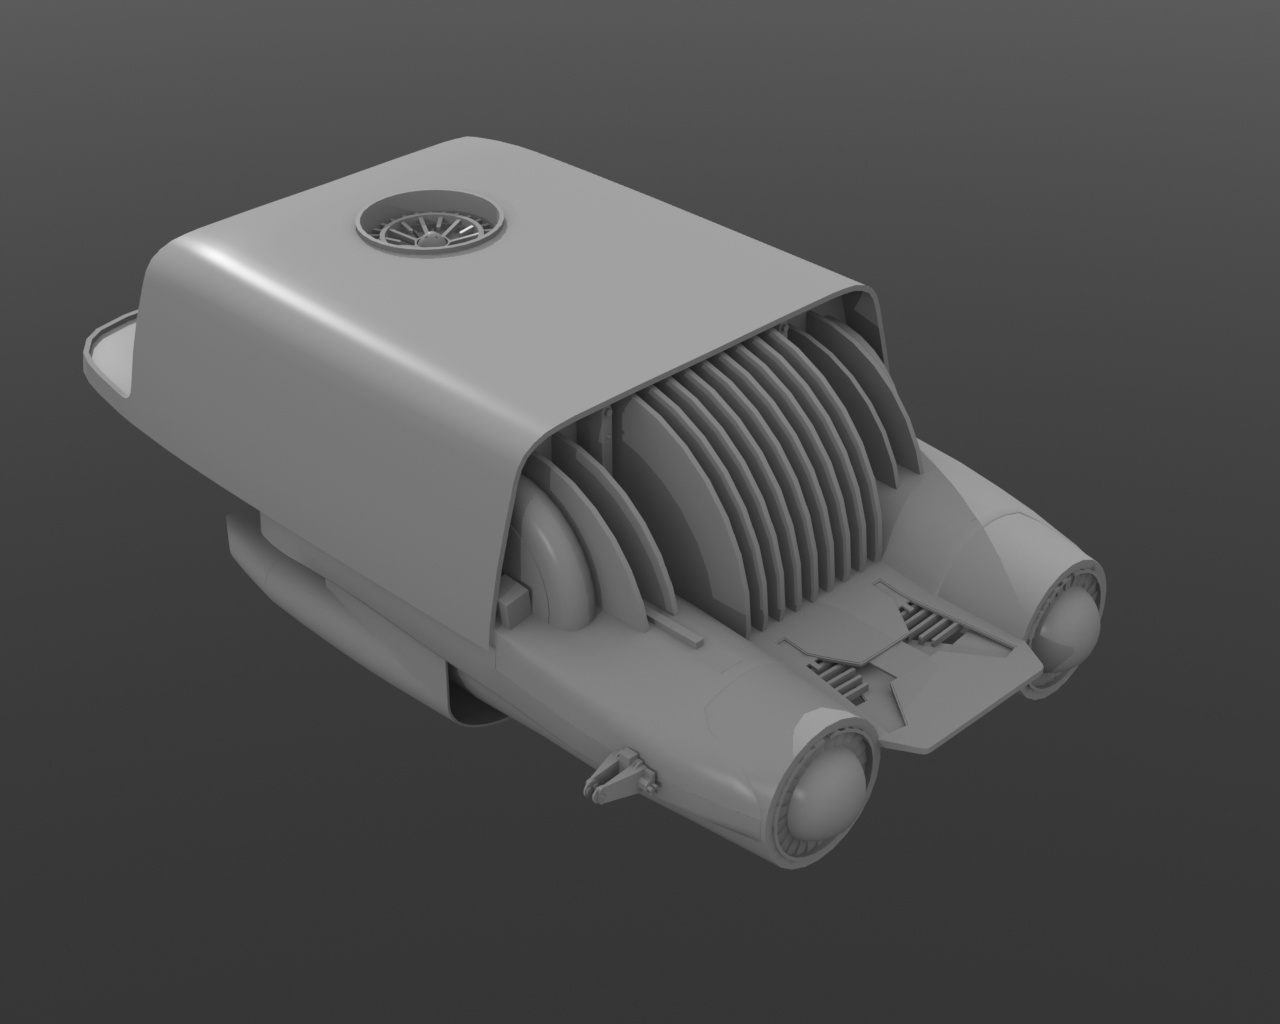
Some very rough starting shapes etc. Got some time in today in and around continuing fatigue, but thankfully that's improving -whew-. A few more shapes to nail, bits to cut in, then into UV and materials and UE.
Post edited by vfxart on


Tagged:
Additional credits
- Icons from Font-Awesome
- Additional icons by Mickael Bonfill
- Banner background from Toptal Subtle Patterns
© Scifi-Meshes.com 2001-2024
Posts
Star Trek III is an underrated film. It easily has more emotion than the previous film. There's the feeling of loss with the destruction of the Enterprise and the death of David, but the feeling of joy at the return of Spock. Plus, they added a lot of cool ship and space station designs.
But hey!- there is nothing like the feeling of getting to the end of some work, knowing you've tightened up some bits of a mesh, solved a few needs, set up one or two small things for the next day... and it looks no different than before. But you know how much improved it is...
Starts to get her paint job tomorrow, after a bit of smoothing and a couple of plates are added.
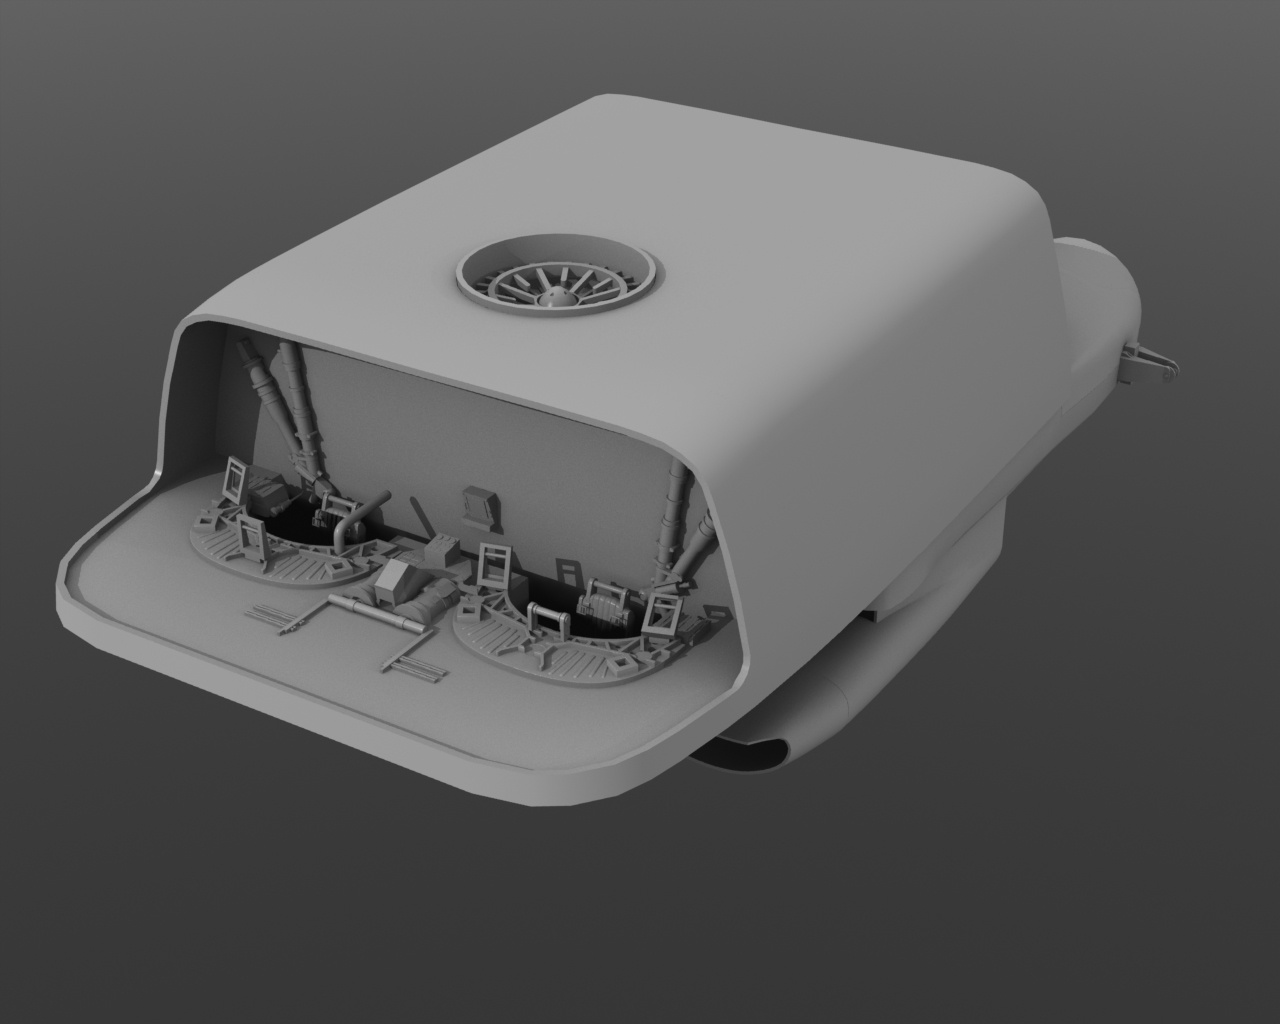
Thank you- there's no reasonable reference to hang much on for the rear wall. It IS very plain, but if there were any indicators of panels, doors, access hatches, etc... I haven't made them out yet. Going to get in touch with the original builder if I can and ask what he recalls, but want to be farther along before I do.
I'll be sculpting the pilots after the paint job and they should detract from the rear wall too. ;-)
Yep, the old poly cleanup day. The rendered result is the same, but YOU know how much better it is, and that's what matters. It can be a real benefit on down the line if your program has polygon limits and your optimization will shave some precious polygons.
I’d love to ask him if the aft effects also came from the BoP hinge blades…
Nilo art directed w Dave Carson on Trek III but wasn't in the model shop. Afaik he's still retired, enjoying a couple of hobbies and not being involved in film.
I created a studio scale master pattern for Timeslip creations of the tug. Your looks spot on!!
I don’t recall anything other than the landing gear on the walls. It’s been a while though.
Plus, with a poorly cat best buddy and still coming off of the fatigue, I am drained. Got basic linework in, now to get her 'real'. Onward!
Hey and thank you! Yeah, have got the kits that make her up, so hoping one day to do the work to form and cast what I need to.
It was 'interesting' to sort out getting the dimensions of the pancake and modeling specifically from those. But it's all turning out. The UV and texture process always turn things up, so a few more tweaks and I should be good, and done soon. STIII Merchantman is up next.
Thanks again... that's a great bit of momentum!
See my gutter leaking in an odd way, go to clean it out.
Pull a handgun from out of the mucky leaves in the gutter.
Cops find three bullet holes during their time here, from two guns. One has a .45 slug that is not from the recovered gun from the gutter. Two holes fit into an event yesterday, but in all this leaves too many questions.
I do not need this. I need work. I need to be settled. Three feet to either side, at the wrong time and it's me or my wife... will be taking the 'deal with what is, not what could have been' approach of course, but progress on this wee beasty might be off a day or so. I'll certainly be coming back to read this for some momentum cuz... I'm gonna need it.
Life my fellow SFMers... deep breaths.
/D
I've got a q for you as I've been tweaking some measurements as I saw something while texturing and 'ugh'... so if you've got a thought, I'll drop a couple of numbers here. You mentioned you worked on this quite a while ago, so if it's not easy to get to, not a problem. I'd just rather not keep doing this again.... and again... ;-)
Along the top of the main body say from the back of the canopy 'glass' to the very rear above the emitter... 150 - 160mm? I have a part that I am using that is 40mm to drop the top vent bits into, and am basing my #s on that. 25-30mm fore, 85-90 aft, but 5mm either way is a lot and the proportions comparison with the various shots that I have always seem just a bit off.
Then, the side mounting ports I have at roughly 6mm. I know Bill said larger, but what I'm getting with my ref isn't letting me go up to 1/2" sq brass stock to set into a 3/4" rod...???
Thanks again...
/D
I've hit a wall and want to ask if any folks here have got ref other than the Bill G photos (which is what I've been working from)
With the screwy (naturally) lens choices for the shots, and of course the angles that make up this beauty not allowing a 90 degree angle in sight... ;-)
I've hit something of a brick wall and need to go back to the model stage. But I do not want to keep doing that over and over... bad enough to have got this far (I know a lot of you feel this pain, and all art is about what we do when we take a lump... well, onward!) But for best foot forward, I need better ref. I have the donor kits, that's not the issue- it's sussing out things that can't be seen in BG's 7-8 or so photos... any helpers? Other angles? Dimensions? Dropping in where we left off before the gun incident. Obviously the bips above and below are markers for the light flashes that the animators added in III.
/D
btw- no, none of the produced bits or blueprints are correct. The eaglemoss looks close, but I can't see enough of the ship to know what was compromised for production.
Thanks...
(cracks knuckles) Just when I got out the shuttle to hit the Merchantman for a bit ;-)
Easier to drop a pic in. I can see more proportions being off with UV and texture underway; trying to drop lines in in areas that aren't aligned correctly, and where I should not have to re-scale a graphic for it to sit properly (discrepancy between cockpit and at upper rear of main hull). That sort of fun.
:-)
Switched back to the Merchantman today, got some fresh eyes for this now. Before I jump back into wrapping her up (and as I said, if I'm going to put time in to resolving areas that don't agree, I think I'm better to wait a bit and see if I can get things corrected no?) :-D
Anyway, this is the last bit that I'm trying to suss out.
http://srsprototyping.com/latest-project/studio-scale-s-t-space-dock-tug/