Greetings!
Welcome to Scifi-Meshes.com! Click one of these buttons to join in on the fun.
Quick Links
PracticalU.S.S. Trieste (DS9 Kitbash)
 BolianAdmiral


 1216
Torrance, CaliforniaPosts: 2,644Member
1216
Torrance, CaliforniaPosts: 2,644Member


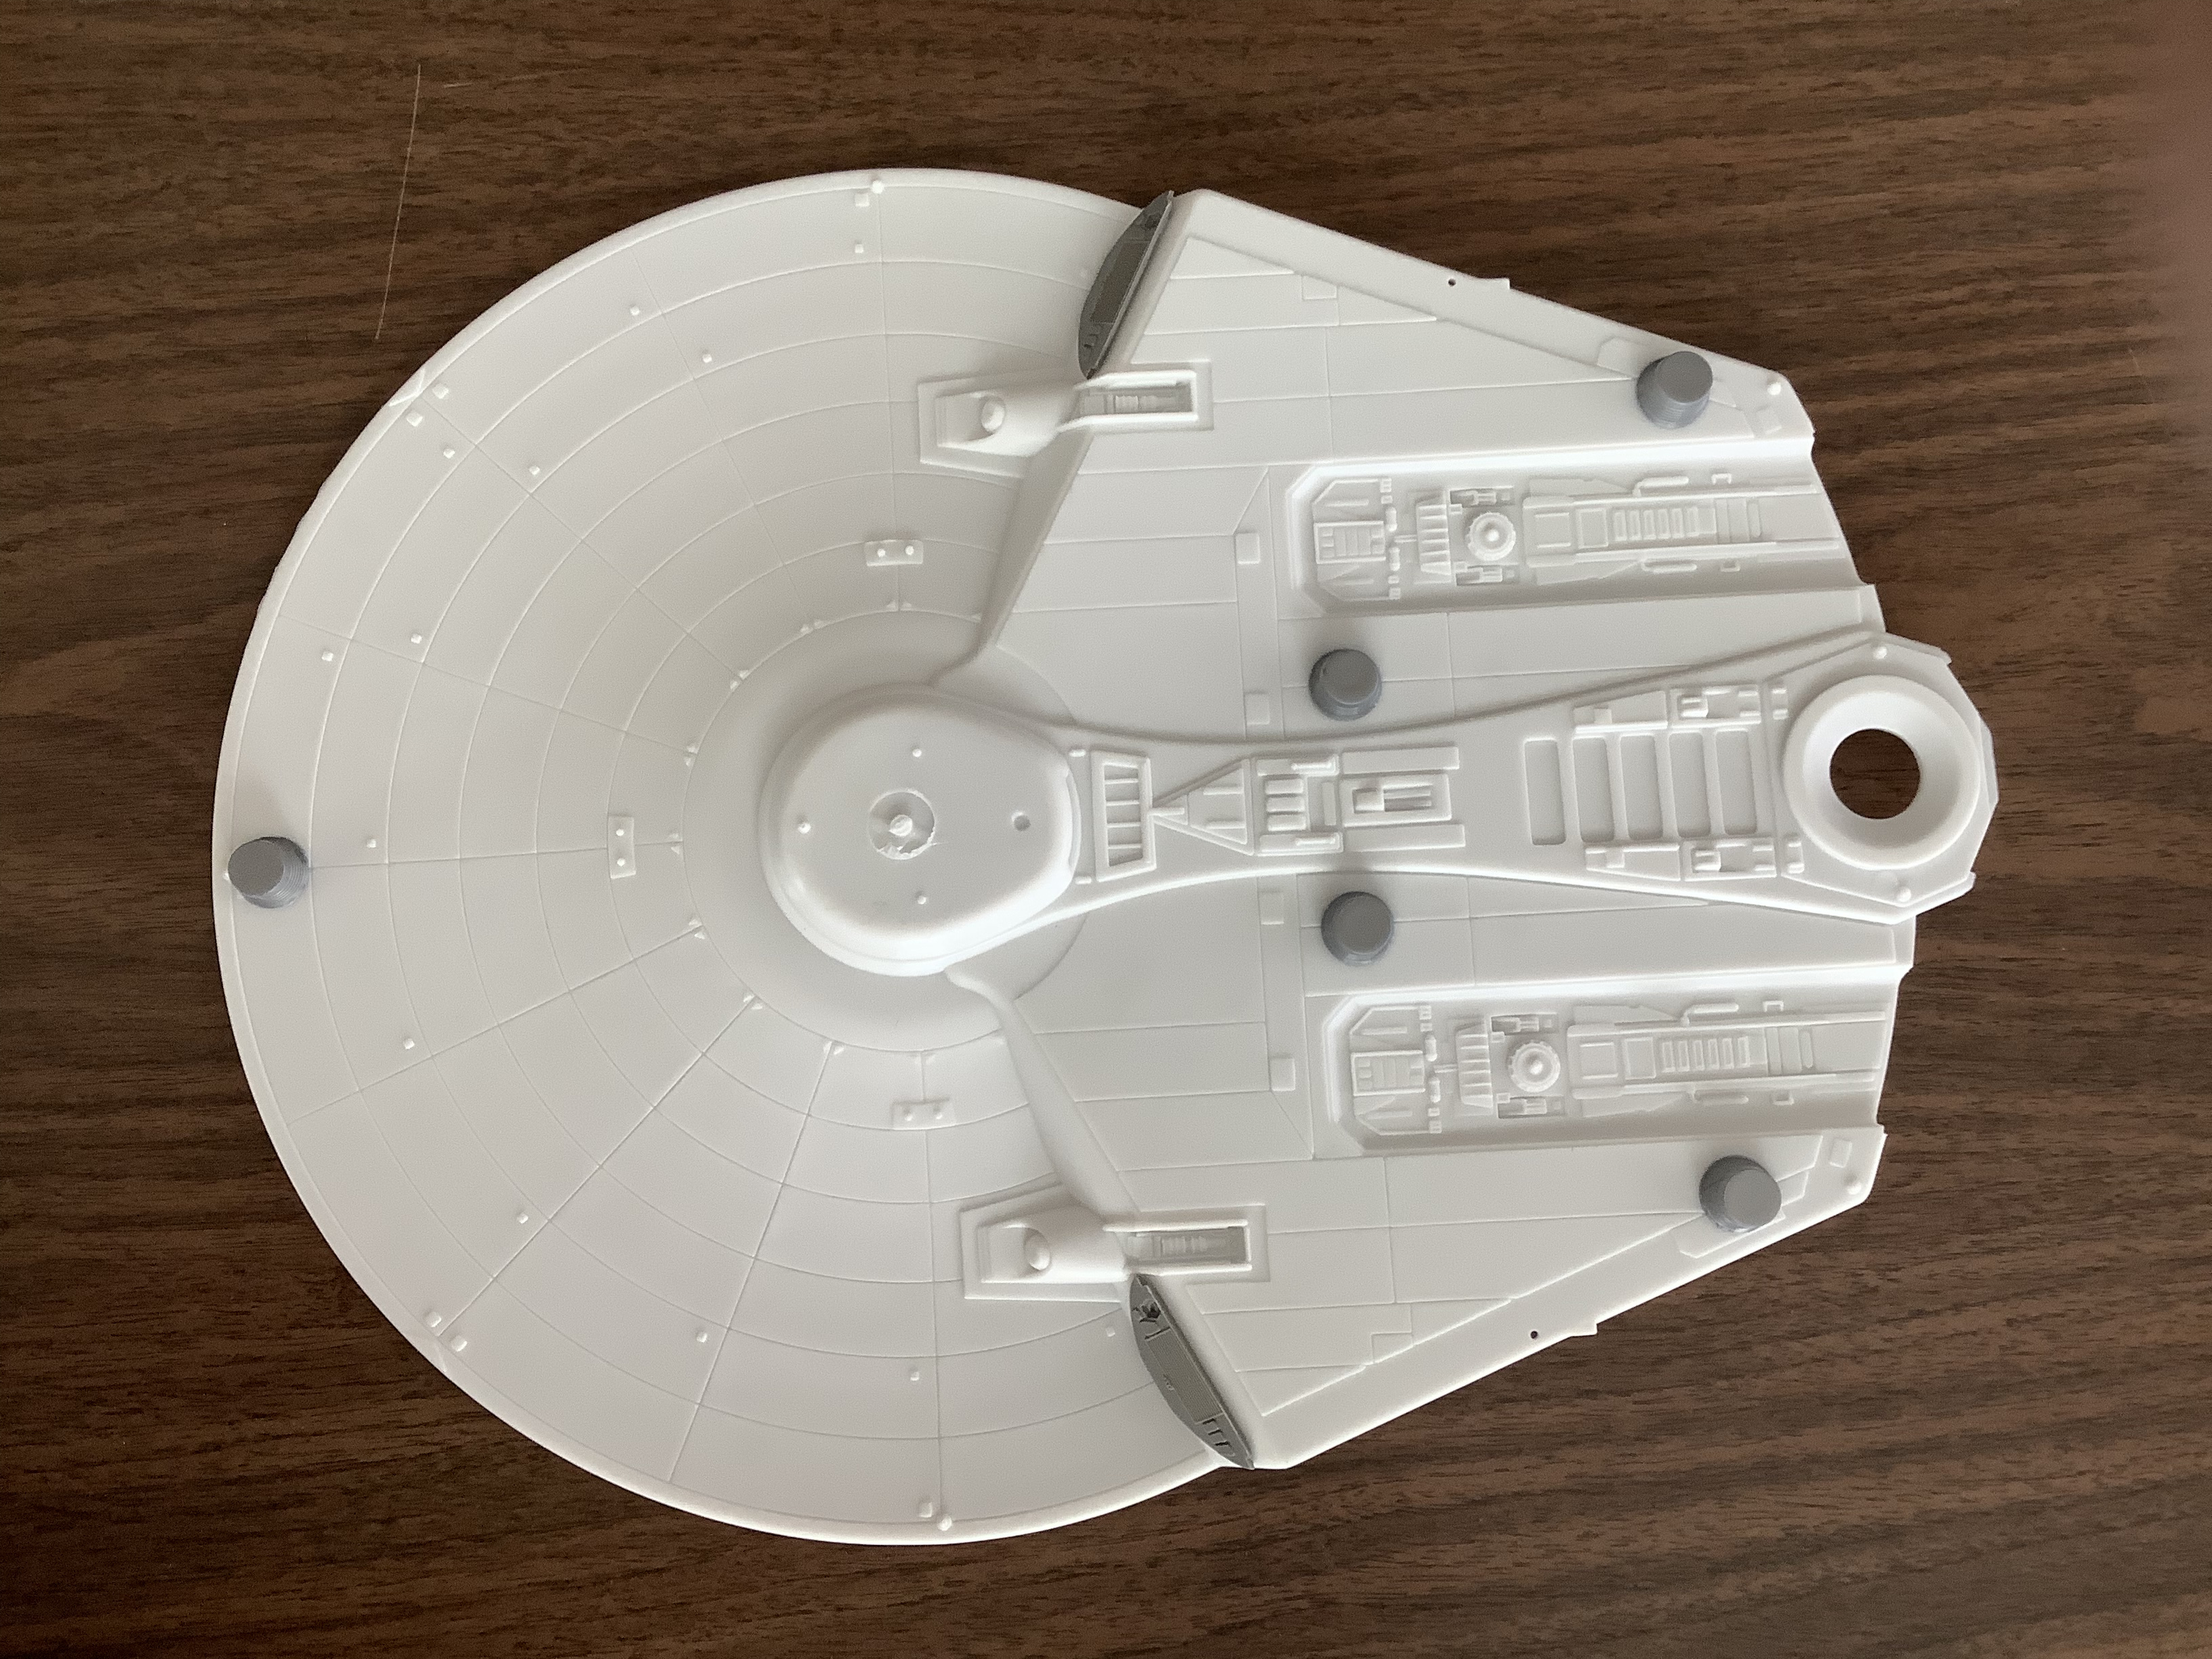
Since I finally accumulated all the necessary bits and bobs for this build, I figured I’d take a break from the Antares/Litvyak build, and work on this - the Trieste-Class ship from DS9 (and presumably TNG). I found some surprises regarding the Miranda-Class ships seen during the Dominion War fleet battles, and I will be drawing upon those when it comes time to detail the underside of the Trieste. I will post those new Miranda references when the time comes. Here’s the first WIP image. All the major conical bits and the Voyager shuttlebays glued onto the saucer surface. There are two more conical bits which support the forward ends of the TNG nacelles, but I’ll wait until nacelle time comes to glue those, as I want to get the positioning right. I’m using a saucer from the most current release of the 1/537 Reliant, and I noticed that this saucer deletes the windows on the forward edge/slope of the saucer extension, which is actually better for the Trieste, since I don’t have to worry about filling in any remaining windows that are left peeking around the Voyager shuttlebays.
Post edited by Guerrilla on

Tagged:
Additional credits
- Icons from Font-Awesome
- Additional icons by Mickael Bonfill
- Banner background from Toptal Subtle Patterns
© Scifi-Meshes.com 2001-2024
Posts
Next step will be to primer the saucer and TNG nacelle bodies. For this I will use black primer, as I have a plan for the windows… I will primer the saucer in black, then make window masks using masking tape, lay those down, then apply the base coat. Then, I’ll remove the masks to reveal black windows.
EDIT: The primer IS black… the sunlight makes it look dark gray.
I have seen people do what you did and then just scratch the top coat off with a stumped down toothpick to reveal the black underneath. I think they used an etching gloss paint though.
Another way in the future is to do like a lot of the war model guys do is paint the kit fully then use a artists acrylic and paint the black into the recess then wipe it away. It works best if your into the paint with gloss only then use a matte overcoat to dull things down as the gloss is easier to get the window paint off. Some will drybrush the hull color over the windows after to get an even sharper edge.
If you plan to do a tonne of these I might consider getting at least a cheap single action airbrush and a small compressor with a long airhose to absorb the pulse. It drastically cut down on paint thickness and paint usage for me before I had to give up painting.
Oh and I would shoot the inside of those kits with the light plastic with a coat of black or dark gray. It helps give them a more solid feel. It does add a step of scraping all glue surfaces. It really helps on models that use lighter paint colors or ones known for not covering well like yellow.
The vinyl is more of a sheet than a tape. So look for sheets of it. It should be in one of those racks like they sell fancy paper in.
Here is a quick google result.
https://www.amazon.com/Adhesive-Vinyl-Sheets-Permanent-Silhouette/dp/B077GSPBQS
Go for the thinner stuff if there is an option.
Casting isn't too bad I used to do it as well. Most of what I have seen those parts would all be super easy to cast as they all have no overhangs.
I suggest some of Steve Neil's videos as he has some practical tutorials on making molds and casting. That is if the videos are still up.
For ventral windows, I would guess the there were none on the model, aside from the ones on the kit. Unless it was a ship that required lots of beauty shots, there would not be a lot of effort in un-seen details.
To show windows on the hull, it may be easier for you to mask off around the windows and paint them in after the hull color is done. There may also be a masking kit for the Miranda in the scale you have there.
Looking forward to more progress.
Instead of cutting a thin width of tape the the length you want for the window height, use a tape width that will be you window height. That way all of the windows will be the same height and not vary as I see in your photo. It is easier to look past varying window widths than it is to look past windows that are not the same height. It is too distracting from the rest of the paint work.
I would also suggest to invest in some Tamiya masking tape. It works great for this application because that is what it was designed for. I use it exclusively for detailed masking.
If you look at my builds in the 'finished' section of this site, you can see all of the masking I have done, using Tamiya masking tapes.
Looking at the filming model image you posted, the windows do look uneven.
Looking forward to more progress.
The high contrast on a lot of these was just do you had something more than a white blob on the crummy tvs back then as well.
I do suspect those windows are UV reactive decals or paint. I am sure the nacelles have something like that on them too. I think in one of the dvd specials or some HBO one they showed how either reflective decals or UV paints can be used to mask off light passes or to cheat and do in camera fake lights via a off screen fill light.