Greetings!
Welcome to Scifi-Meshes.com! Click one of these buttons to join in on the fun.
Quick Links
PracticalHardware Lightsabers Thread


I got a few requests to show some of my other Hardware lightsabers. I decided to start a new thread to showcase them, as it is easier than trying to change a thread title.
As a reminder, here's the Lightsaber from the other thread:
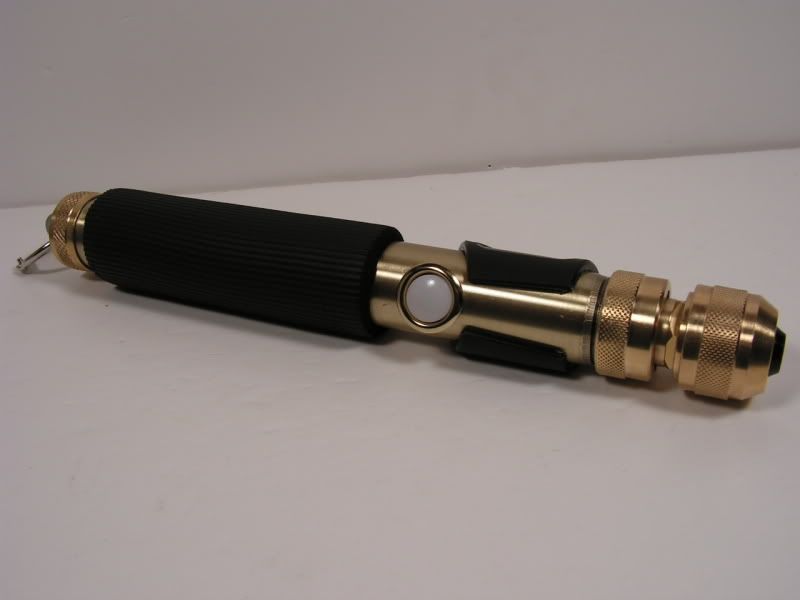
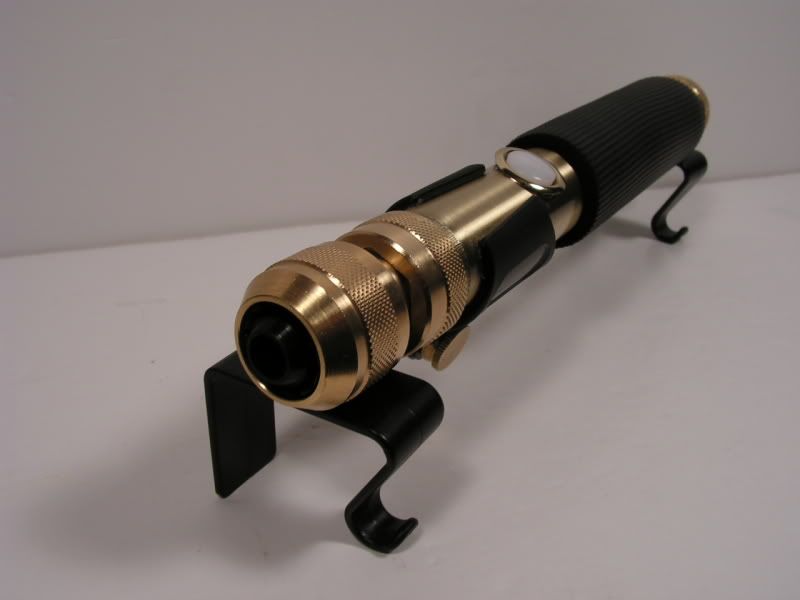
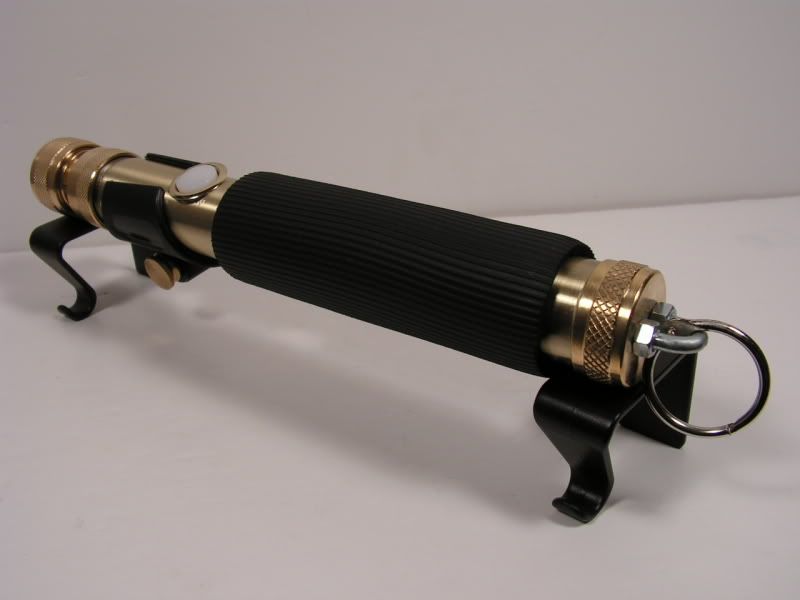
I made this as a Christmas present for a Jedi friend of mine. This is one of my favorites. It's made from a bunch of left over hardware I just had lying around. My favorite thing about this hilt is the back collar thing the fits around the gold button. That was part of a very old microphone stand, and it looked so good when I slid it on it made me wish I could buy a dozen of them. But of course I can't buy any more like that, because it's a piece of hardware from, like 1969 or something. Too bad.
I was sorta thinking of Windu's hilt, as it's probably my favorite. Of course making it mostly gold accounts for much of the resemblance, but I also tried to match it's shape as best I could with the hardware I had.
And here's another one I did:
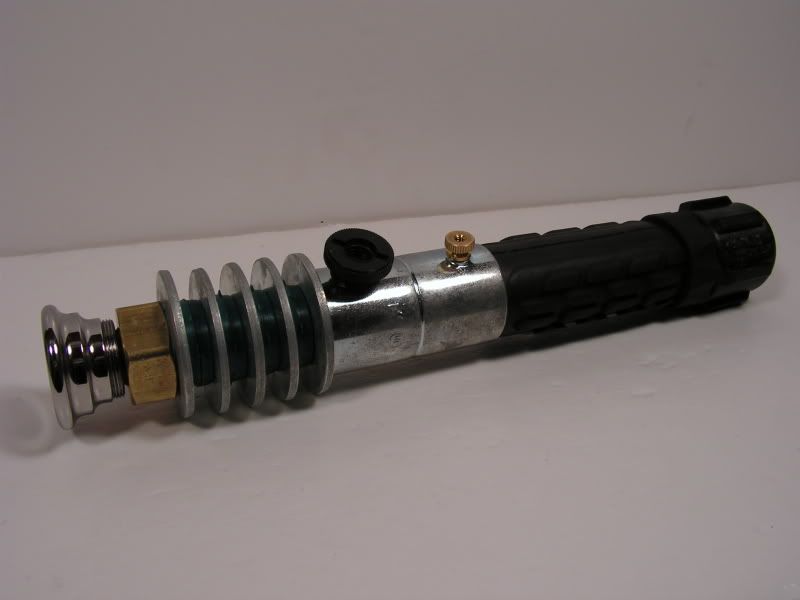
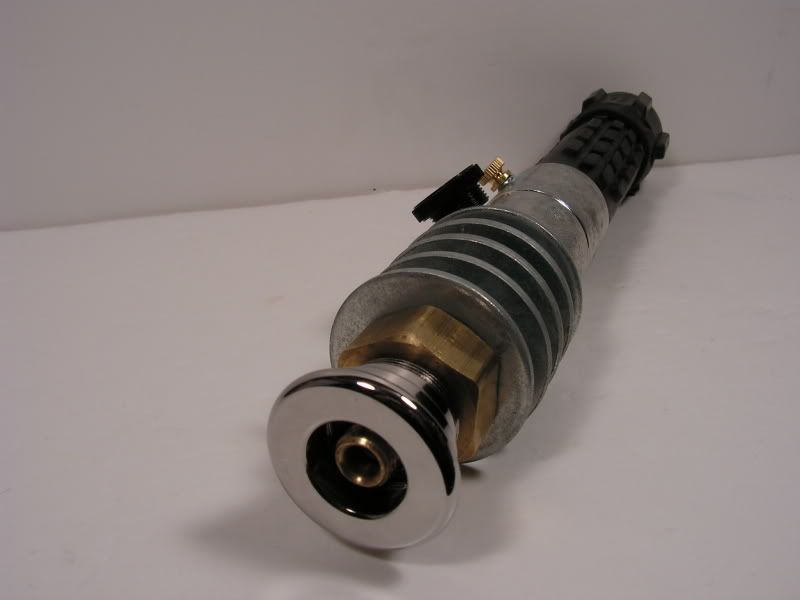
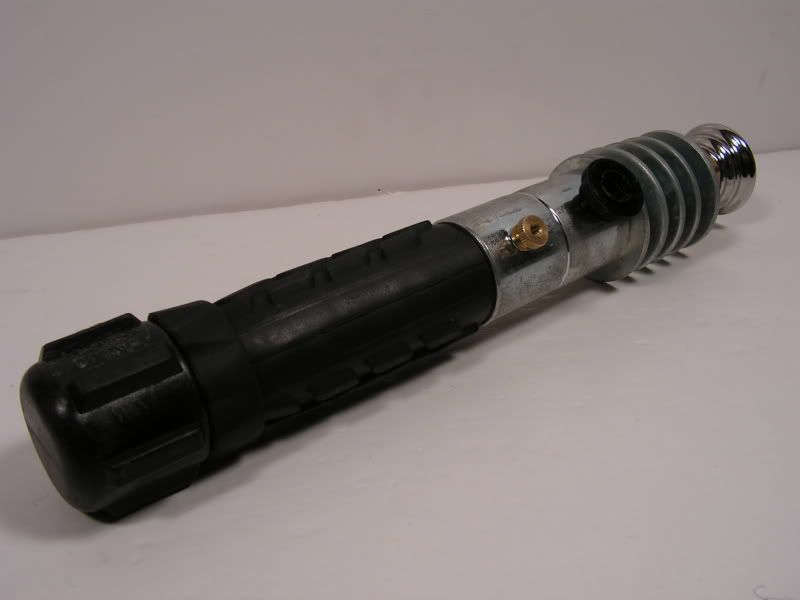
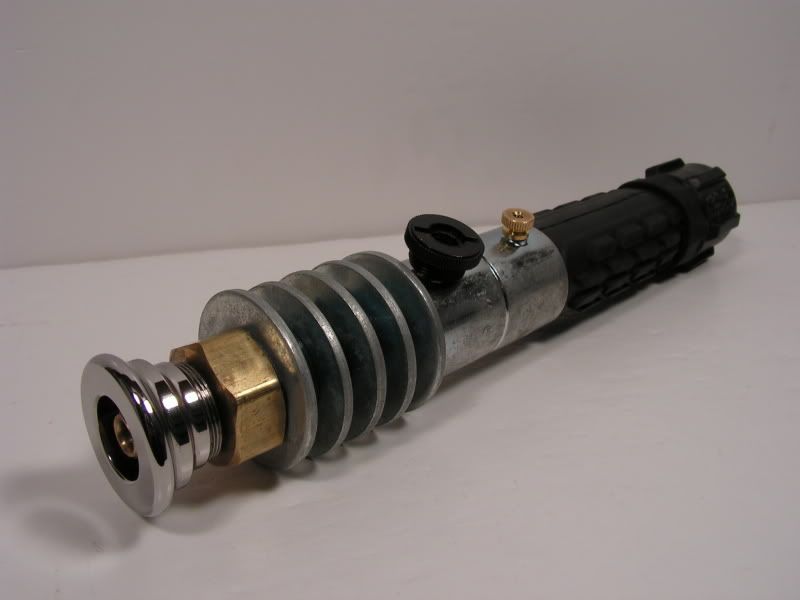
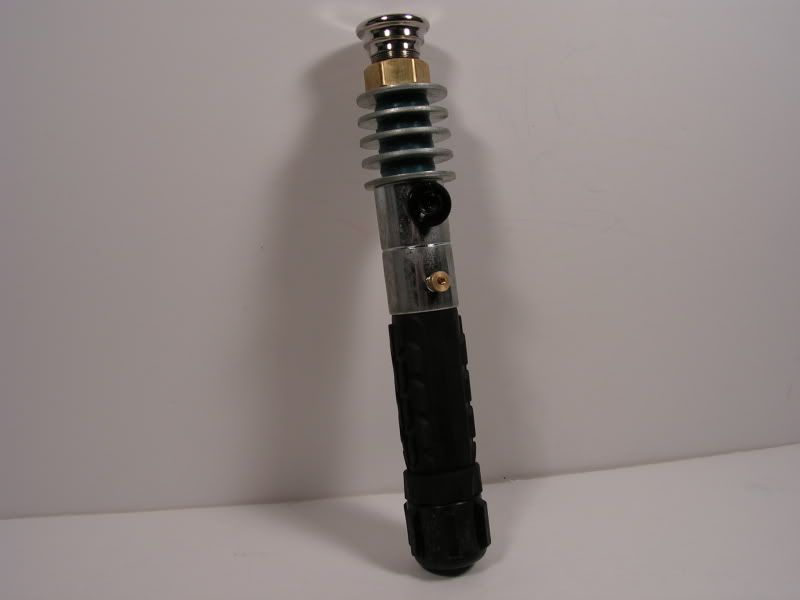
This one is rather loosely based on Luke's ROTJ saber.
It's VERY heavy. You could actually club someone with just the hilt. Starting from the top of the hilt and working down: The emitter is a sink aerator, with some sort of little nozzle inside. Then a large brass bolt from a random plumbing fixture. Hose washers and large metal washers alternate to make the "spine" section. Then a coupling sleeve of some sort, a handlebar grip around a wood dowel, a rubber sealer from a garden hose nozzle, and a propane gas cap. My sabers are usually held together by a long nut section, cut to length, and then bolted at either end. This one also used some welding putty.

As a reminder, here's the Lightsaber from the other thread:
I made this as a Christmas present for a Jedi friend of mine. This is one of my favorites. It's made from a bunch of left over hardware I just had lying around. My favorite thing about this hilt is the back collar thing the fits around the gold button. That was part of a very old microphone stand, and it looked so good when I slid it on it made me wish I could buy a dozen of them. But of course I can't buy any more like that, because it's a piece of hardware from, like 1969 or something. Too bad.
I was sorta thinking of Windu's hilt, as it's probably my favorite. Of course making it mostly gold accounts for much of the resemblance, but I also tried to match it's shape as best I could with the hardware I had.
And here's another one I did:
This one is rather loosely based on Luke's ROTJ saber.
It's VERY heavy. You could actually club someone with just the hilt. Starting from the top of the hilt and working down: The emitter is a sink aerator, with some sort of little nozzle inside. Then a large brass bolt from a random plumbing fixture. Hose washers and large metal washers alternate to make the "spine" section. Then a coupling sleeve of some sort, a handlebar grip around a wood dowel, a rubber sealer from a garden hose nozzle, and a propane gas cap. My sabers are usually held together by a long nut section, cut to length, and then bolted at either end. This one also used some welding putty.
Post edited by Polaris 004 on
Tagged:
Additional credits
- Icons from Font-Awesome
- Additional icons by Mickael Bonfill
- Banner background from Toptal Subtle Patterns
© Scifi-Meshes.com 2001-2024
Posts
So this one's pretty simple: just PVC pipe couplings segmented with washers and held together with a long bolt. I capped the end, shaped the emitter end with a dremmel tool, and inserted an upside down led flashlight reflector into the emitter opening. Add a few random dials and your skills are complete.
was the flashlight localy bought? any info on the flashlight? maybe some on ebay?
so the balck end of it, it's just a piece of a PVC coupler painted black?
ah........ i see now (taking another look at the black rings), they are a grommet of some sort. use to use them in the car in the firewall for where i had wires passing through to help prevent any kind of electrical short
i doo see how the 3 sections are the PVC couplers and the cap at the end. would it have been just as easy to sand out the inside of the couplers (need a drill press and drum sander, or at least a dremmel with a sanding drum to do it easier), use a touch of PVC glue and fassen the copulers to a piece of PVC pipe. maybe find some way of making the end cap screw off to allow access for some batteries to make it light up?
sorry if i go from thought to a process - thinking as i go typing along here........
is that a tire valve in the side?
mmmmmmm ............ brain food............. great, just what i need, more projects to work on
Most of my hilts could have room for electronics in them. They usually have a hollow tube or a series of hollow tubes through which a long bolt is passed through, to hold everything together. I don't know much about how that all works, or how those blades are held onto a hilt, but it seems like you could work SOMETHING out. I did make a couple of dueling sabers and was able to screw doll rods into place tight enough that they do not come loose.
My most durable hilts all are held together with long bolts. Whenever I use wield putty or bonding agents, I get pretty good results, but things do come apart more that with just a plain bolt compressing everything together. When I wield one of those hilts, I can cut loose, without worry. When I weild one that's been glued or bonded, I'm always worried something is going to fly off. Sometimes it even does. Still, I suppose it might be possible to glue something together with good results...
Yes, that is a tire valve. Of all the hardware i had I just thought it looked the best. But of course you CAN tell it's a tire valve cap... Not my most convincing piece of work.
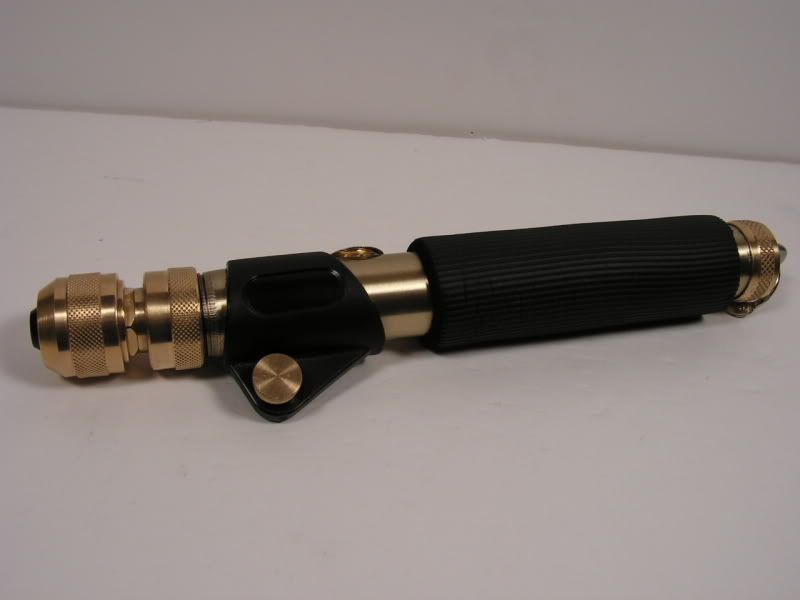
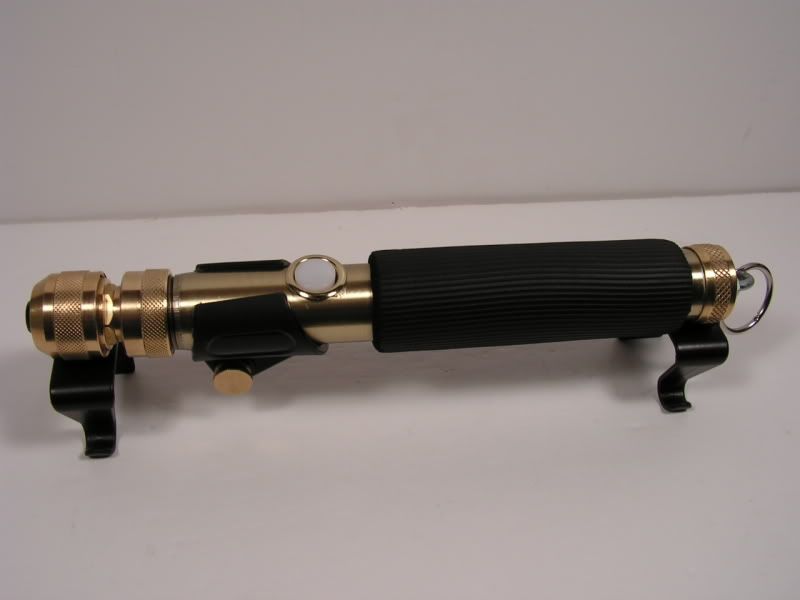
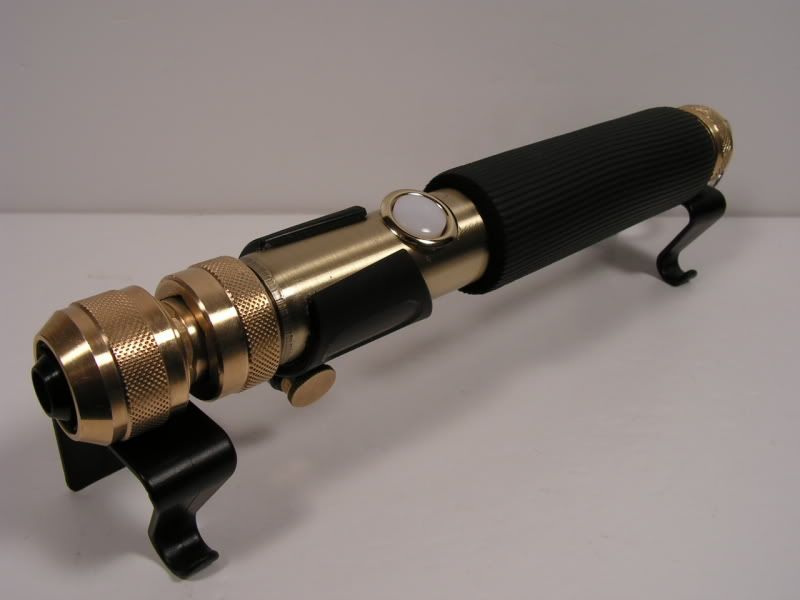
It has a slide switch instead of a push button activator. The emitter at the end is a hose nozzle. The hilt end is a matching hose cap. The hilt pads are simple stick-on friction pads. The activator switch is set into a piece from a screen door, and the bracket around the pike is some sort of pipe mounting brace. The brass tuner control on the opposite side I just found laying around. The little black piece is from a large GI Joe Figure. I suppose if you frequent the hardware store a lot, this hilt isn't too convincing. It's not my favorite example of my work, but I do like how the elements came together. This was my second hilt I ever made, so it's a little cruder than some of the others.
They had one day to make the saber, and then the sabers where placed on display for con goers to view and vote on. On the third day the Judges would evaluate them and give their vote.
It was all for barging right, but man, some of those sabers looked like they were professional movie props.
Cool. I wish I had seen that. What a great idea.
I think the first one is my all-time favorite so far; the elements really went together for a satisfying whole. The second is sorta neat because it's so simple, just a few pieces fastened together, but I think the button and the grip sorta sell it.
I keep expecting to run out of new ideas and repeat myself, but so far no two of these have looked much alike.
I also found some pics of the first hilt I ever did. I admit this one is a bit doofy-- but what can you do?