Greetings!
Welcome to Scifi-Meshes.com! Click one of these buttons to join in on the fun.
Quick Links
3Da Blender Ambassador Class Christmas


I have a Trekker friend for whom I wanted to make a mesh Starship for the holidays. I asked him what his fav class was, and he said it was the good ol' Ambassador class. Pretty good taste if you ask me.
I looked around for a good mesh I could work off of, borrow from, rip off etc, but was surprised not to find anything usable. I concluded I would have to make one myself.
I'm probably not a good enough modeler yet, to be even attempting this, but then a again my friend is not the obsessive I am, and I can probably make a model of good enough quality to satisfy him. So here goes.
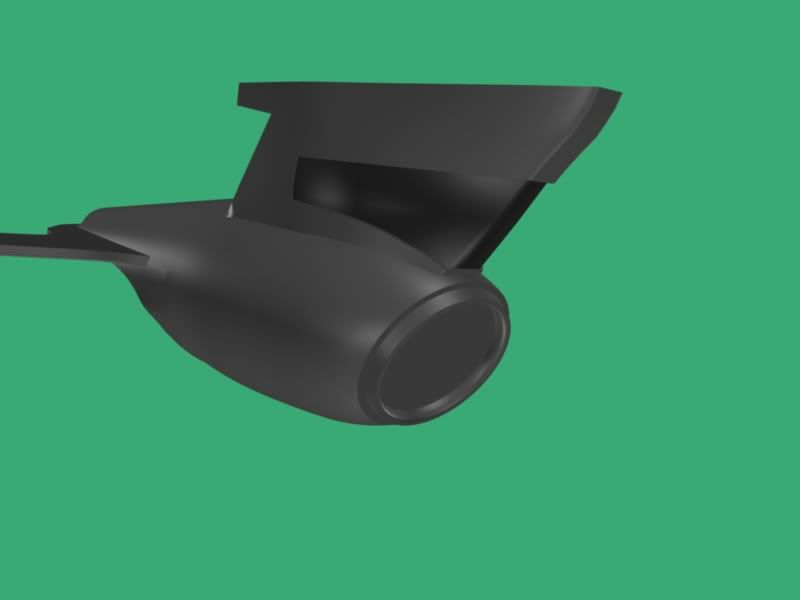
I'm going to re do the entire neck, as I got the initial subsurface shape just a bit wrong, and also the bottom of the inset frame should follow the contour of the secondary hull. I almost got it, but not quite.
This is going to be the Enterprise C version of the model, although I went with the wider opening to the shuttle bay, because it looks more sensible to me. Of course, I can alter the mesh to make the later variant after I'm done.
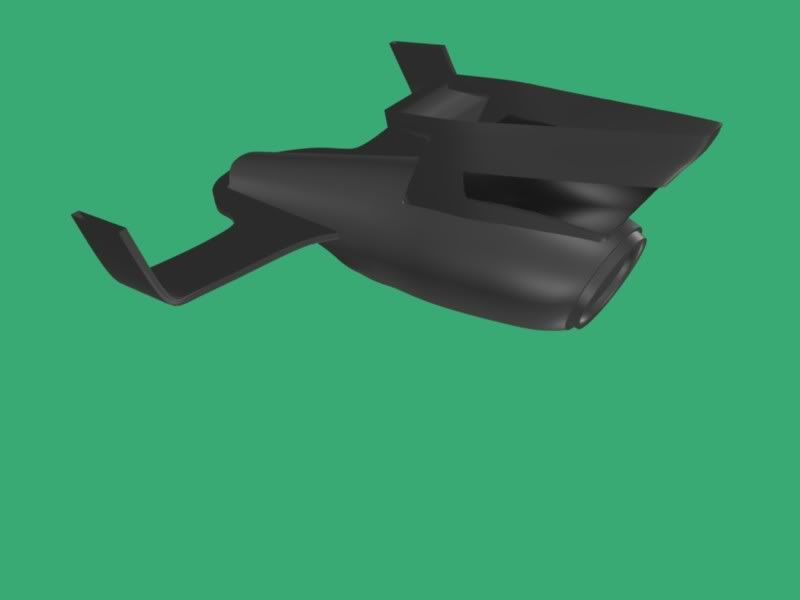
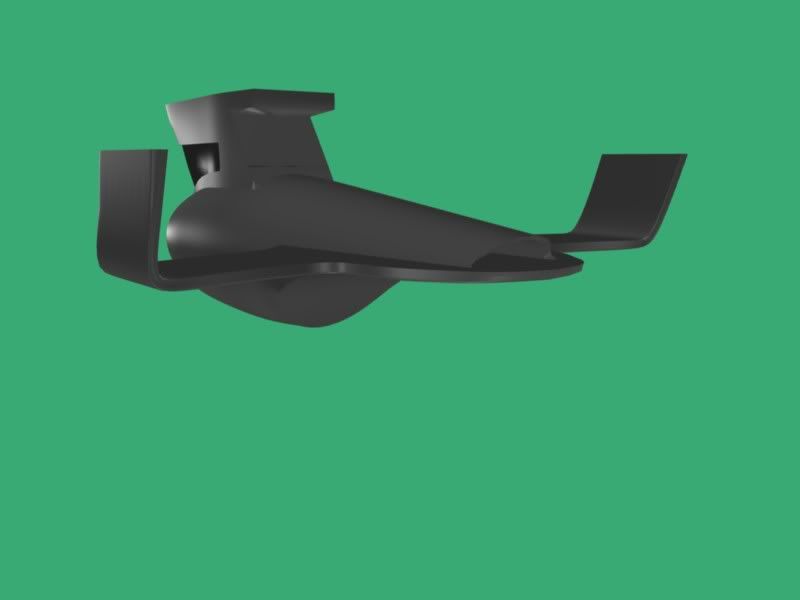
Some smoothing problems on the backs of the nacelles, I'll have to fiddle with the verticies there some. But otherwise I think they are pretty close. They may not look like much, but I think these nacelles are some of my best modeling to date.
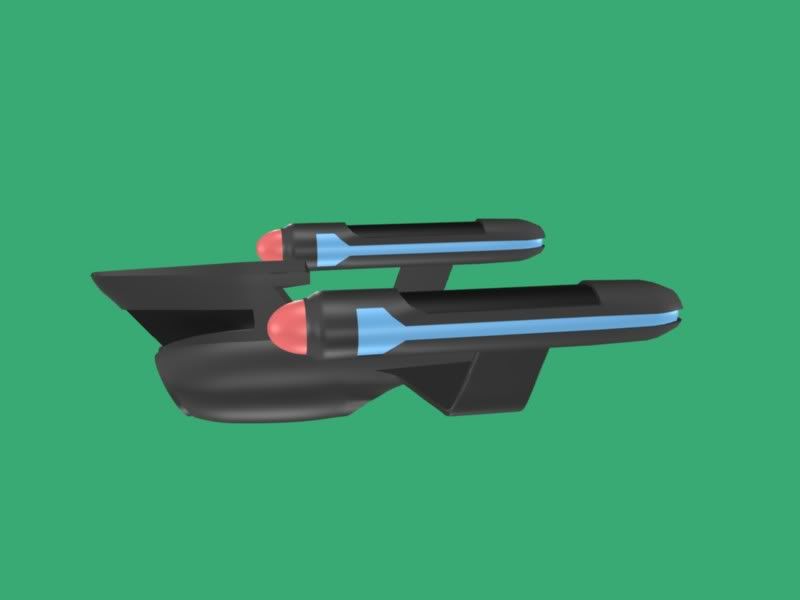
Here's a good angle. Sorry about the lighting; I'm not very sophisticated with my riggings yet. I better read a bit more.

I welcome all comments and crticisims. Thanks.
I looked around for a good mesh I could work off of, borrow from, rip off etc, but was surprised not to find anything usable. I concluded I would have to make one myself.
I'm probably not a good enough modeler yet, to be even attempting this, but then a again my friend is not the obsessive I am, and I can probably make a model of good enough quality to satisfy him. So here goes.
I'm going to re do the entire neck, as I got the initial subsurface shape just a bit wrong, and also the bottom of the inset frame should follow the contour of the secondary hull. I almost got it, but not quite.
This is going to be the Enterprise C version of the model, although I went with the wider opening to the shuttle bay, because it looks more sensible to me. Of course, I can alter the mesh to make the later variant after I'm done.
Some smoothing problems on the backs of the nacelles, I'll have to fiddle with the verticies there some. But otherwise I think they are pretty close. They may not look like much, but I think these nacelles are some of my best modeling to date.
Here's a good angle. Sorry about the lighting; I'm not very sophisticated with my riggings yet. I better read a bit more.
I welcome all comments and crticisims. Thanks.
Post edited by Polaris 004 on
Tagged:
Additional credits
- Icons from Font-Awesome
- Additional icons by Mickael Bonfill
- Banner background from Toptal Subtle Patterns
© Scifi-Meshes.com 2001-2024
Posts
I can spot a couple smoothing problems though, mainly on the back of the nacelles and in front/below the pylons on the main hull.
Yup. The problem on the backs of the nacells was easy to fix, just a few extra verticies. But the other problem, with the "under swoosh" area beneath the secondary hull... that one is going to hound me. I'll try to re-build that area a few times and see if I can get it perfect. This is my fourth try at the secondary hull, and I've probably re-worked that part of the ship a dozen times. So far, this is my best attempt. Here's the problem area in close up:
Any advice would be welcome.
Of course the pylon platform covers most of the offensive area up. But I still would like to make the whole seam completely disappear. I know I saw a tutorial on this subject somewhere, but I haven't been able to find it.
Is there any chance that texturing the hull will hide this flaw?
(I see now there is another problem on the curved bend in the Pylon. I may need to re built it as well.)
I suppose you may not have thought this far yet, but how will you make the window cutouts? Will you do them after baking the subsurf, or within it?
I think I got it.
There's still some distortion behind the pylon platform, but now at least everything visible is smooth.
Here's a wireframe. The double verticies were in the half loop I have highlighted. I removed them and the problem went away. I guess I left them because sometimes when you remove them, it makes huge smoothing problems. But that's probably only because I did something else wrong? Worked great this time!
Thanks, guys.
Thunderchild, I am such a Blender noob, I didn't even realize you could cut windows BEFORE you applied the subsurf! Wow, what a thought. I'll have to mess with that some. What are the advantages of doing it that way?
Generally, for my models, and my purposes, I don't really need to cut windows. I like having fairly nice looking meshes that render fast in animations. Thus I generally do not cut windows much. Usually my windows are just white objects raised just abouve the hull surface. If I wanted to get in really close, I would just add the cut windows that would show in the scene.
Poly count is always a consideration. This is another advantage of subsurfing - without altering the mesh itself, you can have different levels of detail by just one klick on the setting for subsurfing level.
Good start so far. :thumb:
I have a slightly better lighting rig, now, but it's still not great... it make a bunch of bright spots on the model. Better than it was, though.
Everything seems to be going well... but it's time to alighn everything together. I need to snap something to the grid and line up the sub- components on it.
Pylon smoothing...check! Underswoosh smoothing... check! Bring on the next problem!
Hmmm. The neck still is not quite right. The bottom of the ribbed planes still do not follow the contours of the secondary hull. I think I know why this keeps happening, now. It's a perpective problem when I'm working on the model from a flat side view. I could fix it, but I think I like it the way it is better? It's sort of swooshy and fast looking, though it is a significant deveation from either version of the studio model. What do you guys think?
For now the lighting should work very well, the current setup allows you to sot smoothing problems very fast
Good eye. I moved the saucer up just a tad (actually I moved it up only about 2 and 1/2 tids.)
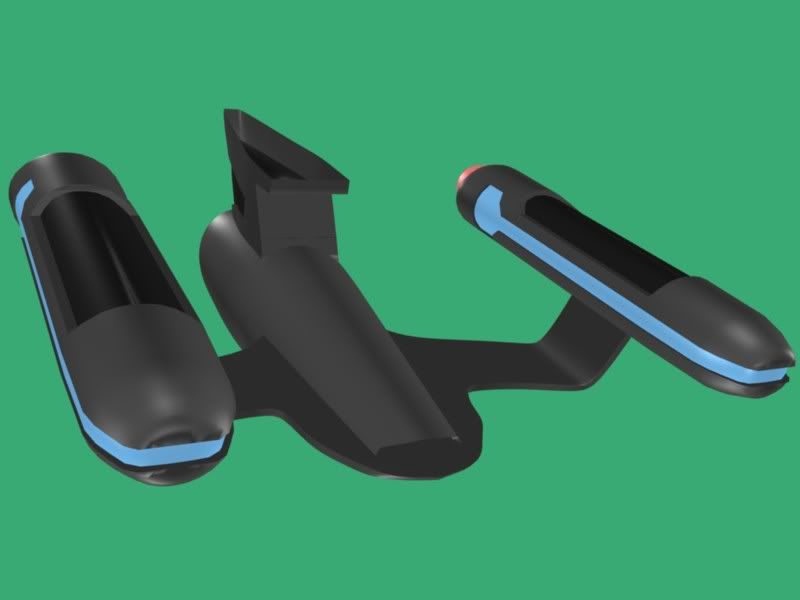
I don't have all the rough modeling done yet; there's still a lot of detail missing. But I wanted to see how much of the colors I could add with physical modeling, changing the material color of actual faces. Turns out, I'm going to be able to do most if not all of it in this way, without needing to rely much on texture maps. This is my preferred way to work, so I am pretty happy.
You're right Melak, The current lighting rig is working out pretty well; I will be using it as my standard set up until I figure out something better. I just wish I could show off my work a little more effectively. Other WIPS look so well lit...
I have been working on this with pretty much all my spare time. At the rate I'm going, it should be done well before Christmas
These colors are based off of the studio model, and of course they are exaggerated. Everything will look greyer and washed out in the animations, as the ships do on the screen. But keeping them brighter now helps me see more easily what I'm doing.
All comments welcome!
Chris
No, I understand exactly what you mean. You're right. I may graduate to something more grand eventually, but right now I find that I enjoy making medium poly ships that render up and animate quickly.
I also think it's probably the fastet way to learn computer modeling. When working with these mid-level meshes, your mistakes are much cheaper, and slow you down less.
The Ambassador's one of my favorite ships and this is a sweet version. The only thing I have a question about is something on the neck. As far as I know, the rear face of the neck should have harder edges. Right now it looks a little too rounded.
Thanks! I'm glad I'm doing it justice to a fan of the class.
As far as the comment about the neck, my general goal was to have a high degree of fidelity to the studio model:
As opposed to some computer models which made those edges VERY sharp. (Which looks very cool, but to me a little unreal.)
Here's my neck up close. (The lights are making it look a little sloppier than it is.)
It's the least detailed part of my model, because even at this point I think I may want to try to rebuild it one more time. I guess the edges are a bit on the baloony side... I'll mess around with it, maybe crease the subsurf and see if I can get it a bit sharper...
Thanks again for the comments.
Yeah, I was lucky to find that pic. Sorry, but I don't know who to credit. I just downloaded a bunch of pics from everywhere when I started this project.
There are no visible torpedo bays on the model. I just put them in the same place they are located on the Galaxy class. But I had half a mind to make those little ovals on the front of the pylons the torpedo bays. Plenty of room in there, good firing arcs, why not? I don't know of any on-screen examples of an Ambassador class firing torpedoes? Any thoughts?
OOPS! I have to move the saucer up just a bit more... those windows on the front of the neck are getting squished. There's always something I don't catch...
Note to self: I need to bring out the shape of the large hanger door a bit more...
Those windows don't look too bad. Not bad for not cutting a single window onto the mesh anywhere.
How are you doing the windows, if you aren't cutting them out? On mine, I had built them as objects that stuck out of the surface slightly. That worked for distance shots, but not so well close up.
Here's a pic, if you are interested...
Unfortunately, that's as far as I got.
OOOOOH Pointy edges. Makes it look so crisp. Great work on the basic nacelle shape, by the way. That's harder than it looks.
Your model is way better than any free model I was able to download off the net. Most of those looked like they had been done from memory or something.
My windows are also just objects poking just above the surface. (By about .01 or .02, can't be much more than that, not much less.)
To make them look as good as possible, I use a Boolean operation to make an object that percisely conforms to the surface of the hull.
I make the "window stamp" objects a flat lozange shape, extend them really long, and poke them through the hull at the spot and angle I want them. So it's basically a very long cylinder sticking out of the hull, as though a pecil were stuck through the hull. The long sides of the cylinder myst not have any subdivisions, they must be one long edge.
Then I duplicate the faces of the section of hull the "window Object" passes through. I highlight the hull section, then the window object and perform the Boolian operation called intersect.
I delete the original objects, and am left with a new window object that PERCISELY conforms to the surface of the hull. (If the hull is a smoothed object, remember to set the new window object to "solid" or it will look bad.)
I take that new window object and poke it up a teeny tiny bit above the surface. From a reasonable distance, it looks good. If you take the time to color the sides of the object the same color of the hull, it looks even better.
This method sounds involved and tedious, but there are all sorts of shortcuts using mirrior and rotate and whatever. For example, the windows in the neck are each a single object that sticks out on either side of the neck. The windows on the saucer were completed in sections, which I then rotated on the central vert of the saucer like slices of pie. Do it right once, and you can duplicate and rotate it seven more times and cover the saucer.
So sure, it doesn't look as good close up, but on the other hand it saves a TON of time. And for my purposes, my models do not have to be super detailed anyway. I just want to do animated flybys and space battles and shuttle exchanges and so on. If I need to get in really close up, I'll just make that section of the ship more detailed, and cut the windows and whatever.
The rest of the time I want a somewhat low poly model that can render quickly, and is not a pain to move around and manipulate when setting up shots. Through trial and error I now have a sense of the sort of models I want to make. Not super high poly, nor super-low, but right at the trade off point.
If you need any clarification on that window proceedure let me know. I'll be happy to answer questions, or even send some pics.
Chris
It's hard to do the ent-c because we only get to see it in one episode, the winning bidder for the model of the ent-c still has it intact? Because that would be a goldmine for someone with a high res digital camera to do some orthos from.
Heh. Don't worry. I'll turn the lights down in some of the windows, and give the boys a bit of night life. I'm planning to divide the windows into three "subgroups" each with their own material group. Then I will be able to edit the groups and make each third of the windows light or dark. So sometimes one third of the windows will be lit, and at other times two thirds. I remember reading that the Enterprise D model had a lighting arrangement that worked on a similar principal.
There are actually pretty good pics of the Enterprise-C model now, as well as a few different very high-quality orths. (The model is in the redressed form as the Yamaguchi, but the differences are not very significant.) The pictures of the model at the auction are located on multiple sites, and while they may not always be "High res" they are plenty detailed enough. I found every angle I needed and then some. I don't have the sites to reference, but a google image search of "Ambassador Class" yielded everything I needed. Including a detailed anaylasis of the differences between the original Ent C model and the later redress. (In case anyone else wants to give it a go.)
I have ray tracing turned off for clarity, so we can see the details on the whole model. Eventually I will Light it more dramatically, and maybe grey the contrasting colors some.
Here's a preview, but keep in mind the model has no textures, and I don't even know how to put in the "Glowy" effects on the engines and such yet:
Maybe...
http://drexfiles.wordpress.com/2008/12/31/naked-truth-pt-ii-enterprise-c/http://www.st-bilder.de/html/ambassador1.html
Star Trek USS Enterprise (NCC-1701-C)
And other refs: Ex Astris Scientia - Starship Gallery - Ambassador
Hope that helps.