Greetings!
Welcome to Scifi-Meshes.com! Click one of these buttons to join in on the fun.
Quick Links
Practical1:2500 scale Romulan Nova Z-1 master Finished
 Odyssey Slipways0
Posts: 0Member
Odyssey Slipways0
Posts: 0Member
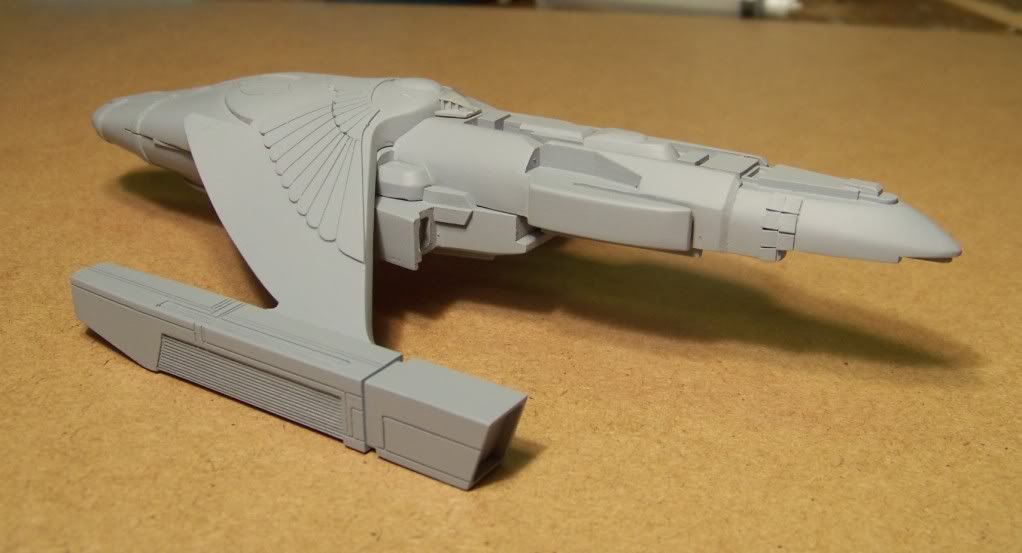
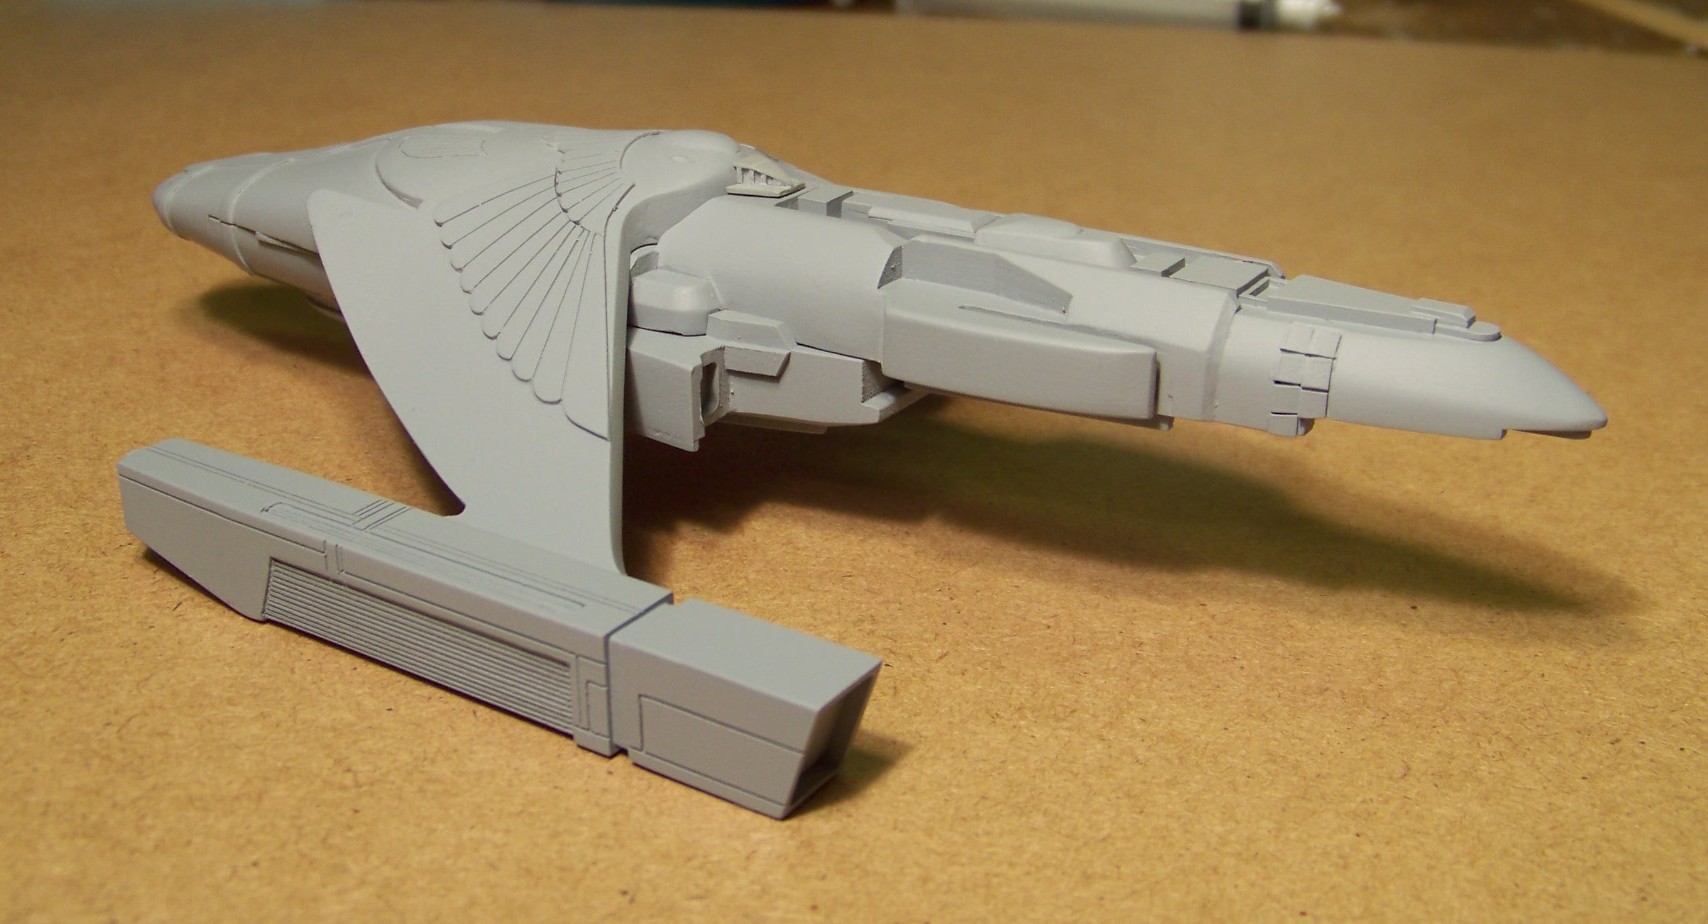
just thought i'd share some pictures with you of the current build by Ralph (not me) for me.
i searched around looking for either the metal mini or pictures of it, but only found 2 shots and they where of the same angle, top front left side. i never found any pictures of the metal mini from below or either end.
ralph has just some drawings from oneline from here: STSTCSOLD&A | Romulan Z-1 "Nova" class - Battleship to go by and a little resin kit (i forget who made it, but they are closed now).
the finsihed length of the kit will be 16.08cm / 6.33"
the drawings were off, so i had him go mainly with the top view drawing
pictures can be seen here of the master 2500 Nova Z-1 pictures by OdysseySlipways - Photobucket
Post edited by Odyssey Slipways on
Tagged:
Additional credits
- Icons from Font-Awesome
- Additional icons by Mickael Bonfill
- Banner background from Toptal Subtle Patterns
© Scifi-Meshes.com 2001-2024
Posts
Oh and thanks for enabling the lazy
meatloafr, any chance you have a metal mini of this ship? if so, any chance of snapping some clear pictures of it?
i'm not 100% sure where some of the information is coming from for the lower detail on this ship (guessing the resin mini model), but it looks like on the lower rear of the ship there is a now a shuttle bay, at least that's what it looks like to me
ralph did try to scribe on the small plating around the rear of the ship but said he just couldn't do it.
once i nget the master and cast one up, i'm going to send it to someone who thinks they can make the plating as a decal add on - guess we'll see
i did stop Ralph from putting the feathers on the underside as i just had a thought, but just thought of something else
i was thinking since the feathers would be greatly shopped off on the under side of the wing, i thouhgt maybe make a slight change, what about something to resemble a 3 or 4 toe claw? make it the same way as the feathers? (skipping this idea and moving onto the next....)
but then i got to thinking, i'll leave the feathers, but possible add the claws to the hull. on the bottom of the hull are them 2 strips (going to see about adding a bit more to them strips - looks like the bottom of a boat when i look at them...anyway) i was thinking maybe to the along side of the strips put the claws to the sides of them, but rather than them being flat like the feathers, make them a bit taller and on the leading edge, make a singe dimple in each and use them as torpedo pods?
just a thought, it is a war bird afterall......
what do you think
Ralph would like to leave the beak as it is now, very suttle. the beak i am looking at would be a bit more pronounced and a bit more like the drawings he is working from.
i asked if a separate piece can be made and he doesn't think so, BUT what he is going to do is put on a piece of clay and sculpt something basic and take some pictures of it for me. at that point i'll see how it looks - if it's close to call, i may put up a pole as to what way to go with the beak (unless i can convince him to make it a separate piece so the builder can choose)
the first picture shows to different angles of the head and i drew in with black lines how i think the beak should be. doing it this way is closer to the drawings. i think it's more practical and funtionable that a decrative beak
the next 2 pictures show Ralph's idea on the new beak. i like it, but to me it comes across as more decrative than functionable.
part of the difference is (to me anyway) is i am trying to follow the original drawings than being decrative. if we go the way ralph has it, it would also change the detailing on the top of the head, loosing the oval shaped piece in the middle of the head (bridge?).
so what do you think?
Ralph's way or mine?
I used to have one (along with a Klingon L-24) but lost them when I moved.
Think I would go for your way.
wjaspers, any chance your work is still around to look at?
i thought when he was going to add a larger beak to it, it would have just continued off the front of the head without that extra build up
i do like the way the feathers cover the entire wing,makes me wish that part of the ship wasn't done yet...why didn't you post these in th ebegining....? i would have followed some of your designs.... specialy the wings
now on pictures 2 and 5, there is that part showing on the underside (it looks lit in pic 2), is that hangar bays?
On the bottom are indeed the (simple) hangar bays.
z-1 wings.jpg
Picture is large, but will scale down nicely... depending on the finial size of the model
as of right now, Ralph has enough work from me right now to last him until this time next year
Pointy Beak
Wedge Beak
looking at the pointy beak, it seems a bit small, so i was thinking, if i where to have ralph add a small strip of plastic along the side edges of the beak from the tip back, then diviade the side into 3rds, make the front 1/3 a solid area, and add a strip or two along the sides vertically, it would give the pointy beak the illusion of more mass (this would also make it look a bit more like some of the beaks shown in the comics).
so what do you think about me having that detail added to the pointy beak?
the pointy beak now has some added detailing to the sides and gives it just a bit more mass looking and not some little thorn.
In these 2 new pictures you'll also note the recessed area from the nose of the ship back to the beak as been filled in with detail.
Ralph also informed me he has added the feathers to the underside of the wings.
I'm not too sure what else may be missing from the master at this point other than the nacelles.
so at this point it almost looks like the master is complete and it'll be soon ready for molding, then off to (hopefully) have decals made for the plating around the aft end of the ship, then boxed and sold as a kit
The newest 4 pictures shows the stock, incomplete nacelles in place.
the next set of pictures should show the optional front end for the nacelles, after that, it'll be on it's way to me for molding, then one casting sent off for decals while i cast some more
okay, i still don't know why i can't upload pictures for them thumbnails, so i'll have to just put in the links to insert the large pictures...
to help with the thread page not loading up to slowly for those with dial up, i'll post one a few of the pictures i got today from Ralph, but all of them have been uploaded to the Photobucket account
oh and i asked Ralph to make one more set of nose pieces for the nacelles as a 3rd option for the builders - i haven't heard back from him yet on them, he went away for the weekend, but i'm sure they'll be a no-brainer for him to make
now to start paying for this nice work of art so i can get it, mold it and then send it off for decals. depending on how much a decal set takes up will depend on what decal options i'll have added such as the area in front of the wings on the upper hull that shows plating, i may see about having some plating and some lit windows, or maybe all windows and also offer some additional feathers to go onto the wings behind the current feathers and some other possible decal options. i have a few other decal options i am thinking of, but it all depends on how much space a basic set takes up
he started with a solid block styrene plastic and did it all by hand (except where he milled out for the wings to fit into)
McP: Starship USS Churchill
Nice to see someone remembers the good-old-days. Thanks