Greetings!
Welcome to Scifi-Meshes.com! Click one of these buttons to join in on the fun.
Quick Links
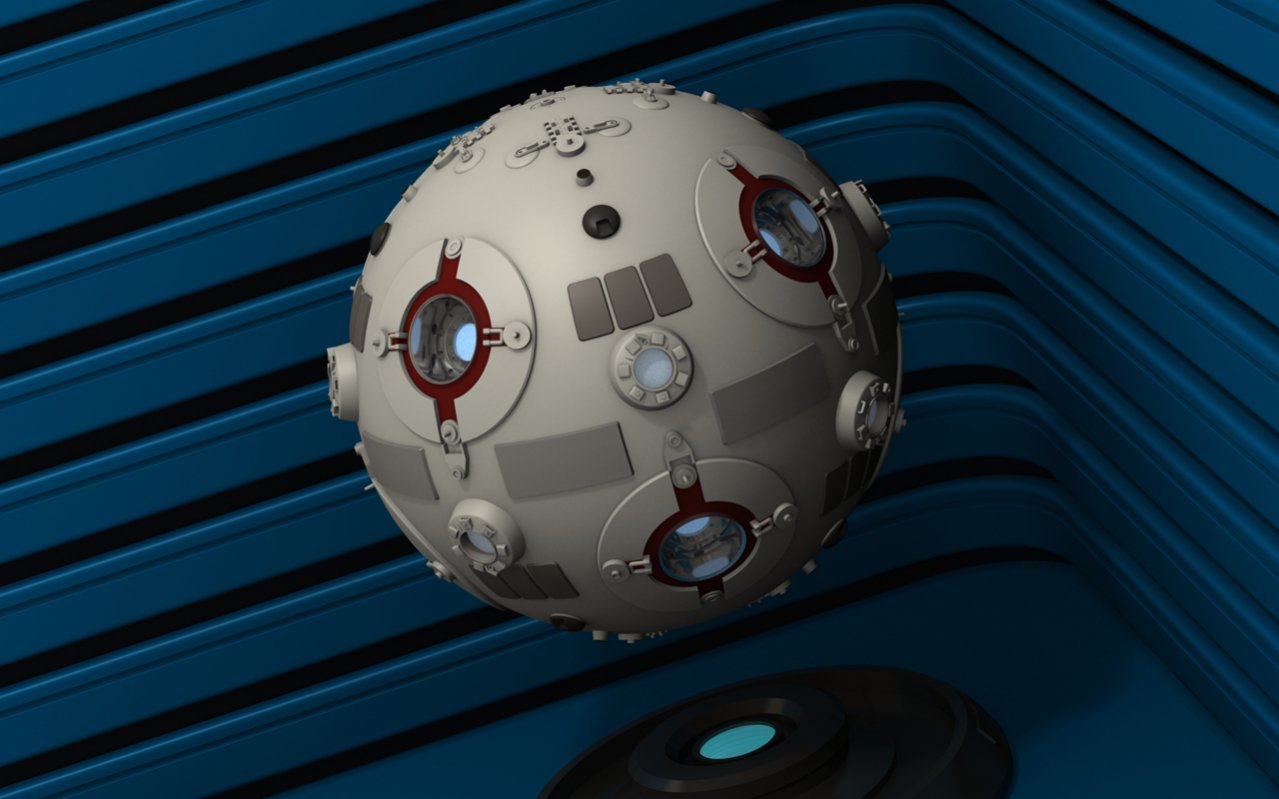
3DWIP Jedi Training Remote
Hi, I'm PixelOz which is the web name that I go by in most places even though my user name appears as guzmanangel here and that is because I created this account a long time ago and I was not using it but now I am.
I modeled this from scratch in Blender 2.49b. This is my first let's say "serious" 3D model. I mean I've done a lot of stuff in 3D but simpler stuff, I don't think that it was for lack of ability cause I feel that I can do more but because I have been involved in many other things.
For example recently I wrote a free 227 pages e-book on how to design paper models with Blender (by the way I will put a link about that in this particular forum cause I haven't yet) and that took a lot of time. If you see the book you will see that it has a lot of 3D renderings in it and other illustrations but they are simpler things.
This is not of course a Star Destroyer with a gazillion details but this is only a first try into modeling something more elaborate than what I usually do for illustration purposes so I hope that you like it.
As you can see this only has some materials applied to it but it still doesn't have any textures on it yet, I'm working on it, this is just the mesh work so far so at the moment it is a just a brand new remote out of the box")
I started this as a conversion to Blender of a remote available from Sci-Fi 3D but I wasn't happy with it cause it looked too distorted to me and I decided to make my own from zero instead.
I modeled this from scratch in Blender 2.49b. This is my first let's say "serious" 3D model. I mean I've done a lot of stuff in 3D but simpler stuff, I don't think that it was for lack of ability cause I feel that I can do more but because I have been involved in many other things.
For example recently I wrote a free 227 pages e-book on how to design paper models with Blender (by the way I will put a link about that in this particular forum cause I haven't yet) and that took a lot of time. If you see the book you will see that it has a lot of 3D renderings in it and other illustrations but they are simpler things.
This is not of course a Star Destroyer with a gazillion details but this is only a first try into modeling something more elaborate than what I usually do for illustration purposes so I hope that you like it.
As you can see this only has some materials applied to it but it still doesn't have any textures on it yet, I'm working on it, this is just the mesh work so far so at the moment it is a just a brand new remote out of the box
I started this as a conversion to Blender of a remote available from Sci-Fi 3D but I wasn't happy with it cause it looked too distorted to me and I decided to make my own from zero instead.
Post edited by guzmanangel on
Tagged:
Additional credits
- Icons from Font-Awesome
- Additional icons by Mickael Bonfill
- Banner background from Toptal Subtle Patterns
© Scifi-Meshes.com 2001-2024
Posts
http://img291.imageshack.us/img291/7920/jeditrainingremotenotex.jpg
I always wanted to model something Star Wars cause I'm a big Sci-Fi fan and I messed around with other peoples Sci-Fi models a lot but never actually modeled something Star Wars myself so here is a first try.
That's a great looking model. Are you going to texture it?
-Brian
The larger image is the new render and the second square one with the arrows indicate the new changes.
The orange arrows indicate many areas that have been rounded. I didn't bevel them, I rounded them which looks better cause that is how they go.
The rounding in the upper edge of those rectangular grayish/brownish parts is smaller and it may not be that be visible unless one gets closer but in real life it is about that small.
The blue arrow indicates that I increased the polygonal resolution of the curved surface to about twice as many and the other blue arrow (the lower one) indicates that I increased the polygonal resolution of the curve (in a radial direction cause it was a bit faceted and I redid the part with twice the poly resolution).
The green arrow indicates how I made the large white circular part protrude less from the surface of the sphere cause I took a very careful look a some additional photos that I found of the original prop and it wasn't as deep as I had it, it was protruding way too much.
In the real prop photos it appears as deeper from the front because of the paint but if you look at it from the side you can tell that the thickness of that part is not as much as I had it.
The greeble associated to those large white circular parts was adjusted accordingly and also the "truck wheel" (the center chrome part that was made out of a toy truck or scale model truck wheel) was also adjusted cause it was too far outside too.
The red arrow indicates that that part was also adjusted cause it was also shorter in the real prop.
The pink arrow indicates that I made the "light" come through the truck wheel holes too cause it was like that in the original prop.
The problem with doing these things as a lot of you already know is always the trouble of finding good source material to work with.
Most of you know how hard it is to get good photos and blueprints of these things and we modelers have to work too many times with some crummy pictures and/or blueprints to do this but we manage you know.
In this case there are a lot of better photos of the Master Replicas Jedi Training Remote prop replica around on the Internet and far less of the real thing and I was lucky to find a few half way good photos of the real one with lots of effort.
As good as the Master Replica model is there are differences and that makes it a bit more difficult to get things right. Also to get the right amount of beveling you have to make an educated guess because its very difficult to judge that sometimes from these kind of photos.
Well, anyway here it is and that how is going so far. I also split the modeling in two and left a lower poly one without all the extra beveling for faster rendering in case I want to animate it or for things in which it is seen at a distance in which case there is no need for that much poly resolution.
These parts were changed to reflect the way those pegs or thin cylindrical protrusions really are cause what happens is that in many photos of the original prop they won't show because the original is really old and they broke off due to handling it from place to place but when it was new they were there and I found out this by consulting with some prop replica builders that explained this to me.
I was suspecting this precisely and they confirmed it and now with the fix it is more accurate.
http://www.scifi-meshes.com/forums/showthread.php?76292-Free-E-Book-About-Paper-Model-Design-With-Software&p=494545&highlight=#post494545
Hope some of you like it.
I like the detail of your file. Would you consider making it available for 3D printing either on http://www.shapeways.com/ or for http://makerbot.com/ ?
Also, check out this page for high res reference photos...
http://www.starwarsdatabase.be/wiki/index.php?title=Jedi_Training_Remote_ANH_SW-107_by_Master_Replicas
If you do consider making a 3D file available, consider designing it to be printed in two parts with a hollow for a magnet so it can float like this example...
http://www.wired.com/gadgetlab/2010/11/hacker-builds-floating-jedi-training-remote-droid/
Please contact me at info at roboteshop.com if you do take this suggestion on board.
Regards
Michael
There are two different zip files, one for Blender 2.49b:
http://fav.me/d50ihr3
And one for Blender 2.5x or newer:
http://fav.me/d50iibb
They are really the same model is just that in the older version the size is specified in Blender units so 1 Blender unit is equal to 1 inch.
In the newer one its measurements are specified in the Imperial system (in inches).
Each of the two zip files contain two models, a higher poly one and a lower poly one.
Enjoy!
This is an alternate download place at Mediafire where you can also download all my free things just like in Deviant:
http://www.mediafire.com/?cuc82t8l3b093
Right there in Deviantart you can also access all of my free things by clicking the Browse Gallery button.
There is more info about the 3D model at Deviantart and also in the accompanying PDF files.