Greetings!
Welcome to Scifi-Meshes.com! Click one of these buttons to join in on the fun.
Quick Links
3DAmbassador Facelift: Meet Aurora


 373
Posts: 704Member
373
Posts: 704Member


Eight years ago, I finished my Ambassador-class model, then-named USS Trafalgar. A few months ago (mid October or so), I went to see what I could salvage out of the remnants of the files I still had after the hard drive failure I mentioned here, and then proceeded to give the model a facelift. I didn't want to rebuild it entirely; instead, my goal was to fix mesh errors, correct (some) topology issues, update (or recreate, where they had been lost entirely) the textures, and overhaul the shaders based on all the stuff I had learned working on Coro.
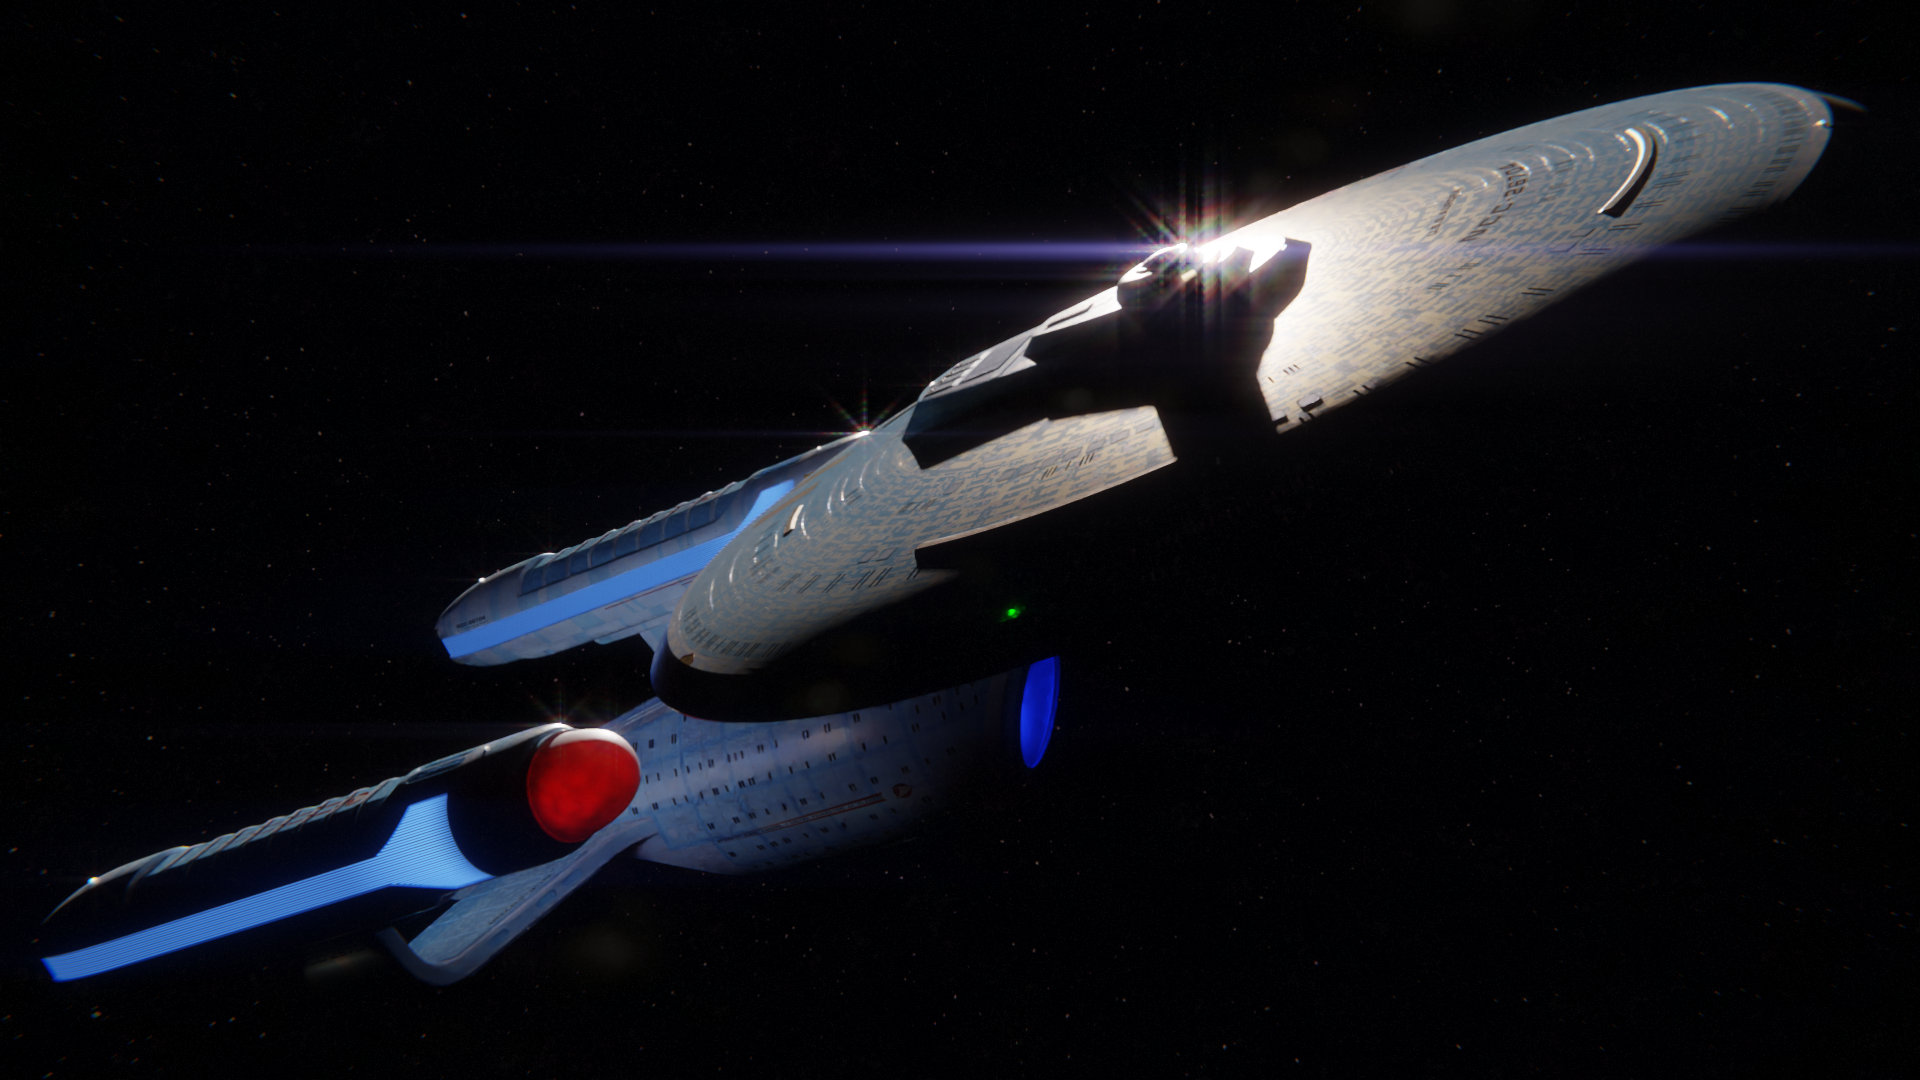
I ended up doing far more than I originally planned, but I feel good about the end result. Meet USS Aurora.


Full list of updates:
- Modeling:
- Fix nonmanifold geometry throughout
- Add glass to window portals
- Add ribs to deflector glass
- Add a mount point for the belly strobe light
- Recreate hull and stardrive "shells" to use as DataTransfer sources to correct normals
- Create a new, conformal escape hatch based on the higher-detailed escape hatch used in Star Trek: Generations (previous version was loosely based on Voyager's hatches)
- Remove some of the existing stardrive windows and replace them with others more consistent with the rest of the ship
- Texturing:
- Fix UVs, especially on the saucer
- Switch textures to UDIMs
- Re-create all original texture masters in Krita (formerly, Photoshop), including layer comps
- Re-create all base color textures as vector files in Inkscape, sourcing colors from color-corrected photos of the studio model
- Re-create the nacelle texture from scratch
- Update the stardrive texture to remove some weird curves from the dark blue "grid" area
- Shaders:
- Revise every material the model uses
- Ditch the Principled shader in favor of a custom-built shader mix network that uses "real" Fresnel to blend between Diffuse and Glossy, and also correctly accounts for microsurface apparent roughness falloff based on angle. Planning to write Wrote up a little guide on this one.
- Update escape hatch material to use deliberate, rather than random, numbering, the way I did for Coro
- Update all interior rooms to better match real-world lighting values, and to color-shift based on different alert statuses
- Investigate (with major credit to @PixelMagic for doing real-world empirical research) how the interference paints on the refit Enterprise actually work and integrate those findings into the hull material. Planning to write up a little guide on this one, too.
- Create a random-scatter "visual interest" texture mix that places small markings all over the hull (inspired again by an idea from @PixelMagic ). Yep, planning to do a little guide for this one, as well!
- Miscellaneous:
- Modernize the running light setup, based on Coro's
- Pull "decals" out into their own hull-hugging objects so they don't contribute to hull shader complexity
- Add a bunch of signage/registry illumination that I didn't have before and that didn't exist on the studio model, either
- Revisit the compositor mix I developed for Coro and further refine it
If I revisit the Ambassador class again in the future, though, I am definitely starting from scratch!
Enjoy!
Post edited by McC on
WIP: [ SDF-1 Macross ] Done: [ Coronado | Ambassador (original) | T'Varo ]
Books: [ Ashes of Alour-Tan | Embers of Alour-Tan ] | Blender Tutorials | Blog
Books: [ Ashes of Alour-Tan | Embers of Alour-Tan ] | Blender Tutorials | Blog


Additional credits
- Icons from Font-Awesome
- Additional icons by Mickael Bonfill
- Banner background from Toptal Subtle Patterns
© Scifi-Meshes.com 2001-2024
Posts
I'm working on an Ambassador-class mesh ATM, and would be interested in your thoughts regarding the windows on the secondary hull. It drives me nuts that on most source material the windows follow the shield grid, which implies interior decks with crazy curves. But following interior decks gives lines of windows that clash with the shield grid. I haven't been able to figure out a happy medium...did you struggle with that at all?
Thanks!
I did! I basically decided to abandon trying to replicate the model's window layout and instead figured out what a logical deck layout might look like, then adapted what made sense to adapt from the model's window layout pattern rather than trying to exactingly replicate the placement. This was the deck layout I settled on.
Books: [ Ashes of Alour-Tan | Embers of Alour-Tan ] | Blender Tutorials | Blog
Yeah, I did pretty much the same thing, starting with the deck layout then using it as a guide. It looks like you kept more of the fore/aft shield grid lines horizontal, while mine all follow the curve of the hull. You definitely made the right call...your engineering hull windows look really good, mine clash badly with the shield grid. (And I'm well past the point where I'm willing to re-do them.)
Also loving the window texture...I've seen other models using set images for the windows, but I haven't tried it yet myself. Going to experiment once the windows are all in place.
Bear in mind that it's not just a texture on the windows. The windows are actual "panes" of glass, with very simple room boxes behind them, mapped with set photos.
Whether or not that's worth the effort depends entirely on how close you plan to get and if you ever plan to see the thing in motion, though. If you're only ever rendering stills, just slapping a texture on the window itself and calling it a day is generally fine. If you plan to see it move, or want to get close, though, having room boxes (or an equivalent) is pretty much a must-have, I think!
Books: [ Ashes of Alour-Tan | Embers of Alour-Tan ] | Blender Tutorials | Blog
Looking back at your engineering hull shots, I think as much as I don't want to, I'm going to have to go in and remove some of the shield grid lines. I went with a tighter grid than you did, and it's biting me now. Even if I don't straighten the remaining lines out, maybe having fewer of them will reduce the window clash...
I also like the approach you took with the front of the neck. I opted to round it off, calling back to the Excelsior design.