Greetings!
Welcome to Scifi-Meshes.com! Click one of these buttons to join in on the fun.
Quick Links
3DMy Take on Star Trek: The Original Series, Shuttle Craft.

 1088
Posts: 4,361Member
1088
Posts: 4,361Member


It been some time since I last visited here or even posted something.
Not really been doing any 3D stuff for a fair few years now. But I recently got back into it.
I started out wanting to make the shuttle a bit more streamlined as the original is very boxy. But at the same time make sure that it looks like it has come from TOS.
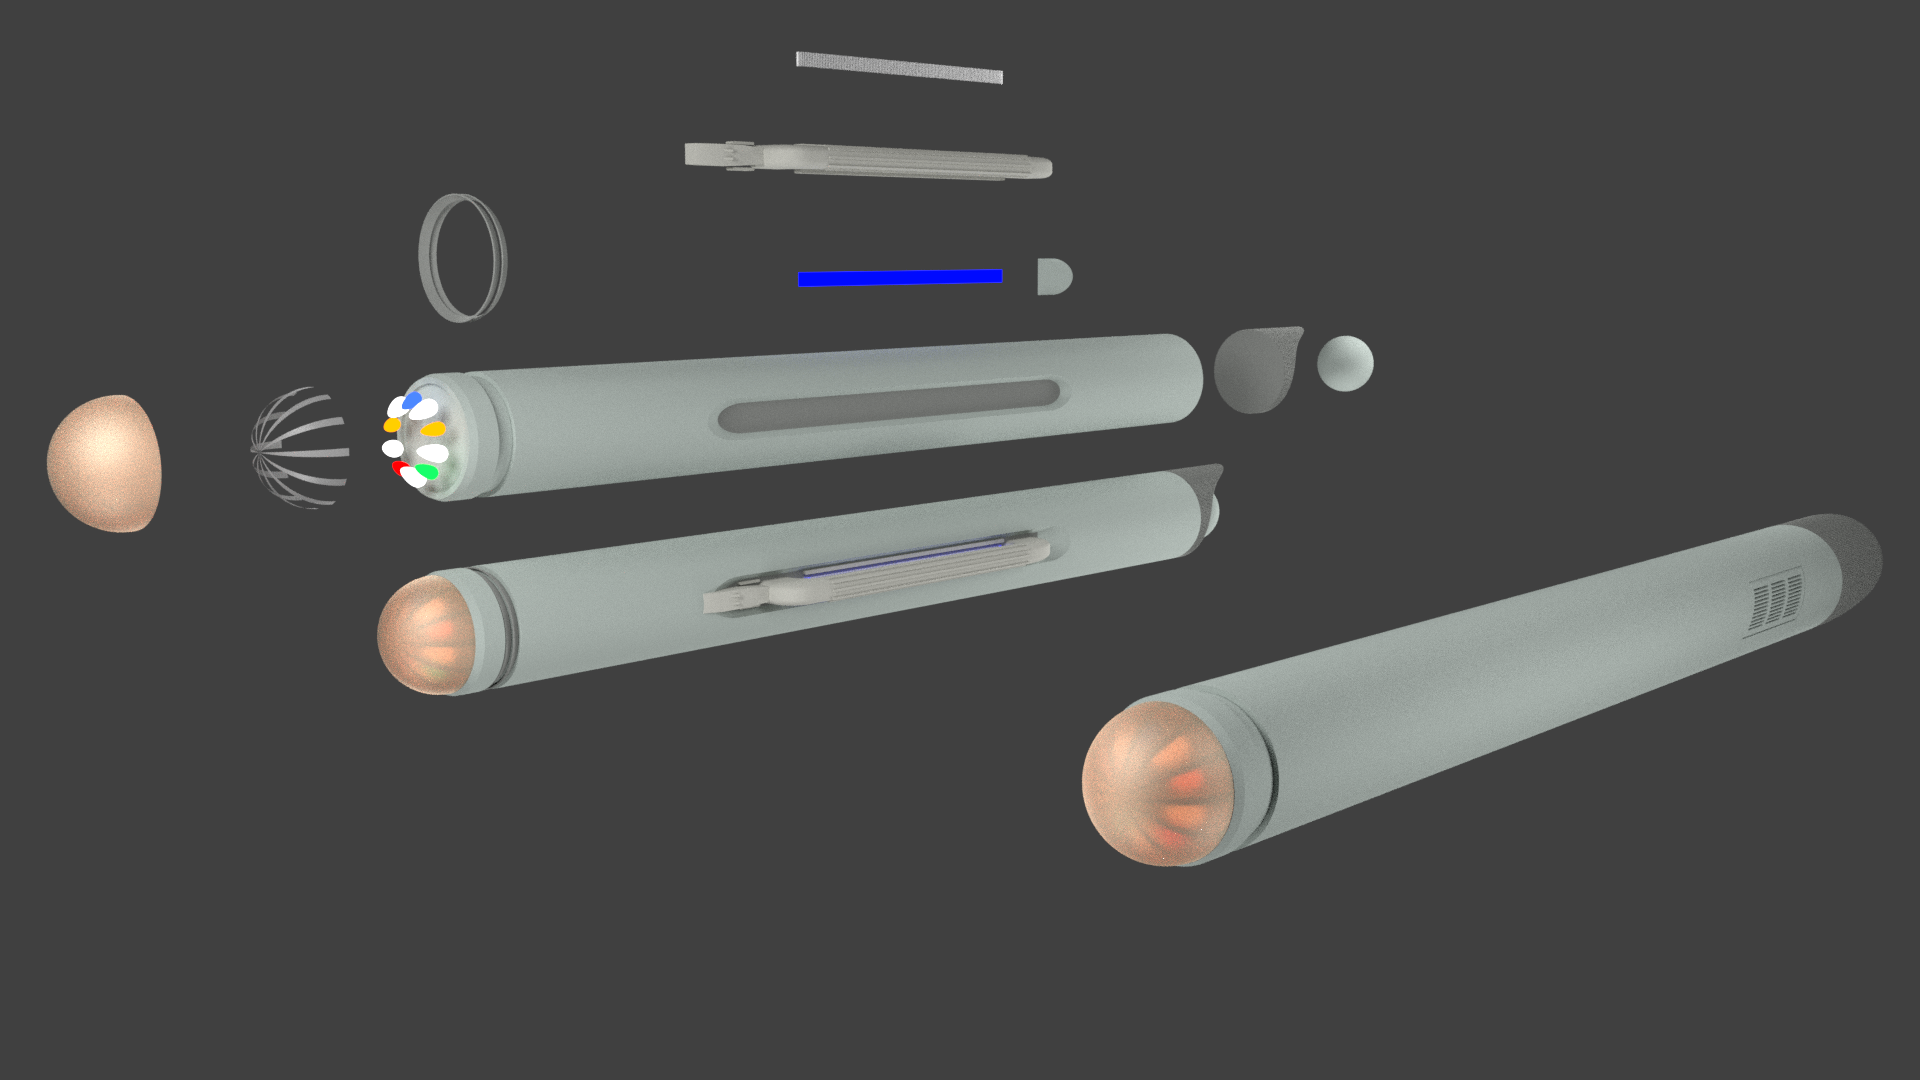
I started of with the nacelles, the original nacelles don't have a lot details on them except for some vents on the side and a forward landing gear. I don't think the shuttle was even warp capable in the TV show, which made no sense to me. Why have Warp Nacelles and an impulse engine if it can't go to Warp. So what I have done is leave out the forward landing gear as the Nacelles are not tapered like on the Enterprise. This can be used to land on like we see with all Starfleet shuttles from the Motion Picture onwards. I plan to add some landing pads to the outside so the nacelles are not damaged during landings.
I add all the details that can be found on the Nacelles of the Enterprise, including a blue glow.
I see the shuttle Max Warp speed being around Warp 1.5. (fast enough to get the shuttle across an entire Star System in less than a day.)
Below is a picture of the Nacelles and broken up into its parts.
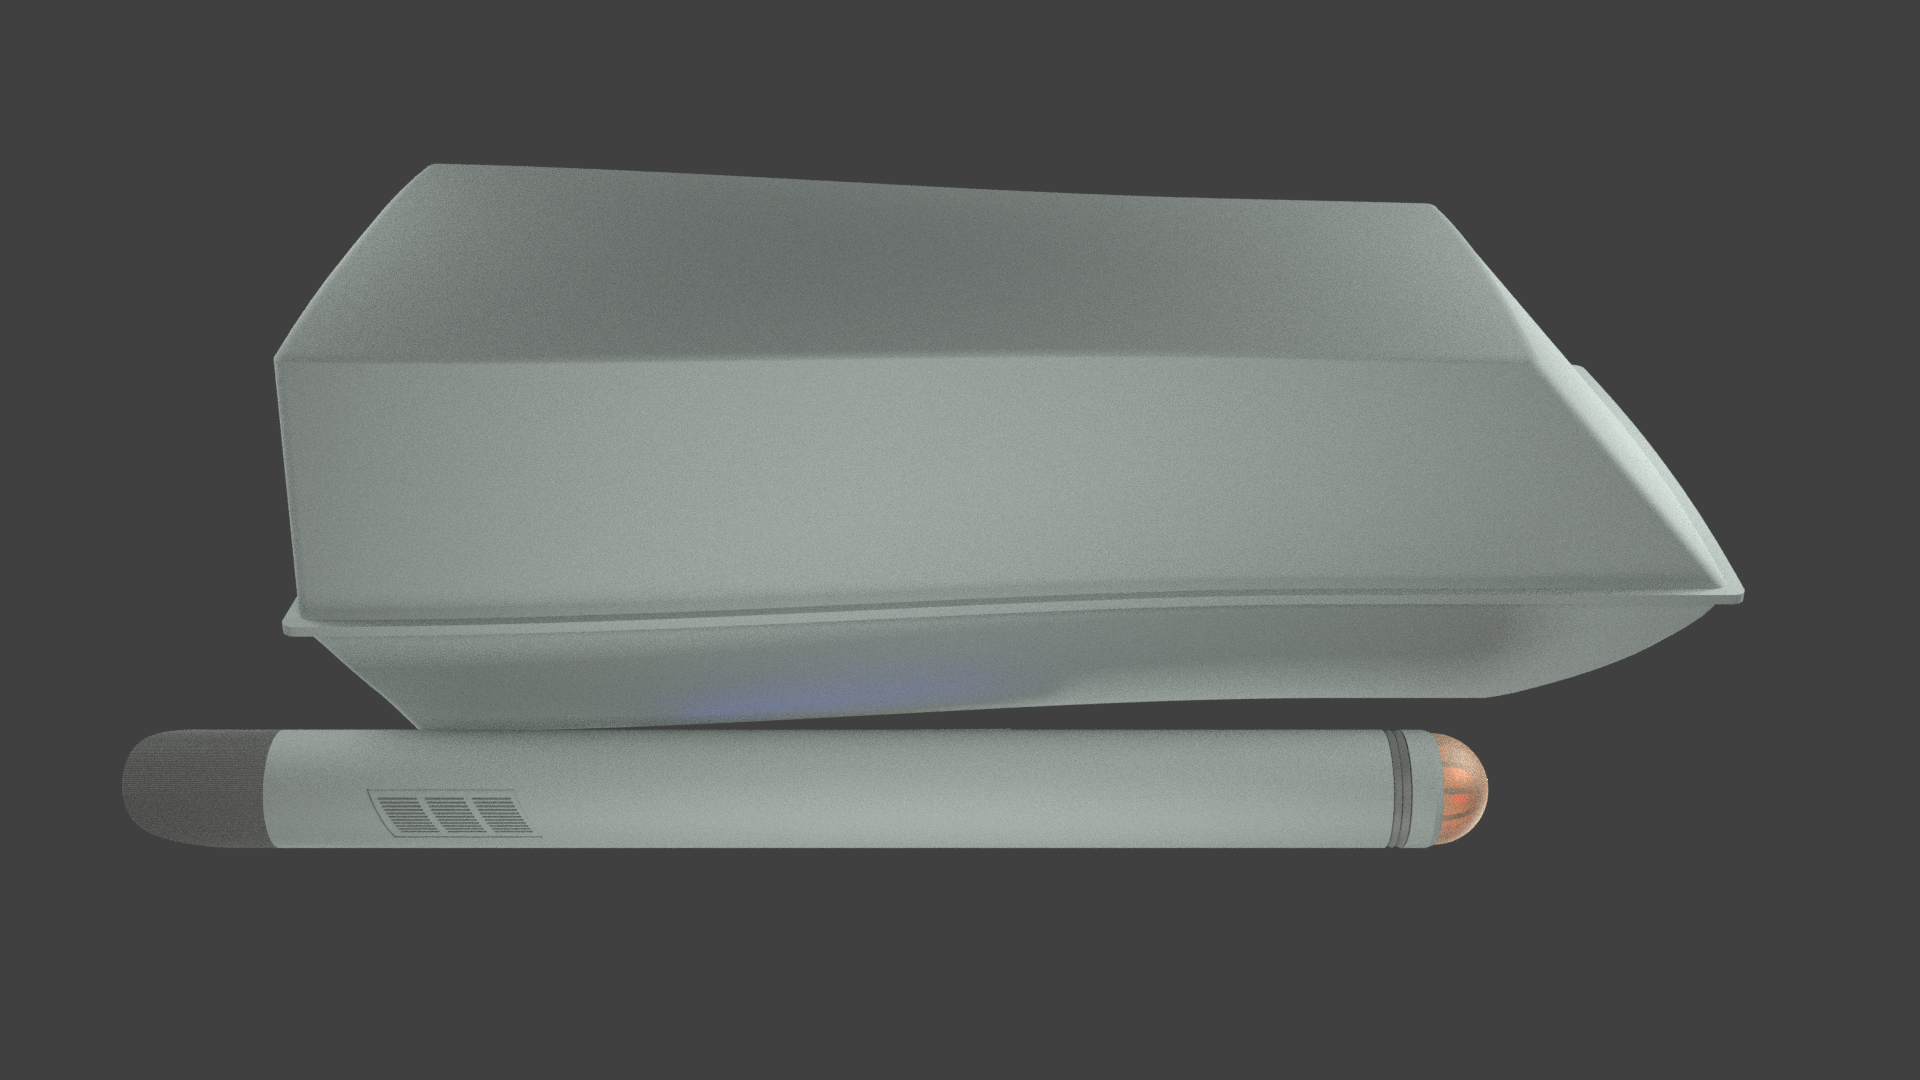
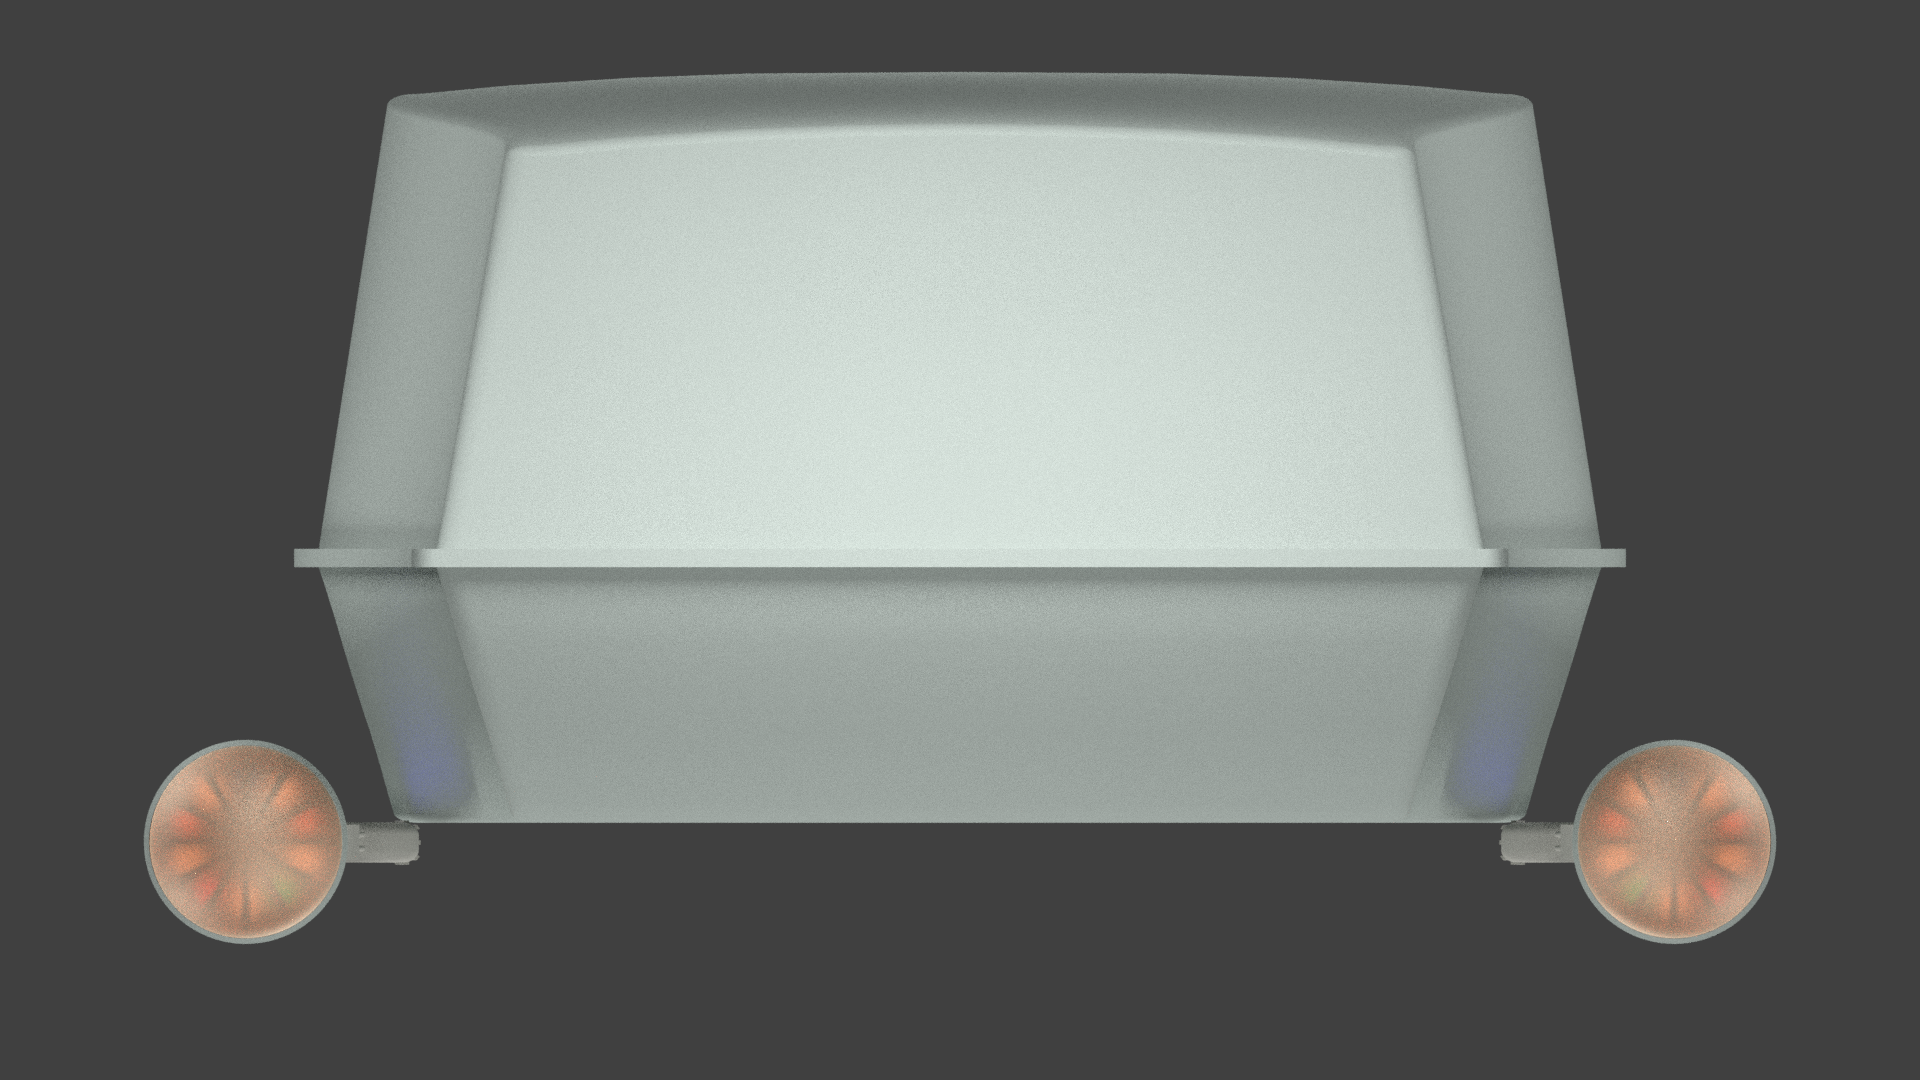
With that done I have now moved onto the main body of the shuttle.
I tired to streamline but after about 20 different version I could not find anything that I liked.
So I have gone back to the original design and rounded out the edges a bit so they are not as sharp as the original.
I have also widen out the rear of the shuttle. The thinking behind this, is that on the original blueprints and what was show on the show, there was nowhere for fuel tanks and the likes. So I have made room for all of these bits that you don't see but need to have a working shuttle.
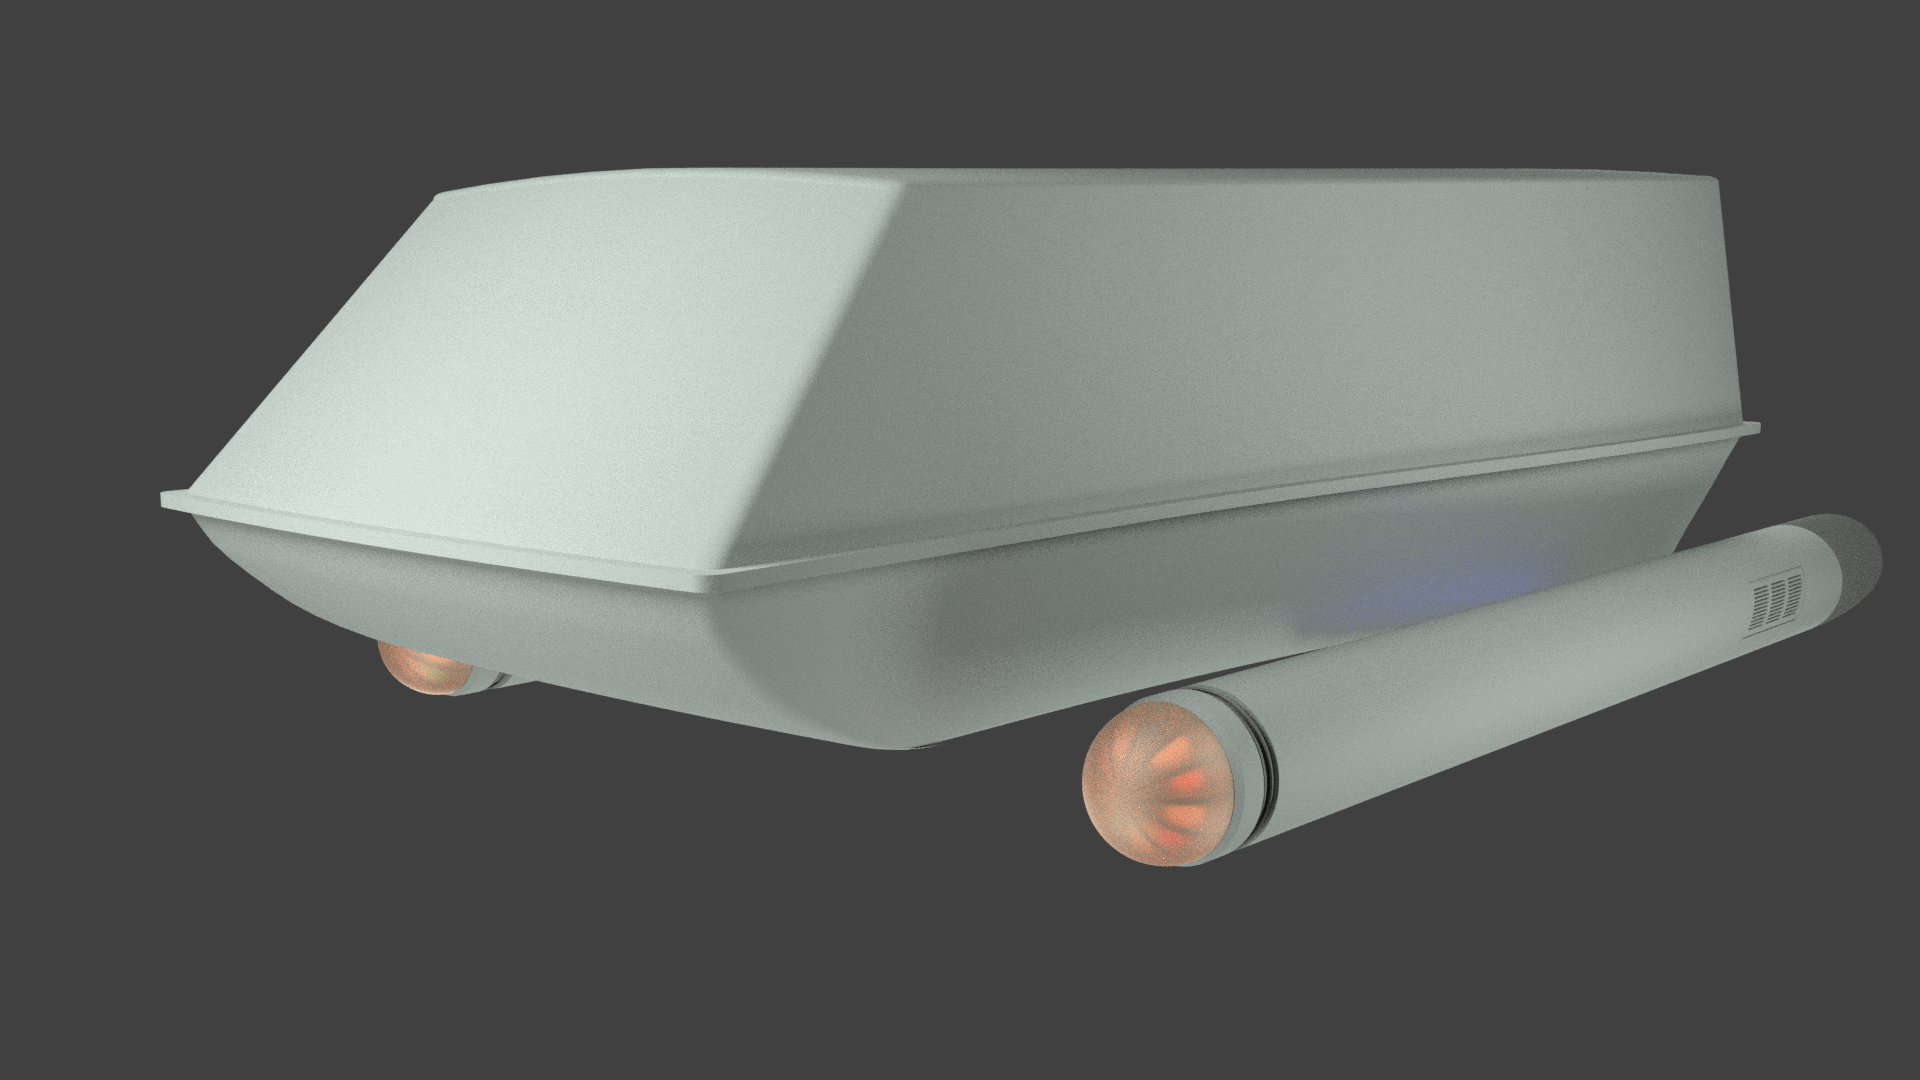
I am now going to start work on the "Wings" that attach the Nacelles to the shuttle.
Once that done, I will work on the back end of the shuttle to reshape her a little, then we can really start of the details.
Not really been doing any 3D stuff for a fair few years now. But I recently got back into it.
I started out wanting to make the shuttle a bit more streamlined as the original is very boxy. But at the same time make sure that it looks like it has come from TOS.
I started of with the nacelles, the original nacelles don't have a lot details on them except for some vents on the side and a forward landing gear. I don't think the shuttle was even warp capable in the TV show, which made no sense to me. Why have Warp Nacelles and an impulse engine if it can't go to Warp. So what I have done is leave out the forward landing gear as the Nacelles are not tapered like on the Enterprise. This can be used to land on like we see with all Starfleet shuttles from the Motion Picture onwards. I plan to add some landing pads to the outside so the nacelles are not damaged during landings.
I add all the details that can be found on the Nacelles of the Enterprise, including a blue glow.
I see the shuttle Max Warp speed being around Warp 1.5. (fast enough to get the shuttle across an entire Star System in less than a day.)
Below is a picture of the Nacelles and broken up into its parts.
With that done I have now moved onto the main body of the shuttle.
I tired to streamline but after about 20 different version I could not find anything that I liked.
So I have gone back to the original design and rounded out the edges a bit so they are not as sharp as the original.
I have also widen out the rear of the shuttle. The thinking behind this, is that on the original blueprints and what was show on the show, there was nowhere for fuel tanks and the likes. So I have made room for all of these bits that you don't see but need to have a working shuttle.
I am now going to start work on the "Wings" that attach the Nacelles to the shuttle.
Once that done, I will work on the back end of the shuttle to reshape her a little, then we can really start of the details.
Post edited by Freak on

Tagged:
Additional credits
- Icons from Font-Awesome
- Additional icons by Mickael Bonfill
- Banner background from Toptal Subtle Patterns
© Scifi-Meshes.com 2001-2024
Posts
Unlike the original model, I have put them on both sides of the shuttle. Reason for this is that you want more than one way to get out. The Reason the original did not have them on both side is that it was only filmed on one side, so to cut cost down they did not put one on the other side.
I have also built the pylons for the nacelles. I was playing around with the idea of winglets that came out of the pylons for atmospheric flight. But have not found anything that would work.
Next I plan to do the impulse engines.
I have also added a glow to the vents of the nacelle that are facing outwards.
I have also built the impulse engines on the rear of the shuttle.
I plan next to start adding all the little details. It also looking like I am going to have to build an interior. For the landing gear, I am not going to go with landing legs coming out the nacelles and the rear of the shuttle. I am think of having four legs that comes out the bottom of the shuttle as their is room for it.
I modelled the landing gear after the one found on the back of the original shuttle and stuck four of them under it make sure that there was room for it to fit in. I did try rigging it so that all the parts could move and be used in animation. But after a few days of trying to figure it all out I gave up for now. (I haven't done rigging before so was learning as I went along. In the past I just moved the part while doing the animation but for a landing gear its is a little more complicated than that to do and rigging it would work better.)
Reason for this that I don't actually plan to do any animation with this model.
I then placed the decals with the ship name and reg on, this is all modelled. At present the shuttle only has material applied and no textures. I plan to do that all after finishing the modelling. I have also started to add details below the impulse engines, but there is still much to do.
Ignore the loop things at the bottom, it was an idea I had but have decided to drop it as it not working.
The rest of the shuttle is still looking a little bit bare and I am thinking of panelling it.
Anyway onto the Pictures.
First up is a look at the landing gear.
Next is the landing gear on the ship and the rear details.
A better look at the decals.
Under the shuttle with the landing gear closed.
Things I plan to add to the shuttle:
1. Escape hatch/ Airlock on top of the shuttle.
2. Shuttle Warp Core ejection hatch.
3. Navigation lights
4. interior
5. panelling?
I would suggest adding something to the roof though, it looks very barren with the removal of the side panels from the TOS shuttle. Maybe some sort of "box" with a light on top?
I plan to put an Escape hatch/ airlock up there.
Not sure if I am going to keep the Escape hatch/ airlock. If I do it means I going to have to add panels.
Onto doing the interior and then the Texturing and after that I can call this done and start making some pictures.
As you can see from the picture below, with Kirk and Spock sitting in the flight chairs they are unable to see directly out the windows. which seem a bit pointless of having windows if your pilots can’t see out of them.
I have also put in passenger chairs as well. I did try a standard of two by two layout, but that left no room to go up the middle.
Below are pictures of the interior and with lights added. I put red lights up front to make it a little different but this can be changed to white.
Here is a lighting test to see what it would look like with the rest of the shuttle in place.
As you can see form the picture due to the glass setting I have you can’t really see with in. I am not sure if I am going to change this at the moment.
If I don’t it will save me having the interior and just leave the lights, which will save on render times.
Below is a picture of a handles added to the roof of the shuttle. I did this to add a bit more detail and also for someone to hold onto when they come out of the escape hatch/ airlock on the top of the shuttle. Though I am not 100% happy with them and might redo them.
With that done, it now onto adding proper materials and texturing her.
Yeah not really happy with those handrails. I am going to have to redo them.
I re-did the handrail on top of the shuttle as it was pointed out by ashleytinger that it was two thick for someone to grab onto. It could be raised a little, but as it is now, there is enough clearance for someone to grab onto it.
I have textured about 90% of the shuttle and left the other 10% as they don’t really need any textures as materials will do. I was thinking of putting in the UPF flag for the TOS era onto the shuttle but though against it as it would be a bit to much. I not that great a creating my own textures but a pretty much happy with this.
I have put a lot of dirt onto the bottom of the nacelles, while they won’t touch the ground when the shuttle is landed due to the landing gear. It is close enough that when landing and taking off, the dirt would be thrown up hitting them. (think of the down draft you get from a helicopter when landing and taking off.)
With that said onto creating some pictures with this little shuttle.