Greetings!
Welcome to Scifi-Meshes.com! Click one of these buttons to join in on the fun.
Quick Links
3DLego V-wing


Inspired by Stonky's gorgeous looking Lego X-wing I decided to do some modelling myself.
Working 40+ hours a week in 3dsMax for the "Boss-man" does take it's toll on my motivation to do stuff at home, but this weekend was an extra long one so I decided do do some Lego modelling.
About a year ago I already made a start on an excavator (#7428) but looking back at it the quality was not really on par any more.
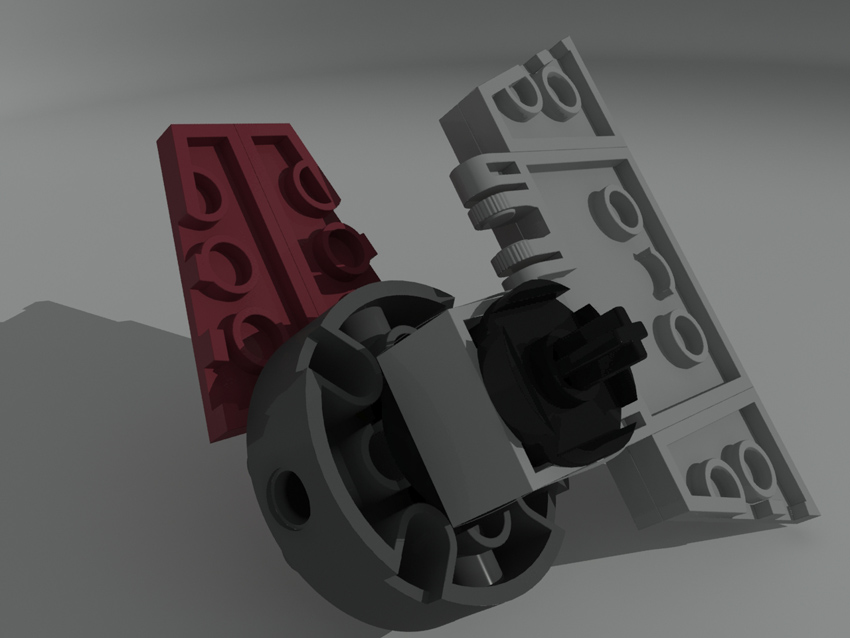
So, here's a little something on a V-wing model I found sitting on a bookshelf.
So far the only annoying part was the big round one with all the holes etc. in it.
I'm already looking forward to modelling the Clone Trooper helmet
Working 40+ hours a week in 3dsMax for the "Boss-man" does take it's toll on my motivation to do stuff at home, but this weekend was an extra long one so I decided do do some Lego modelling.
About a year ago I already made a start on an excavator (#7428) but looking back at it the quality was not really on par any more.
So, here's a little something on a V-wing model I found sitting on a bookshelf.
So far the only annoying part was the big round one with all the holes etc. in it.
I'm already looking forward to modelling the Clone Trooper helmet
Post edited by maran on
Additional credits
- Icons from Font-Awesome
- Additional icons by Mickael Bonfill
- Banner background from Toptal Subtle Patterns
© Scifi-Meshes.com 2001-2024
Posts
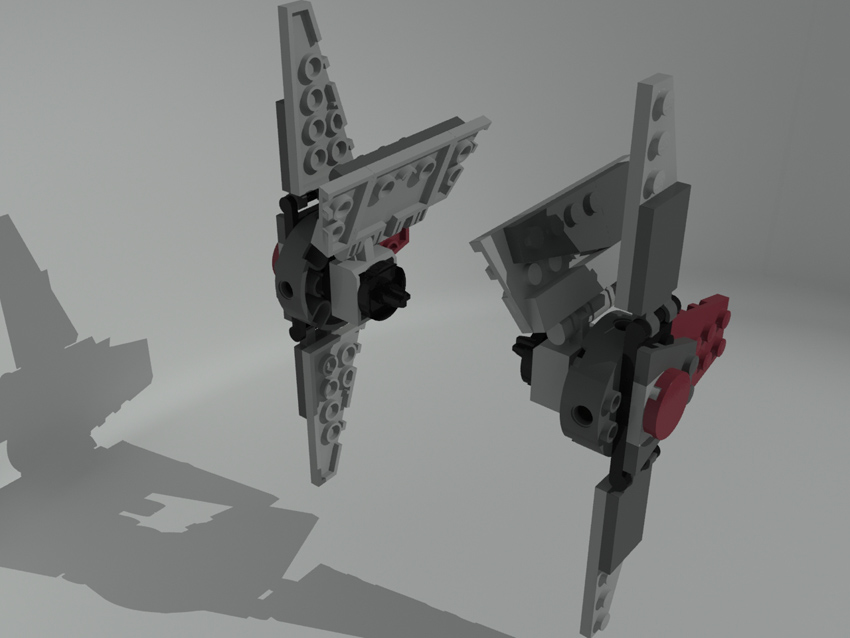
The "wings"are now finished and I started on the main hull of the ship.
I decided to put the droid in there already, to give it that Star Warsy feel.
Also did a little experimenting with DoF, but I've never done that before so it turned out a bit less like I hoped. I rendered out a depth-map and added the blur in Photoshop.
If anyone knows how to get that damned Mental Ray DoF working....
Also, from a very quick look around Google, it seems like Mental Ray produces quite dithered DoF effects compared to Digital Confusion. Could it be that you're using an f-stop that's too low (or too high) or not enough AA passes? Another tip seems to be to combine multiple effects to try and smooth out any issues. Particularly with simulated DoF from a depth map you can run into issues when you have high contrast objects separated by a large amount of depth space.
Just a few more basic pieces and the canopy. After that I've gotta figure out how I'm gonna do his little Clone trooper helmet...
I'm trying to add those little holes on the bottom of the plate-bricks but whatever I try I can't get them right.
It looks like the mesh-density of the displacement is too low; anyone knows how to fix this?
Have you considered a bump map rather than displacement map? This would render at the resolution of your map, rather than the resolution of your geometry. Given that these are small details and you already have a map set up, it would be an easy route to take. You may have to do is amplify the bump level above the recommended 100% setting to get the illusion of the right depth, and depending on a few factors this can sometimes produce artefacts and poor results on rendering. But generally, if you don't want to model those indentations, I'd go for a bump map.
Alternatively, if you really need/want to use displacement see if your program has some sort of adaptive sub-division setting that only subdivides extra polygons where they're needed. Different software will do this in different ways and I'm not familiar with all of them. You'd have to look it up.
these are really small details
your mesh and your computer wil thank you for that.
I did try normal- and bumpmapping, but the end-result makes the holes look way too shallow.
@ Stonky
I displace them at rendertime. I don't want to know how many poly's it would be otherwise
I did finally manage to get a decent result though; 3dsMax apparently doesn't like crisp textures for displacing stuff, so blurring them helped a lot. Also, a colleague of mine knew of some hidden away options to increase the detail.
Almost everything on the ship is done now except for the canopy.
I'll probably have to redo the materials because the ones I use now don't support ambient occlusion for some reason.
Anyway, thanks for all the help guys, appreciate it!
Or switch renderers.
Very nice work, and the question everyone asks themselves is - when am I done? Do I bevel the edges? Do I change/improve the render settings? Is the renderer that I'm using going to give me what I'll ultimately be happy with?
I think that you've done a great job so far - is it photoreal? Not yet (neither are mine), but maybe that's not your goal. How far are you going to go with it?