Greetings!
Welcome to Scifi-Meshes.com! Click one of these buttons to join in on the fun.
Quick Links
PracticalDeBoers Enterprise Model x 3
 NemVia192
Posts: 71Member
NemVia192
Posts: 71Member


:cool:
Hi Everyone. It's been a while since I've posted anything here, but let me assure you, I've been quite busy. My latest WIP is a series of 42" long refit Enterprise models. 3 in total. 2 of them will have drydock's built for them and one will be for a diorama in the Mutara Nebula sector. I've started on these projects in August of 2010. I've spent the last 6 months or so just drilling out holes for viewports and scratch building some of the interior rooms as well as a hanger deck for each of these ships. Here is a link for a chase lighting test that was made for the landing deck on the hanger http://www.youtube.com/watch?v=U6mz21PT0u8
Right now I'm starting on the warp engines and getting ready to add their lighting effects. I'm about due for an update on my website so you'll be able to see where I'm at in about a week or so.
Check it out and let me know what you think.
Mark
http://www.NemVia.com
Post edited by NemVia on
Tagged:
Additional credits
- Icons from Font-Awesome
- Additional icons by Mickael Bonfill
- Banner background from Toptal Subtle Patterns
© Scifi-Meshes.com 2001-2024
Posts
I've finally started work on the Warp nacells of all 4 ships. This is the first project that I've done using Epoxy. At first I thought Ididn't care for it so much, but after seeing the results and getting used to the smell, I believe I'm hooked. There are a lot of things you can do with epoxy resin that you can't do with cement. For you seasoned modelers I'm sure you might feel the same way. In this update I've cut out a lot of the holes for the lighting effects, I've added the Warp effect grills and added the fins to the rear of all of the engines. I've been able to run the wiring necessary for 4 seperate lighting effects needed in each of the nacells. About 6 months ago I had purchased enough Micro Fluorescent tube lamps to light all 4 ships and now I'm finally able to add these items into the nacells and secure them into the models. At the end of the album I have an engine lighting test pic. I'm very happy with the test reults so far. In these models you will not be able to see any LEDs in the warp grills like you could with the PLE version I did. When All of the components are added into the nacells, I will be able to seal them up and begin the finall touches on the seams and cracks and dings that are in the hull by doing some extensive putty-work along with sanding and filing. After this I will be able to opaque the engines and start there final paint jobs. Talk with you next update.
Mark
http://www.NemVia.com
What a month this has been! A lot of problems encountered with these builds, but eventually they were smoothed out and fixed. I've added a couple of pics for the Enterprise this month. I have to tell you it's been a tough month though. First I had problems with an order of 3mm yellow LEDs that I needed for the thruster effects. They kept sending me the wrong size and the wrong color LED which was becoming a problem and putting me seriously behind on my updating. Next I had one of the lighting circuits go out on me and it was difficult to isolate the problem, but I managed to finally find out what was going wrong with it an repaired that with no problem. I also managed to break 2 of the fluorescent tubes that light the warp engines..... GAAAAAH! Now I'm in the process of epoxying the engine halves together which is no easy task because of the nature of the epoxy and it's curing time. At first I tried to epoxy the entire engine pieces together in one shot, but found this to be way too messy and cumbersome and it left a few gaps I didn't count on. So in order to avoid the mess I decided to epoxy only small sections at a time. First, I'm epoxying the fron't and rear of the nacell then clamping those together over night to ensure agood bond. Then with 2 exacto blades I apply the epoxy to the top seam only. I use one knife to hold the seam apart then apply the epoxy with the other knife, clamp it together and let it bond over night. I repeat the same with the bottom seam. This allows me to avoid a lot of mess by doing it a little at a time. The pictures I've added show that I've used an abundance of epoxy to make sure the seam is over-filled. This will minimize the need for a whole lot of putty later on. But at least now I have the Warp nacells assembled. I will begin smoothing these out and preparing them for opaquing and their final paint job.
I really should have gone over the assembly instructions a little slower. It does say very clearly that this is not a model to be rushed or assembled in one night. Not that I've been trying to go that route, but I would have thought maybe just that tiny iota molecule sized bit of "faster" progress would help just a wee bit. Sometimes you have to step back and tack a breather or two to collect your thoughts and strength to re-group and get back into it again.... which I have.... Feel much bettrer now that I've solved a few problems.
The real problem with these kits is there are no guide tabs to line up the pieces so you have to be very careful when assembling this type of kit. I've read in other forums about those who have built these models and have had the same reaction as to the dificulty level. Some of the pieces don't line up exactly so there is some improvising to be done. I'm not complaining... Just venting. I myself can't wait to see them finished that's why I keep plugging along. Any thoughts on this are welcome. I should be ready to start putty work and a lot of sanding by the next update, then I can start opaqueing and final painting on these warp nacell pieces. See you soon!
Mark.
http://www.NemVia.com
I Apologize for not posting anything for a while, but let me assure I have been extremely busy on these ships. As of now I am working on the most difficult part of building these models and that's the starting of the AZTEC Pattern for the Engines. In the DEBOERS ENTERPRISE update I've sprayed the basecoating of FLAT WHITE on all of the endines and pylons, then I began with the first of up to 5 different colors I will be using for the AZTEC patterns. I have also started on the basic "Lightning bolt pattern" for the support pylons as well as the masking off of the first color that will be needed for the complicated shading of the engines and so forth. It takes about 3 hours per engine just to start this pattern off. To date I've completed the masking of all of the Port Side engines on the Enterprise models. Now I will be doing the reverse pattern on all of the starboard engines. I had a tough time deciding on what exact pattern would be for the pylons because even though there are many great pics of the filming miniature's details around many different parts of the ship, there are very few clear ones of the support pylons. So I had to scour the movies again, finally finding a good or at least a half way decent shot while the Enterprise is in Drydock. (Thank gooness for ST:TMP) The shot is about 3-4 seconds long but it showed enough of what I needed to get started. There are 5 new pics in this album #'s 133-138.
Mark
Well, this month has sure been a productive one! I've spent the last 30 days or more doing nothing but masking and painting the Aztec patterns on the Warp Nacells and support pylons of the (3) Enterprise models. I've put 4 different colors on each of the engines so there were three different maskings that needed to be done. After all four colors were finished I had to removethe masks which takes about an hour and a half per side. There are 6 of these engines, so I will be doing this a little at a time over the next week or so. I will need to do some minor touch-ups to these engines, fix a few cracks and chips in the seams and paint, then I can finish all the flush vents, intakes, control thrusters and other parts that need detailing and paint. I will also be adding some small domes for the strobes on the top rears of the engines. Then I can add the decals that go on the back ends of the nacells. All around, the paint jobs are turnng out well. Please feel free to leave feedback and let me know what you think!
After the engines are finished I will begin work on the engineering hulls which I think will be a lot easier than the engines and there are only 3 that I need to finish rather than 6. See you next update!
Mark
http://www.NemVia.com
Mark
Home - NemVia Productions
In the Enterprise update, I've had to spray the entire engines with a very light and thinned out coat of off white. This will tone down the Aztec colors just a little bit but will allow the sublte shapes of the Aztecing to show through. I've also painted up all of the misc. details such as the inside stripes that run up the support pylons. This took 3 different colors to make the stripe look perfect, Then I've added the decals which in this case are only 2 decals to the rear of the engines. The only thing I need to add to these now are the small domes for the warp crystals and the strobes on the rear ends of engines. So now I can finally put these in mothballs for a while and start working on the next part of this project, which I'm looking forward to, and that will be the "Engineering Hull". At least in this case there are only 3 pieces to work on, so the updates might be a little closer together.The new pics are on page 3 of the Enterprise album pics 164 - 179.
See you next update!!!!
Mark
http://www.NemVia.com
Mark,
In the Enterprise build: I've added 26 new pics starting on page 3 slide 180 thru page 4 slide 205. I've begun working on the engineering hull. Like the warp engines there is a ton of putty and sanding work that needs to be done and redone. The bottoms of the hulls are the worst parts. They have a little bit of a valley in them which makes it very difficult for a nice smooth and rounded finish. I've had to fill in the old mounting holes on the 2 shipd that will be mounted from the saucer section in the drydocks and the other ship needed a larger bore hole for the mounting rod that will be used for the Mutara Nebula diorama. I have also added some new nacell mounting holes for when the engines are finally attached to the hull. I'm also going to add the lighting effects that are seen on wither side of the travel pod docking ports. To do this I had to drill out the old hatch doors and have rebuilt my own doors so that I can re-cast them in clear resin to allow for the small but interesting lighting effect.
Recasting a LOT of parts. This model was not inteded for lighting that is for sure. That is why all of the port holes need to be drilled out. But also, there are other pieces that need to be redone. So far I've recast the torpedo launching tubes, the lighting housing for underneath the fantail, the strobe light covers or domes for the flashing light effects, the airlock piece which I built at the begining of this project and have now finally got around to casting it into a single piece. I only need two of these pieces, that's why it took so long to get to. And finally the largest piece I've had to cast: the main deflector dish and the dish housing. This too was originally to be done as two seperate pieces, but I didn't like the way the hole drilling was turning out and I do not want it to look like a drilled them out either. So I recast these two pieces into one clear resin piece. I will then follow a technique that was used while building the Spacedock in STIII:TSFS where the entire plexiglass model was first painted over and then all of the spots that were supposed to be windows or portholes where lightly scratched off to allow the interior lighting to come through. I tried this on a scrap piece and it works out beautifully. I will have pics of this later on.
I just have a few more small things to add onto the engineering hull by way of detailing and then I will be ready to begin the painting which I am looking forward to doing.
Well, that's it for this update. Please be safe everyone. I will see you in 2012!
Take care, Mark
Home - NemVia Productions
Also thanks to everyone who has visited my site. Last month My 100th member joined in. Don't be afraid to join up! More are always welcome!
Now for my first update this year, I've been doing some refining of the details on the secondary hull. I've added all of the re castings of the Travel Pod Doors and epoxied them in place, next the will be prepaired for opaqueing and painting. I've also started working on how to put the lenses on some of the lighting effects. In this case it will be the Lighting ouside the Hanger bay. My solution was to drill the holes out, then add clear resin into the cavities. Not a very easy process, but after the work is done it looks pretty sharp. I've taken a couple of pics to show what the lighting effects will turn out like in the secondary hull. The same goes true for the Thrusters. I've decided to cut out the wedges on the tops and bottoms of the saucers and re-insert them with clear epoxy resin pieces. Right now I'm still making the molds for these parts and I should have the first of them done in a few weeks. In the meantime, I've also been casting several clear and white resin shuttle craft that I will be using for the hangers and also the Drydock model for when I start on that project. So stay tuned. I will be opaquing the secondary hull in the up-coming weeks and then I can start on the Aztecing for the Secondary Hull.
See you next month.
Mark
Home - NemVia Productions
I have 16 new pics in the February update. I have spent a lot of the last month trying to smooth out the Engineering Hull. Ive been re-shaping a lot of the viewports and adding places for new lighting effects both to the Travel Pod Air-lock doors as well as the Hanger Deck. All of this is done in preparation for the Aztec patterns that will soon be added. To help protect some of the etched lines in the hull as welll as add some detailing I have begum masking out all of these lines and details. This process takes about 2-1/2 hrs per side. The pics in this months update show all of the detailed masking. I will then begin adding different shapes to different parts of the hull to begin some of the Aztec work.
Other updates this month include the spraying of the Main Deflector dish and housing piece which will also have some Aztecing put into it. Also I've sprayed the Bridge pieces in preparation for their detailing work. By the next update I hope to have at last 2 more color shades added to these pieces. See you in next months update.
Mark
[url]Http://www.NemVia.com[/url]
Greetings everyone! Well, it's now March. Time is flying by quickly! This past month I've been working on the masking for the 4 different shades of Aztec paneling for the entire Engineering Hull. So far I've been able to do the first 3 shades and 2 seperate masks. I was able to spray the 3rd shade on this morning. After the paint has set for 24 hrs I can begin the masking for the final shade on the hull and do some minor masking for the Strongback features as well as the housing for the main deflector dish and the dorsals front and back. On a few parts of the hull, some of the small masks have come off or have moved a bit due to the handling and from what I'm seeing the painting is turning out very well. Unfortunately we won't get to see what it all culminates to until the final colors have been added, the paneling is toned down and then the masking can all be removed. I've also begun some more masking for the main deflector dish piece (that is not connected to the engineering hull). The Deflector housing and stronback will be done in slightly darker colors, but they will not stand out too much. I'm really trying to shoot for the look in ST:TMP where everything is more subtle. From WOK onward there have been different and duller finishes added to the miniature for filming purposes. After the painting is all finished for the Engineering Hull I can finally add the Nacells to the hull and start working on some of the wiring and lighting. I feel real good about how things are looking so far and even I am looking forward to my own future updates. It's getting there my fellow modelers. Just hang in there! To view the pics go to my site below!
See you next update,
Mark
http://www.NemVia.com
Mark
http://www.NemVia.com
See you next update!
Mark.
http://www.NemVia.com
I've added 15 new pics for the Enterprise Update.
For the Enterprises it has been quite a month of work. The first tough part was to add the new re-cast thruster pieces to the tops and bottoms of the saucers. Some were exact fits while others needed a bit of sanding and puttying, but all this effort will produce a very nice lighting effect later on. I've had to cut out some wiring holes in the saucer section to allow the wiring to go from the saucer to the Dorsal. I've also had to remove a section of one of the framing braces to allow room for the crew rec-deck assembly for later on. I have also opened up the rear of the upper saucer to allow for both the epoxying of the warp crystal/impulse engine piece as well as the lighting effects for that area. I've made the hole large enough so I can epoxy these pieces into place well enough so they won't move at all. To epoexy them into place and take care of the putty work at the same time, I line the entire rim of the Warp crystal piece with the putty, then press it into place, then I immediatly epoxy the piece into place with 5 minute epoxy. When this is set I take an exacto blade and remove the excess putty from the outside. This alows for sanding to be kept to a minimum. Next I mask off the Warp crystal dome as well as the impulse engines so that I can opaque the entire hull top and bottom. I let the Flat black set for at least a day then spray the entire top and bottom with Light Neutral Gray. I've been finding it better to start with the darker colors first, then mask off the smallest details and work my way up to the lightest colors. By next month I should have most of the first masking done and hopefully the second one for most of the saucer pieces. Hope you enjoy this update and I'll see you all next month.!
Mark
http://www.NemVia.com
For the Enterprise update, unfortunately I was not able to get too much accomplished on the Aztec Painting because of spending so much time on Reliant. But it has been started and is going good as well. Although the Aztec pattern is different from Reliant I am still using the same painting technique. First I've sprayed the entire saucer sections, top and bottom Neutral Gray and now I'm in the process of masking of smaller areas of the hull to create the first color of the Aztec pattern. These maskings will then be removed after spraying the next color "Light Gray" and then lightly spraying over that to soften up the harshness of the Neutral Gray color. Then for the final Aztec Pattern I will overlap different parts of the first color with the masking and painting to give the hull the appearance of several different shades of color in the Aztec pattern. There are 5 new pics of this process in the August updates. As of this update I have two of the Enterprise upper saucers masked and ready for painting. By the next update I should have all of the base colors finished.
See you next update! Enjoy! And as always comments and New members are always welcome!
Mark
http://www.NemVia.com
It's been a very busy month for the Enterprsie models! I've now begun working on the Aztec patterns! And hooooweee! that is sure a lot of work.I've decided not to use any friskette to make the patterns because I've found that the widths of the grids vary slightly from one another. Some are wider and some are narrower. This can be very frustrating when using a friskette template. So in this case I measured the widest grid and use that for the basis of my pattern, then for the narrower grids I just make slight cuts and do some minor overlapping for the narrower grids. So all of the patterns for each individual grid are now matched up more perfectly with masking tape than they ever could be with a stencil or friskette. It takes about one hour to do one entire grid circle on each of the saucers. All of the upper saucers Aztec patterns are completed and I've got 4 rings of the grids done on the lower saucers. So, yeh, do the math... yes, about 30 hours to get what I did, done. But the pictures will speak for themselves. Everyhting is turning out very nice at this point.
I've also had to tweek a few things with the engineering hull and deflector housing. As I re-watched parts of ST:TPM and ST: TWOK I realized that something did not appear to be right and it turned out to be the Strongback and deflector dish housing. In ST:TMP when the Enterprise was in drydock, I was not seeing any of the strongback details that I painted on the ship that I was seeing in the movie. There was way too much definition to the colors that I had used and there is a slight sheen to the surface of the ship indicating she was basically "BRAND NEW". I began to rethink what I did and it turns out that I had been following pictures of the studio model details as the model was repainted for 1701 - "A". I became very distrought and realize this needed to be corrected befor I add decals. The solution was quite simple though, I took some light Neutral gray and thinned it out a lot. Then with a very light spray setting on my airbrush, I resprayed over the entire strongback with this color and guess what. It worked. You can still see the details but they have been toned down quite a bit. I will be spraying the Engineering hull as well as the other parts of the ship with gloss to give it just enough sheen to not only add the decals, but to give it the new hull look as well.
I should be able to have the rest of the masking done by the next update and hopefully all of the decals will be finished, then I can finally start putting these babies together and begin the lighting and wiring.
So, that's all for this update. I will see you again next update! Take care,
Mark
http://www.NemVia.com
Now I will be able to start on the interior lighting and adding the interior pieces to the model. I will first need to build some cradles to hold the models in place while I'm working on these areas. But the ships are finally going to be assembled during the next month. Even I'm looking forward to the update for next month! See you then!
Mark
http://www.NemVia.com
Hey Everyone!
This month was not a good month for productivity, I ran into a very nasty problem with the Hanger Decks... All three of them actually. While they were in storage the very ends of the flight decks started to warp (no pun intended) upwards. I finally realized there was no chance of getting these pieces to fit into the model properly, so I was going to have to re-do all 3 flight deck pieces. Apparently the resin I used, which was supposed to be a very hard and durable resin, was not as hard and durable as was promised, So I had to cut off all of the flight deck pieces and use what I originally wanted to use in the first place but was afraid that the paint would not adhere to it very well, and that is pieces of window quality plexi-glass. I first had to trace the old piece shapes onto the plexi then cut them and reshape them until they fit perfect inside the models. Then I wanted to add some more detailing to the flight deck namely, more and clearer landing and take off lines along with parking position lines for the work bees. The best way to do this was to first mask off the areas where the chase lighting effects would go, then spray the entire top of the deck piece flat black to make sure no stray lighting would come through the deck. Then I sprayed the same entire pieces yellow so I could mask off the lines I wanted on the deck. I didn't want to do this the other way around because I was afraid the masks might peal off some of the deck paint. Anyway it was easier to cut small strips of masking tape and get all of the yellow lines nice and straight. Then I sprayed the flight deck Intermediate Blue. Then removed all of the masks and finally sprayed the entire deck pieces with gloss cote. This gives the deck a nice sheen to it. Check out the pics in the November update page and you'll see what I mean.
After this huge delay I started adding the porthole glass which for the most part is .005" clear styrene #9005 and then the exterior lighting and wiring for the secondary hull. This proved to be quite a challenge because the Engineering hull comes pre-assembled and if you have large hands, it can be quite cumbersome getting all of these LEDs in there. Plus there is the matter of getting all of the spot lights aimed properly, then carefully putting the hanger deck piece inside without bumping anything. I have several Lighting TEST pics in this update and from what I'm seeing it looks pretty good so far and I can move onto the Deflector Dish lighting and start on some of the saucer lighting.
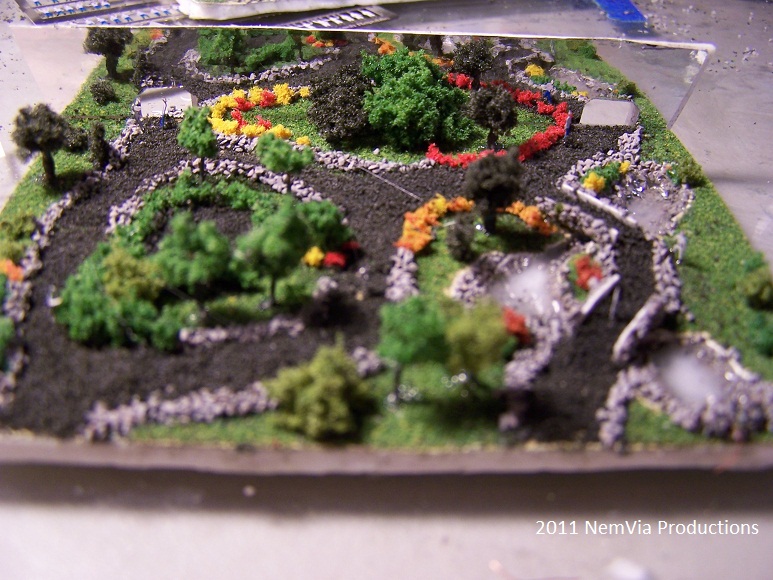
Also in this update I've been able to add one of the botany decks inside the engineering hull. This deck will be lit with some EL lighting. I really like the effect this stuff does on a piece like this. It lights the deck up very evenly rather than the sharp light points that an LED gives off. It was also a challenge to get this deck into the hull. It can not be done assembled. I had to first put the lower half in first, then the top piece. They are both very tricky to get in there. The corners of the pieces had to be fed up into the dorsal (Thank goodned it was hallow otherwise I would've really been stuck) then slowly turned so that the pieces were parallel to each other then one more 90 deg turn to make them fit into thier final postion.
Just one more note: Because of the redoing of the flight deck pieces, I was only able to accomplish all of these updates on only one of the models, so I will need to repeat these on two more of the kits and portions of this on the Reliant model. I apologize for this mess up, but sometimes these things happen, but actually I'm kinda glad it did because I like how the flight decks look much better than I did before. Well that's it for this update. Please feel free to make comments! See you in 1 month!
Mark
http://www.NemVia.com