Greetings!
Welcome to Scifi-Meshes.com! Click one of these buttons to join in on the fun.
Quick Links
3DMy latest pitiful, worthless effort.
 Judge Death0
Posts: 0Member
Judge Death0
Posts: 0Member
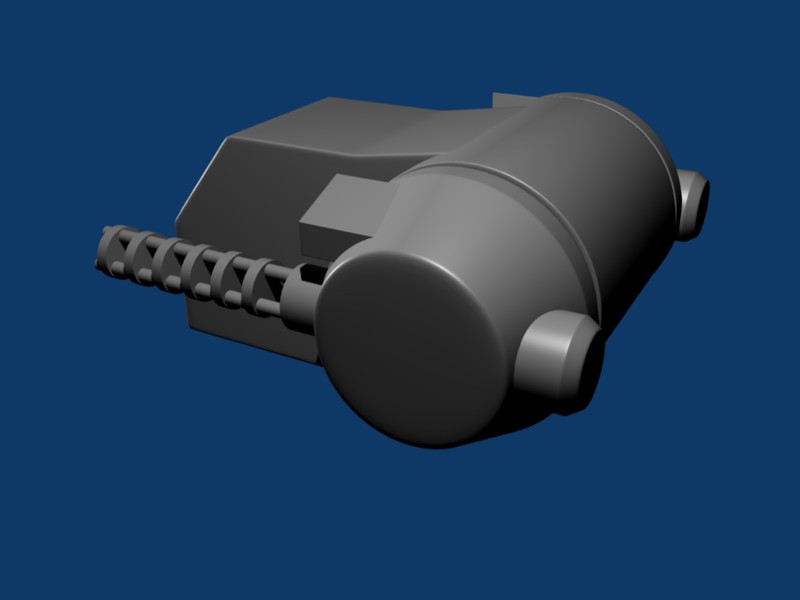
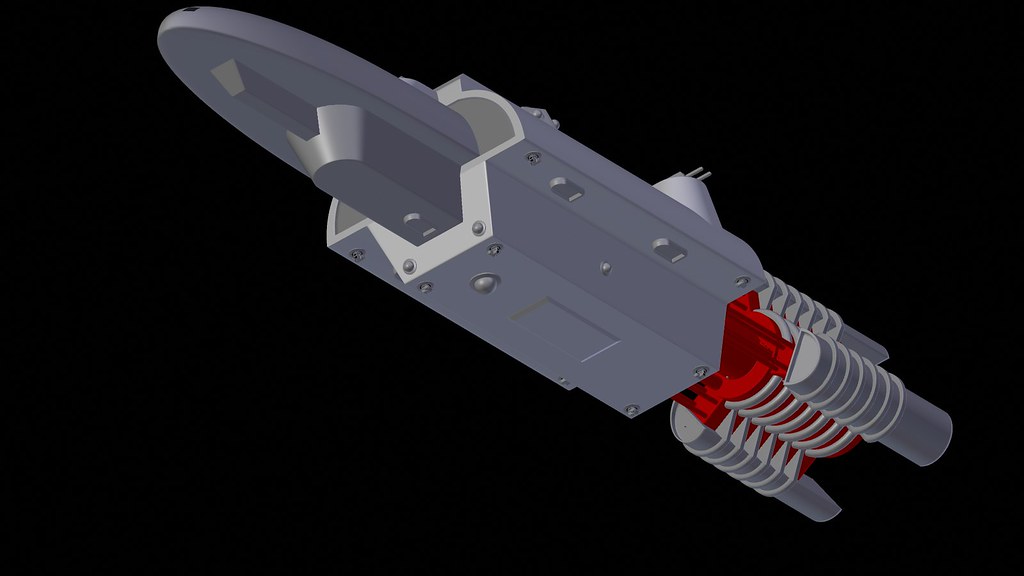
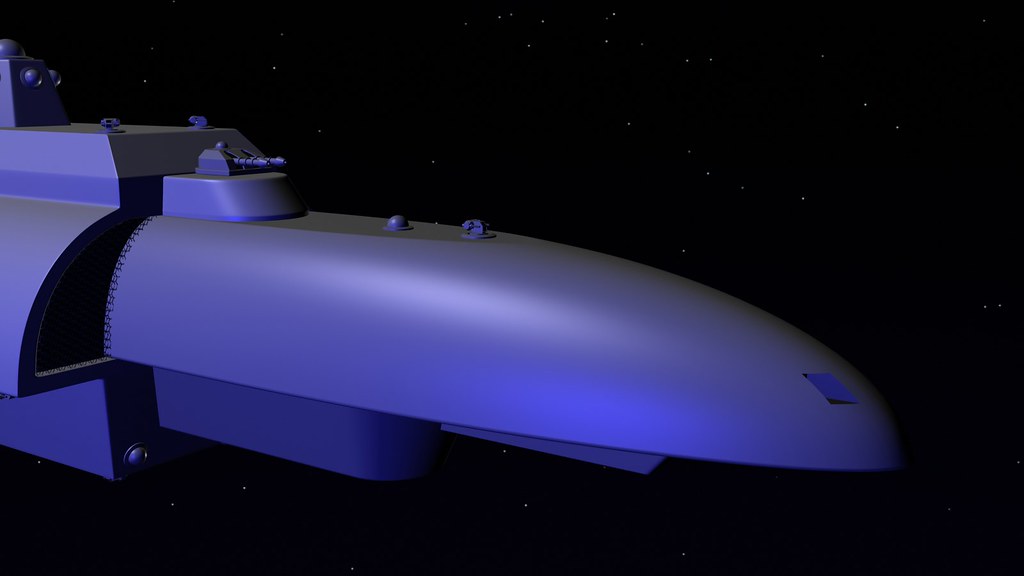
I'm making a multi role destroyer for a SF setting that' supposed to be in the low to middle end of the high SF tech spectrum, in some ways lower tech that star trek but still with some goodies like gravitic tech, fusion power, etc.
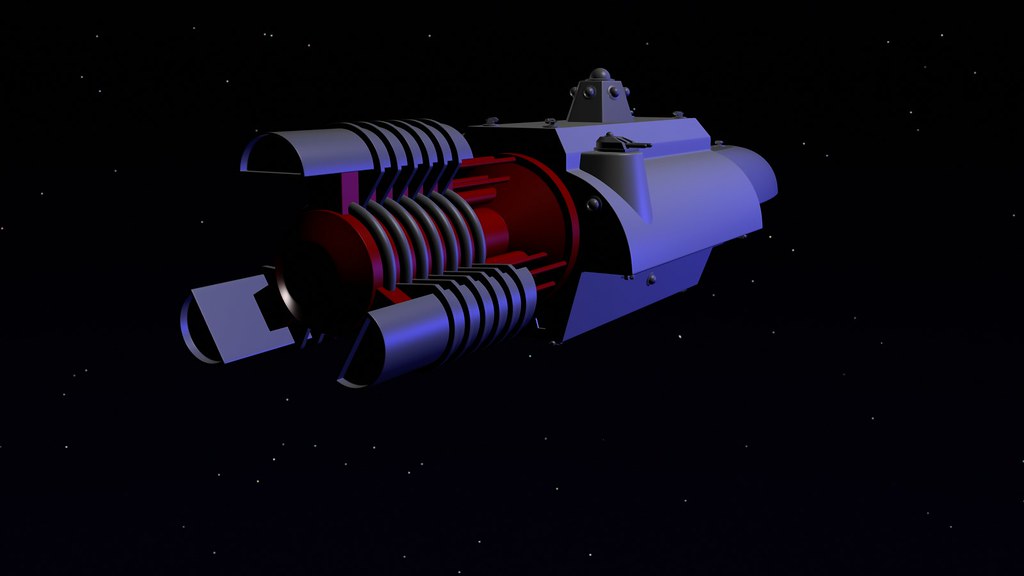
Here's my latest effort, the ship's supposed to be ~500' long and have atmo flight capacity but mostly a starship.
These are the pix, I'm wondering if I'm overloading my system as it;'s slowing down on this. I may need to decide how to detail it, use bumpmaps or greebles or hand model detail. Let me know what you think of my pitiful effort, which I probably sholdn;t even psot here given the quality of the rest of the work here.
http://farm6.static.flickr.com/5250/5365459176_4627698f5f_b.jpg
http://farm6.static.flickr.com/5288/5364845449_43675212ed_b.jpg
http://farm6.static.flickr.com/5089/5364845425_cc4cb8c1dd_b.jpg
http://farm6.static.flickr.com/5004/5365458666_d2eb913721_b.jpg
http://farm6.static.flickr.com/5123/5365458612_961f56f170_b.jpg
http://farm6.static.flickr.com/5161/5365458494_e71cfa8c25_b.jpg
http://farm6.static.flickr.com/5168/5365458440_a4533554d0_b.jpg
http://farm6.static.flickr.com/5201/5365458352_c29544becd_b.jpg
http://farm6.static.flickr.com/5167/5364844741_113ca72cbc_b.jpg
http://farm6.static.flickr.com/5287/5364844307_cc7cf11fd3_b.jpg
http://farm6.static.flickr.com/5130/5365457278_4cb8fd8426_b.jpg
http://farm6.static.flickr.com/5125/5365456888_2cbd3d01fc_b.jpg
http://farm6.static.flickr.com/5210/5364843091_d943a74582_b.jpg
http://farm6.static.flickr.com/5087/5365455972_8bb1680904_b.jpg
Post edited by Judge Death on
Tagged:
Additional credits
- Icons from Font-Awesome
- Additional icons by Mickael Bonfill
- Banner background from Toptal Subtle Patterns
© Scifi-Meshes.com 2001-2024
Posts
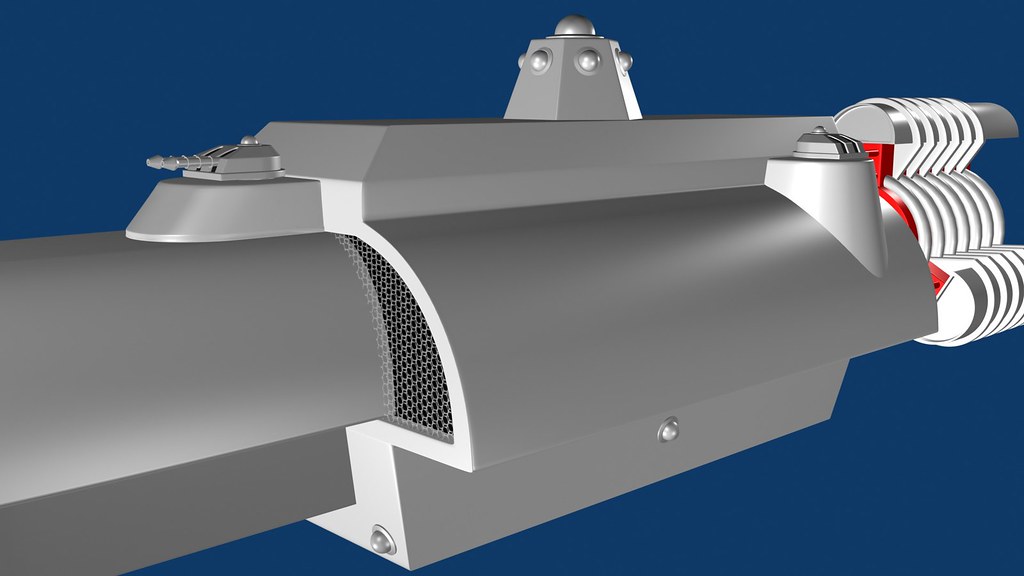
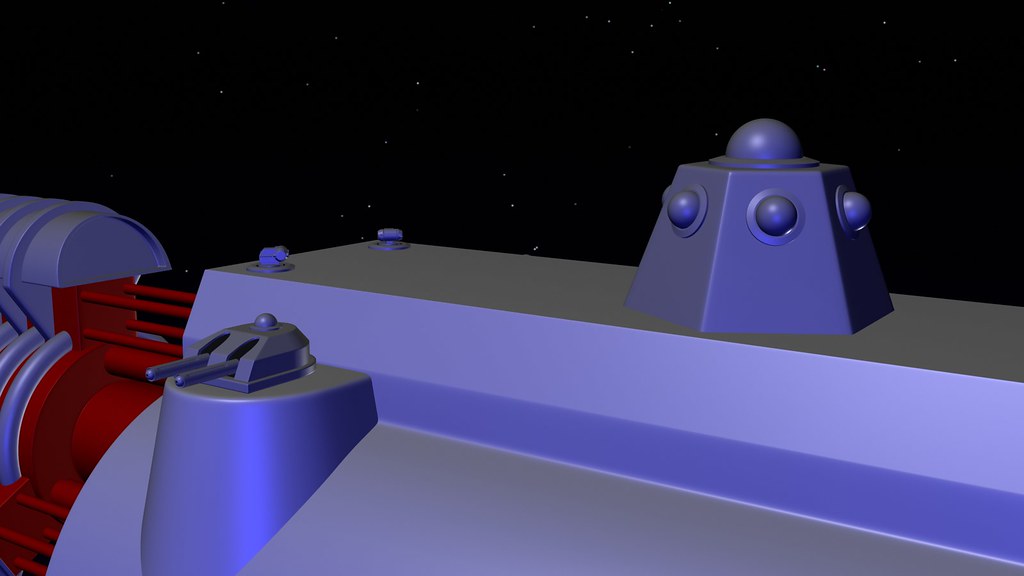
Eghads, look at those weapon placements... well done. You used subsurfing and got vey nice shapes for those turrets and such... they are almost but NOT simple shapes, and their edges are very smooth. That is great stuff; you have really come a long way since I I saw you post last.
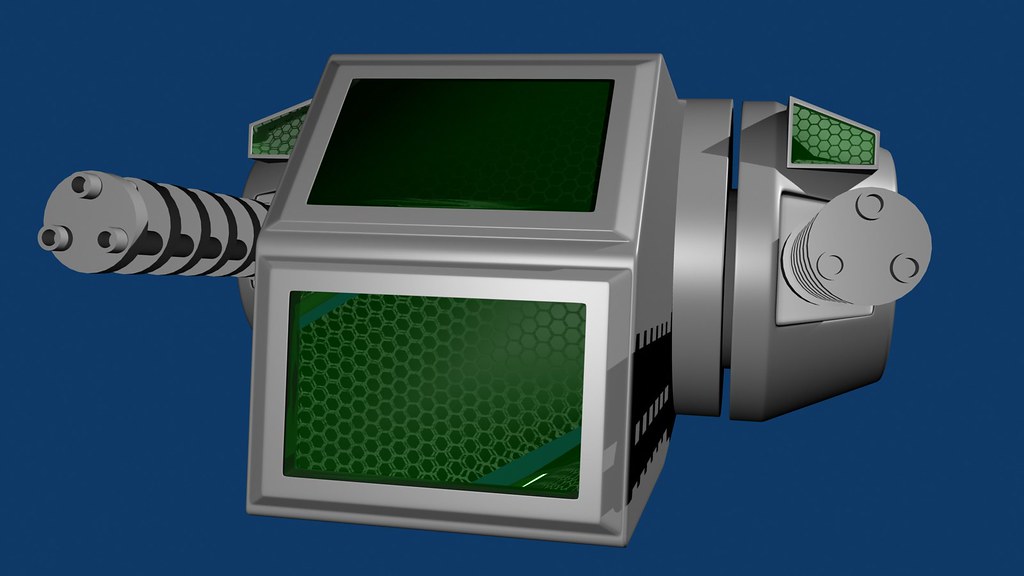
Really the only thing that jumps out at me is the giant screens on the intake type thingys. It looks like they just disappears seamlessly into the hull on the inside. I would just make a frame to cover that, hiding the connection area.
Definitely finish this one;I think it's really going somewhere....
Some people have said it looks a lot like a submarine, others said it was kind of retro/art deco. I can honestly say I just envisioned a set of technologies in my mind, a set of requirements and went from there.
The main turrets were loosely based on real turrets as I figured they had similar jobs and might use similar forms. I went with twin rather than triple barrel figuring you'd need longer range in space hence bigger barrels.
The point defense turrets were fairly technical looking too, based on technology and requirements, and don't look too different from some stuff we have now.
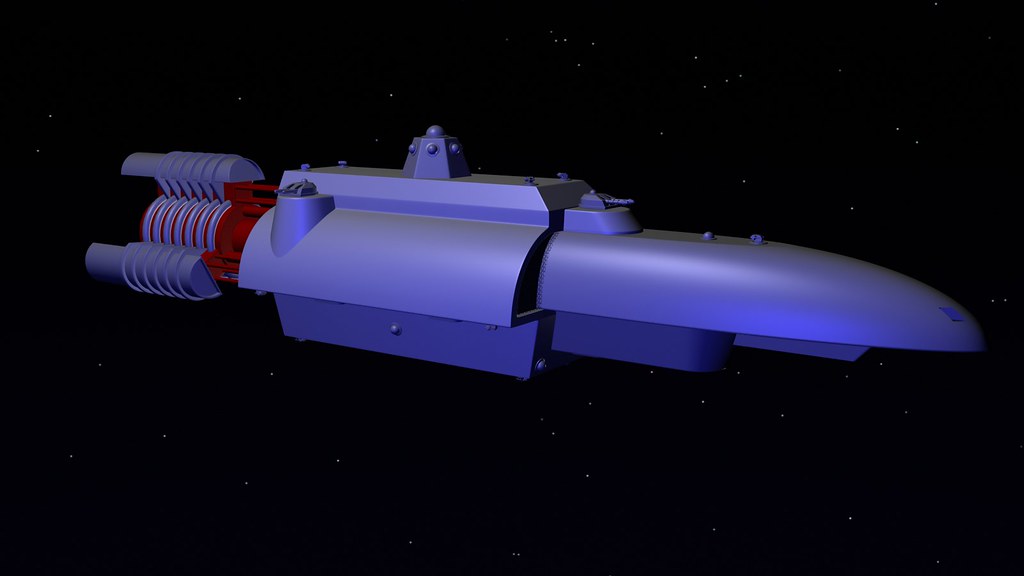
Here's what I'm thinking so far for hull look/texture.
I wanted to do the ship with a metallic look, kind of dark, maybe like something close to the hull color of the klingon cruisers seen in ST:TMP, a dark metallic blue gray.
The panels would be aligned in a hexagonal pattern, suggesting the hull plates were hexagonal and perhaps suggesting a hexagonal weave or grid in or on the hull, a very faint, nearly hairline hexgrid suggesting the panels were fairly tight, but maybe had some spacing to allow for thermal expansion/contraction.
This would probably be waaaay beyond me, or maybe even blender, but a faint iridescent sheen on the hull, a slight prismatic effect, would be something I'd like to do (probably can't) to imply the hull might have a thin, smooth coat of transparent synthetic diamond layered over the hull panels, perhaps as heat shielding, or some sort of defense against micrometeorites. (Yes, I am a technical detail bastard!)
Ok, the last bit's too much, I suppose...
I'd like a name in some cool font. I've got plenty of cool fonts for inkscape, that'll likely be the least of my challenges.
Ideas? BTW, this thing's chugging my computer so if someone wants to take a look at the file I'd be glad to load it.
Yes, that might work if I stol...er, borrowed a good looking free metal texture...
Second: To quote the new Scotty, "I like this ship! You know, it's exciting!" Your design has a very Jules Verne flavor to it, something you don't see too often anymore. I think it looks more like a World War II PT Boat than it does a submarine; small, sleek, and tough as nails. Your ideas for the hull plating are very ambitious and it you're able to pull it off I think it wil look great. The highest compliment I can give is if there was a Max 8 or .3ds version of it available I'd be happy to add it to my library. It looks like it would be a lot of fun to play with. Keep up the good work!
Also, in a way I was hoping to get s0mething that could be used in Traveller,for those of you familiar with that RPG.
I'm trying to texture is via mapping. I know one of my idols here prefers to model detail, but with nmy hexagonal hull plating idea that's not really feasible. I've had a remarkable degree of success given the fact this is my first effort at a texture, but still have a way to go.
I had an image in mind as to what I wanted and began struggling towards it, and began looking at some free textures/materials I've had for a while and I eventually came up with this material I used as a hull for my destroyer.
Behold, I texture:
http://farm6.static.flickr.com/5123/5370728781_0cd4e5fa97_b.jpg
The basic material is called "gun iron' and it and the other one I used for the honeycomb mesh come from here: http://matrep.parastudios.de/index.php?p=7
I used the gun iron for the basic material, and may change it soon, and I took the texture from the honeycomb mesh, which was a B&W image of a hexgrid, and added it as a texture, and after tinkering with the settings for several hours and making some intelligence/perception rolls and a lot of trial and error I arrives at something close to what I'd imagined, not bad for a first effort and several hours, even if I've been into blender off an on for a couple years now.
I still have a way to go, as the grid is way too thick, making the hull too pebbly. I'm going to find or make a grid with lines between 2-5x finer, and maybe adjust a setting to make them not so deep.
Also if I can I'm going to see if I can copy some settings from a diamond material, also available at the above site, to give the hull a rainbow iridescent quality to suggest a coating of artificial diamond on the hull for protection from dust, heat, etc.
I'm pleased with the fact my efforts were at least in the ballpark and close to what I'd imagined, so it's not a bad first effort.
There seem to be some errors here and there, and I'll need to see of adjusting the scale of the hexes fixes them or I'll need to separate the hull sections even further and apply the texture to each section. I know that can be done fairly easily if you know how, just select the verts, give them a separate name and then you can apply materials to them individually. Have to brush up on that. Also there are sections I might not apply the grid to as they're too small.
Now I'm off to find or make a fine lined hexgrid, sans numbers, in B&W.
it a nice start but the honeycomb mesh looks to big. I think you need to make it smaller in scale, this will incrase the number of honeycomb on the ship hull, but I think it will look a lot better.
Next comes mapping. I was just mapping this to the whole thing in one go, I suspect I'll need to learn to "unwrap" like people have showed me tips on, then model the map to each section of the hull individually.
Or maybe I'll go with a more conventional type of surface and do it like brother Polaris does, model the hull plates individually via extrusion and scaling. This hex mesh might be too ambitions for a texture newbie, but as close as I got to right on the first night of work I'm not ready to give up on it yet.
Coolness...
What exactly am I on to? The hexagonal hull plating idea? The idea of mapping the snip's hull in sections?
I wanted to ask about that. I've had a situation where I make a material, and then blender maps the same material to every section with the same settings and I've concluded that won;t work. So I think I need to make a different material for each section, or even each separate part of each section.
SO for some of the flat sections I could use flat as a setting, on trhe angular sections maybe I could use cube, on the curved sections maybe tube or spere, or calculated, world, etc.
Any ideas on doing this right in blender?
Look at the pic and imagine if the lines were finer, the hexes therefore closer with thin, hairline seams between them.
That's the problem, not the application of the pic but the pic itself. I have searched long and hard and found something that lets me make hires, non jaggy hexes with fairly thin lines. Now I need to figure out how to map them.
Many, many hours of work later I have this. I saw you can't really make a 2d mech evenly cponform to a 3d objecy with lost of variances in it's shape and such, so I sectioned the hull. I tweaked the scale and mapmode for some of the hull sections to get the hexgrid to look decent despite a curving, tapering hull.
The only thing wrong is the way the ribs flare out on the way down, I suppose it could be fixed with a lot of very careful vertex moving but I have no idea how to do that or what effect it would have of the sections.
I made the hexgrid myself with inkscape, and got it to work after finding an add on for IS that makes hexgrids which can line up. Wish it didn;t have a dot in each one that had to be killed manually.
I "intruded" the hull panels and scaled them down a little, borrowing brother polaris' hull panel technique. I have a lot to do and with I could keep the ribs from flaring without messing everything up but don't even know where to start with that unless I find the distance between the upper verts on the top of the ribs and shift each set of verts along the ribs until they're that close together. That'd be a bitch...
Feedback, comments, offers to look the mech over for errors, etc all welcome.
This is looking AWESOME. The plates and the hex mapping are just killer-diller. Can't wait to see how this turns out.
While you are working on the model details, it might be better to demonstrate those with a clay render. With your current lighting some of that detail is hard to see.
There are several ways to do this, but when working on a model I have found that the easiest way is to:
1. Create a new material and call it "clay render" for simplicity. This material should basically be the default material and should not be assigned to anything in your scene.
2. Enable "Ambient Occlusion" in the World settings of the World tab.
3. Create a new render layer in the Layers section of the Render tab and rename it to "clay renderlayer".
4. Set the "Material" property of your newly created layer to the "clay render" material you created in step 1.
You can configure your render layer further, but it's not necessary and it has advanced user stamped on it.
To do a clay render, go to the Layers section of the Render tab and uncheck your original render layer and check the clay renderlayer. Do the reverse when you want a normal render.
This is a Blender-cookie tutorial for a clay render addon you can use:
http://www.blendercookie.com/2010/09/23/tip-clay-render-addon/
Leave the energy setting at 1.00, any higher and you can get to much light. which starts to hid details. If the energy level is to high for a test pic your rendering, just turn it down a little 0.50 normal work very well for close ups.
I leave the textuer as default. but I also make the Horizon Colour black, this makes the model pop out more over the standard gery back ground.
I also add a light for shadows, but you don't have to do that.
Check out my Blog, all the Tron wip stuff was done using Blender 2.56 with these setting.
The Akria was done in Blender 2.49 (which I am still working on.)
Link to my blog is in my sig.
I'm going to need to rearrange some of the attachments to the center hull to fit around the gridwork as I did it separately due to chugging on the full file.
I have a personal rule that makes me have a technical justification for everything, but I had the idea for a ship with a gridwork like hull with hexagonal patters in the recessed panels that was too strong to resist, so I had to come up with a justification for the hexgrid material and why it's on the fore and center sections but not on the rear engineering sections.
After wracking my brain and it's vast store of SF material and technical knowledge I came up with the idea of having the hexmesh material represent a kind of special, advanced form of energy resistant armor that was made to reflect or refract as much of an energy weapon as possible with it's outer layer (Gotta add a prismatic iridescent layer to the hexmesh material to show that somehow) and the layer under it is made of complex structures and exotic matter that is highly absorbent of energy. The armor tries to reflect or refract as much of an incoming energy attack as possible, then absorbs most until it's saturates, at which point it explodes outward, ablating the energy away from the inner hull. That why it is hexagonal cells, to allow each segment to blow off independently.
As to the sections between the meshes, those are to allow the ship to radiate heat waste heat and such without having it retained by the armor, and those sections have a different, more heavy form of armor.
The engineering section of the ship has none of this armor as the energy emissions from the main reactor and engines at full power would be absorbed by the armor, causing it to overheat the ship so the rear sections use different armor. The nose section uses different armor, reinforced for atmospheric entry as taking the main brunt of atmo entry would be tough on the expensive energy armor, hence the enhanced plating over the forward edge where atmo entry caused the worst effects.
Hey, it's still a better technical explanation than most SF movies of series use....
With the vert problem you could turn down, or off the subsurf modifier.
You don't need the subsurf modifier high, I normal use it at a 2, but some times go up to 3, never higher than that.