Greetings!
Welcome to Scifi-Meshes.com! Click one of these buttons to join in on the fun.
Quick Links
Making Ringed Planets (In Detail) In 3ds Max


Hello again, IA’m Toa_Kaita, dead-set with another tutorial in 3ds Max. In this tutorial IA’m going to show you how to make a ringed planet in 3ds MaxA—in detail. (Audience oohs)
OK, for starters, create a sphere with a radius of 10 and 12 segments. Center it in the middle of your work station. Next add a Noise Modifier to it. In the noise Parameters menu, give these settings:
Seed: (Whatever number you wish)
Scale: 100
Fractal must be checked.
Roughness: 0
Iterations: 6
Strength: X 25, Y 25, Z 25
This will give us our asteroid. But we want it to have materials on it, correct? Well you may choose whatever material you wish for this asteroid, as long as itA’s dull, grey, and has a lot of craters in it. For this tutorial IA’m going to use the standard 3ds max moon map.
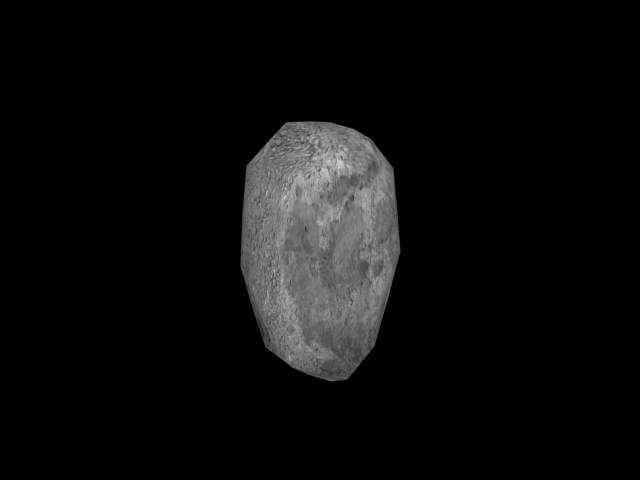
Next, copy your sphere as a Copy instead of Instance. This sphere will be modified as follows:
Radius: 1250
Segments: 200
Delete the noise modifier on this sphere as it is not needed. Then grab your favorite planet material and apply it to the sphere.
Then create a Tube, centered in the middle of your workstation. Apply these settings:
Radius 1: 3000
Radius 2: 2000
Height: 0.1
Height Segs: 1
Cap Segs: 1
Sides: 200
Then Go into Object Properties and uncheck A“Renderable.A†IA’ll explain why later.
OK, next we will be creating a Particle Flow Particle System. Go into your A“CreateA†Tab and click the dropdown arrow and select Particle Systems. Create a PF Source.
Once you have created your PF Source click Particle View.
In the Particle view, look at event 1 and click on A“Birth 01.A†In the Birth 01 Modifier tab set these settings:
Emit Start: 0
Emit Stop: 0
Amount: 2000
Next, add a A“Position ObjectA†Modifier into Event 1. Then click it, and choose your Tube as an Emitter Object. Change the location from A“SurfaceA†to A“Volume.Aâ€
Delete your A“SpeedA†Modifier.
Leave your A“RotationA†Modifier alone for now.
Now, delete your A“ShapeA†Modifier and replace it with a A“Shape InstanceA†Modifier. For your Particle Geometry Object, select your Asteroid Sphere.
Now render it and you should have an effect something like this.
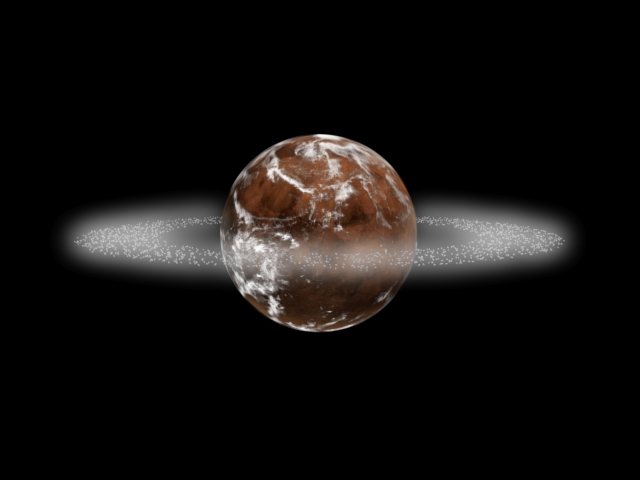
Pretty sweet, eh? Now do you want one ring or two rings?
If you want two rings, keep reading.
Select your Tube and give it these settings:
Radius 1: 2000
Radius 2: 1500
Now create another tube. Give it these settings:
R1: 3250
R2: 2250
Height: 0.1
Height Segs: 1
Cap Segs: 1
Sides: 200
As before, go into the object properties of the tube and uncheck A“Renderable.Aâ€
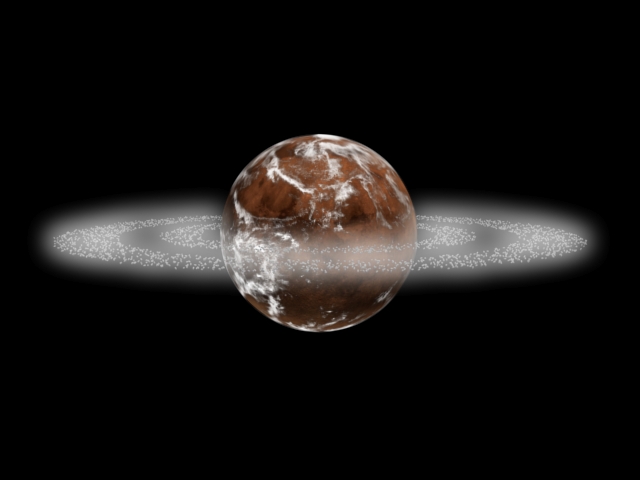
Now, go back and select your PF Source, and enter Particle View. Now go to Event 1, select the A“Position ObjectA†Modifier, and add your second tube. You should get an effect like this (Glows not included).
ThatA’s my tutorial, I hope it helps.
Kudos,
Toa_Kaita
CREDIT: Kristian Foshaug @ 3d Total for his A‘AsteroidsA’ Tutorial and inspiring me to make my own
OK, for starters, create a sphere with a radius of 10 and 12 segments. Center it in the middle of your work station. Next add a Noise Modifier to it. In the noise Parameters menu, give these settings:
Seed: (Whatever number you wish)
Scale: 100
Fractal must be checked.
Roughness: 0
Iterations: 6
Strength: X 25, Y 25, Z 25
This will give us our asteroid. But we want it to have materials on it, correct? Well you may choose whatever material you wish for this asteroid, as long as itA’s dull, grey, and has a lot of craters in it. For this tutorial IA’m going to use the standard 3ds max moon map.
Next, copy your sphere as a Copy instead of Instance. This sphere will be modified as follows:
Radius: 1250
Segments: 200
Delete the noise modifier on this sphere as it is not needed. Then grab your favorite planet material and apply it to the sphere.
Then create a Tube, centered in the middle of your workstation. Apply these settings:
Radius 1: 3000
Radius 2: 2000
Height: 0.1
Height Segs: 1
Cap Segs: 1
Sides: 200
Then Go into Object Properties and uncheck A“Renderable.A†IA’ll explain why later.
OK, next we will be creating a Particle Flow Particle System. Go into your A“CreateA†Tab and click the dropdown arrow and select Particle Systems. Create a PF Source.
Once you have created your PF Source click Particle View.
In the Particle view, look at event 1 and click on A“Birth 01.A†In the Birth 01 Modifier tab set these settings:
Emit Start: 0
Emit Stop: 0
Amount: 2000
Next, add a A“Position ObjectA†Modifier into Event 1. Then click it, and choose your Tube as an Emitter Object. Change the location from A“SurfaceA†to A“Volume.Aâ€
Delete your A“SpeedA†Modifier.
Leave your A“RotationA†Modifier alone for now.
Now, delete your A“ShapeA†Modifier and replace it with a A“Shape InstanceA†Modifier. For your Particle Geometry Object, select your Asteroid Sphere.
Now render it and you should have an effect something like this.
Pretty sweet, eh? Now do you want one ring or two rings?
If you want two rings, keep reading.
Select your Tube and give it these settings:
Radius 1: 2000
Radius 2: 1500
Now create another tube. Give it these settings:
R1: 3250
R2: 2250
Height: 0.1
Height Segs: 1
Cap Segs: 1
Sides: 200
As before, go into the object properties of the tube and uncheck A“Renderable.Aâ€
Now, go back and select your PF Source, and enter Particle View. Now go to Event 1, select the A“Position ObjectA†Modifier, and add your second tube. You should get an effect like this (Glows not included).
ThatA’s my tutorial, I hope it helps.
Kudos,
Toa_Kaita
CREDIT: Kristian Foshaug @ 3d Total for his A‘AsteroidsA’ Tutorial and inspiring me to make my own
Post edited by Toa_Kaita on
Additional credits
- Icons from Font-Awesome
- Additional icons by Mickael Bonfill
- Banner background from Toptal Subtle Patterns
© Scifi-Meshes.com 2001-2024
Posts